
Walkthrough · Updated October 30, 2026
The Creators Dept Guide
Creators Dept is your creative department in one place: proposals that sell, agreements that sign themselves, a Client Partner Portal for every partner, a content library with approvals, social posting, your team and your files. This guide walks through each part. The screenshots use a demo agency with made-up partners.
01 Signing in
Open app.creatorsdept.com (or your agency's own address) and sign in with your email and password. No password yet, or forgot it? Choose Email me a sign-in link and use the link we send; it works once and expires in 30 minutes. If your team uses Google, Continue with Google signs you in with your work Google account.
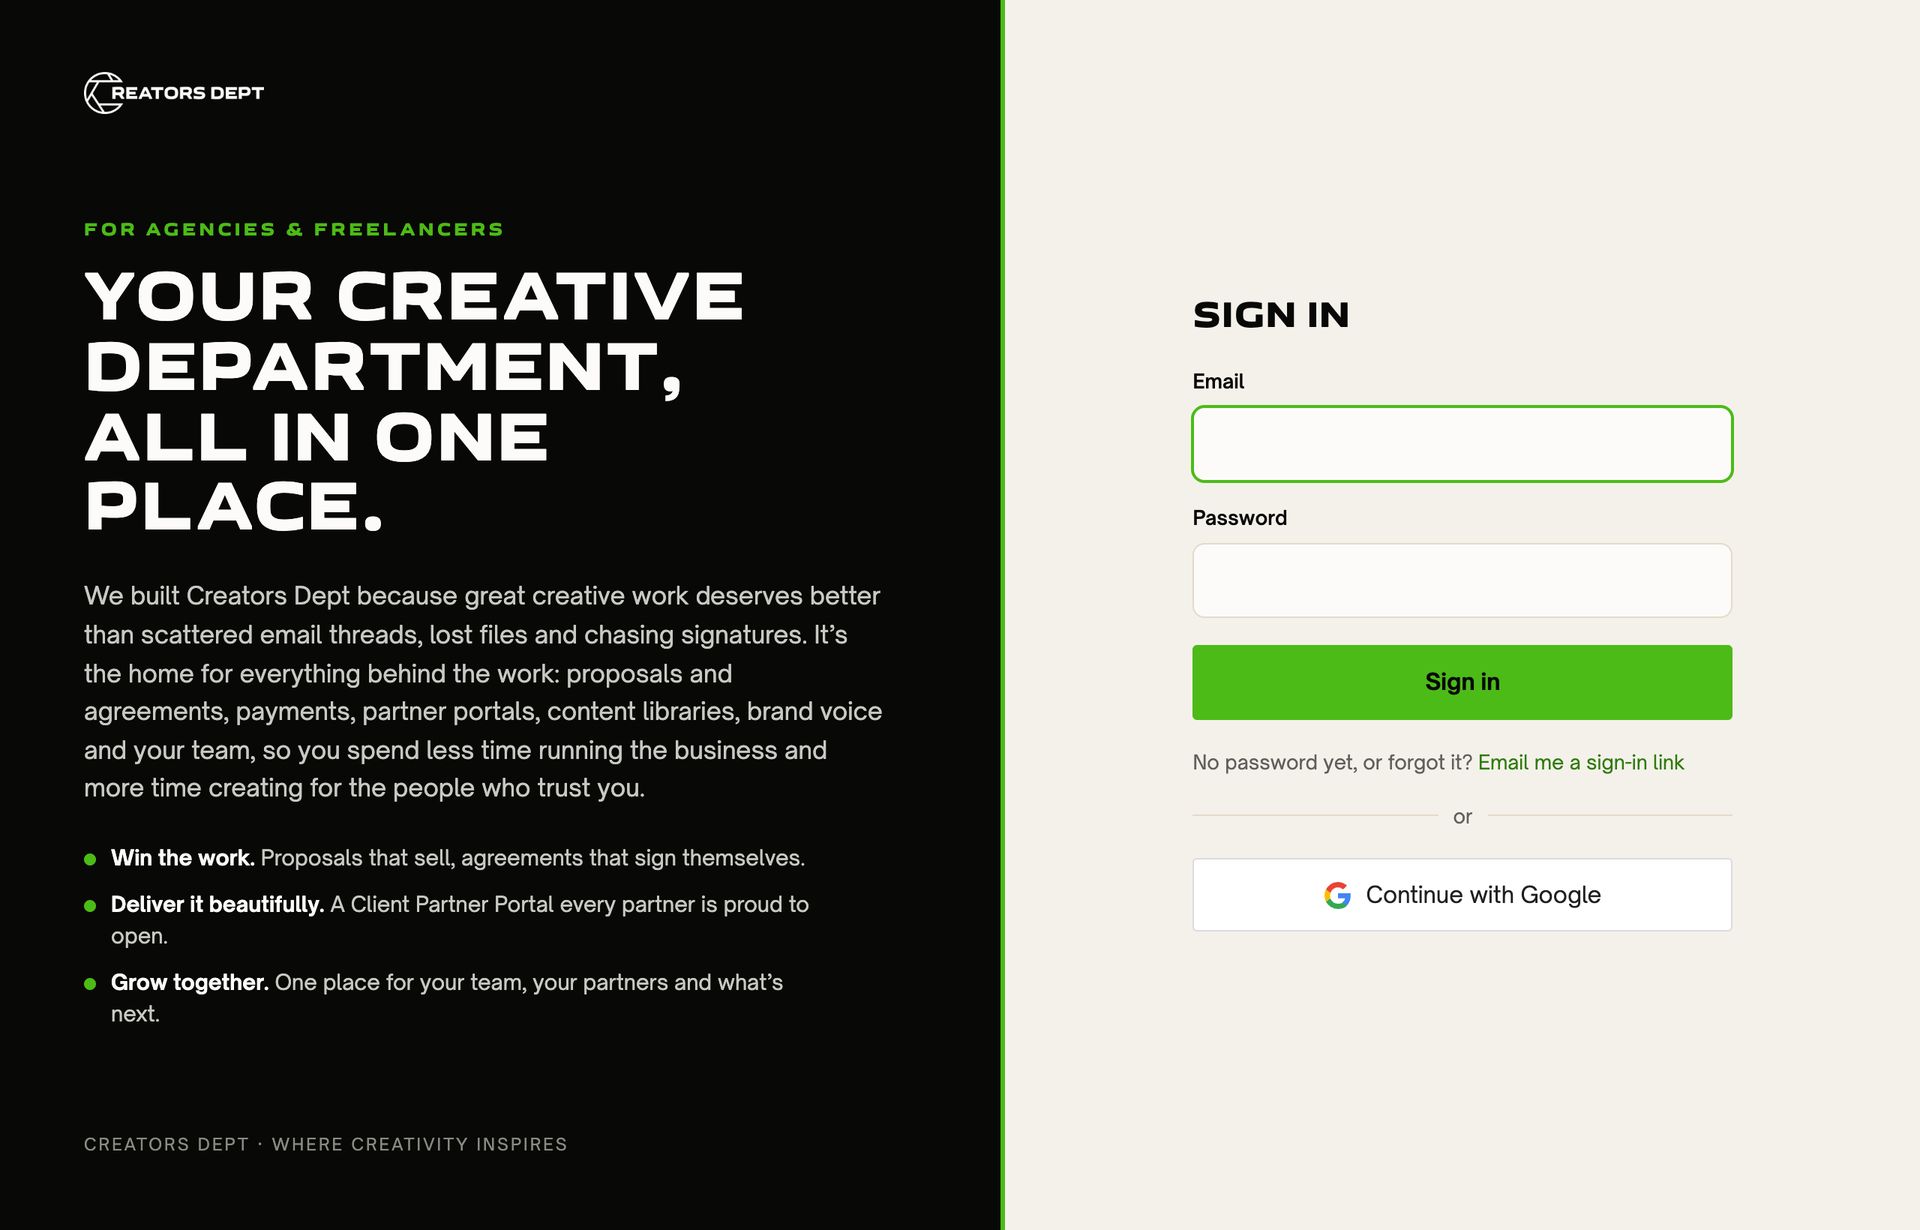
- Team members get an invite email with a one-time link. The first visit asks them to set a password.
- Partners sign in to their Client Partner Portal at the same address, under /portal, with their own email. If a partner lands on the team sign-in page by mistake, it points them to their portal, their portal password works there too, and Email me a sign-in link sends them their portal link.
- On a phone, use your browser's Add to Home Screen to keep the app one tap away.
02 Home
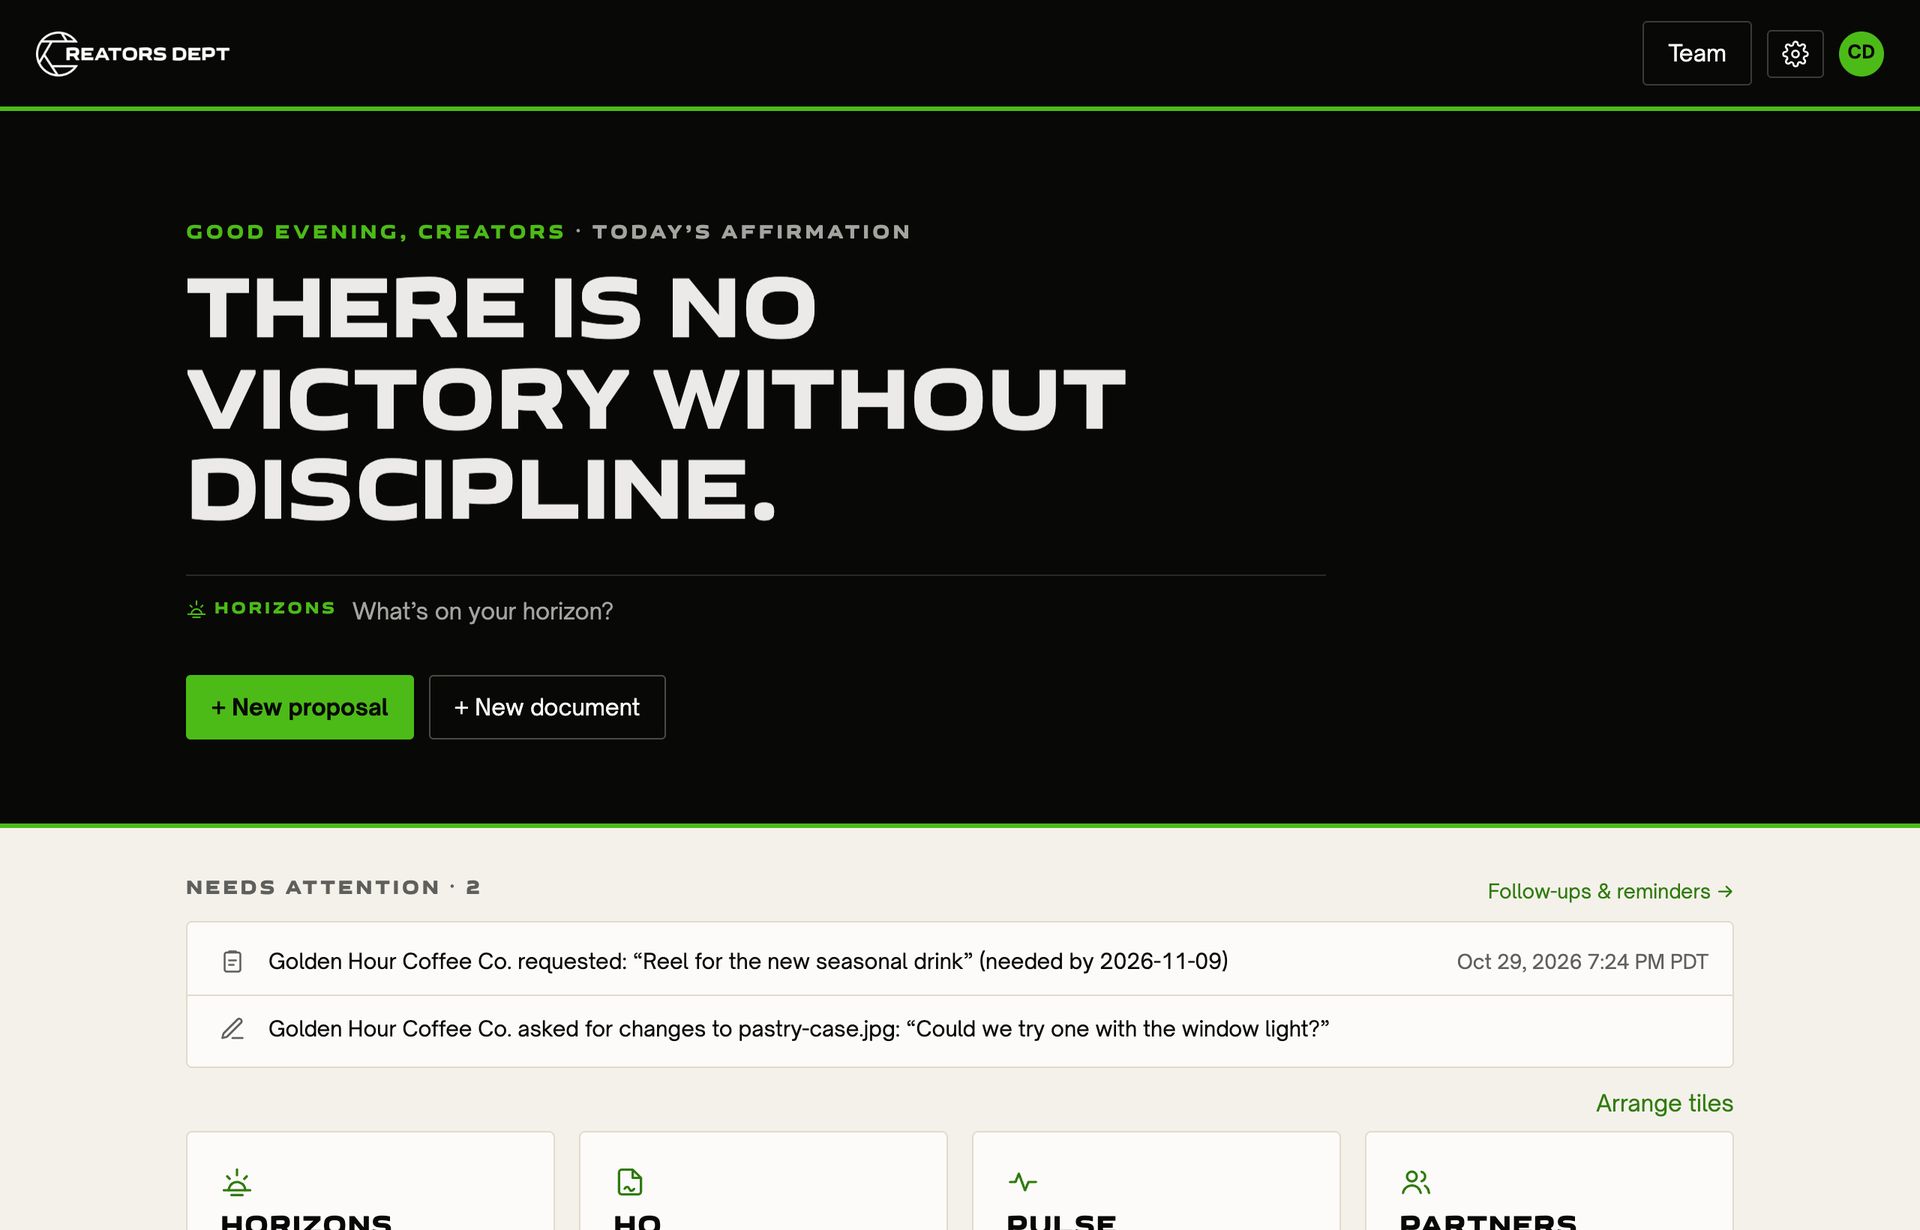
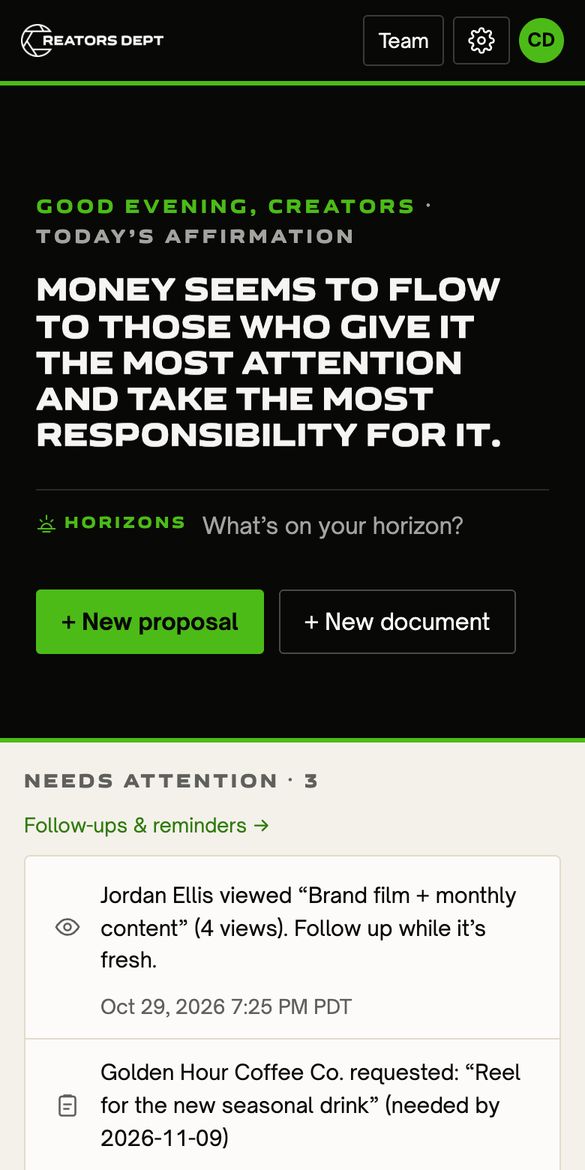
Home opens with a daily affirmation and the two things you start most: + New proposal and + New document.
With Google Calendar connected (in Your profile), your calendar sits under the affirmation. Switch between Today, Week (the next 7 days) and Month (the next 30), grouped by day with Join Meet links. Click the title to fold the whole calendar away, or any day to fold just that day. Home remembers your view and whether it's folded.
Needs attention lists what's waiting on you: partner requests, change requests on content, proposals someone just viewed, unpaid deposits, agreements waiting for a signature and proposals about to expire. Follow-ups & reminders sets the automatic nudges the app sends partners for you (weekdays, business hours, and never twice for the same step).
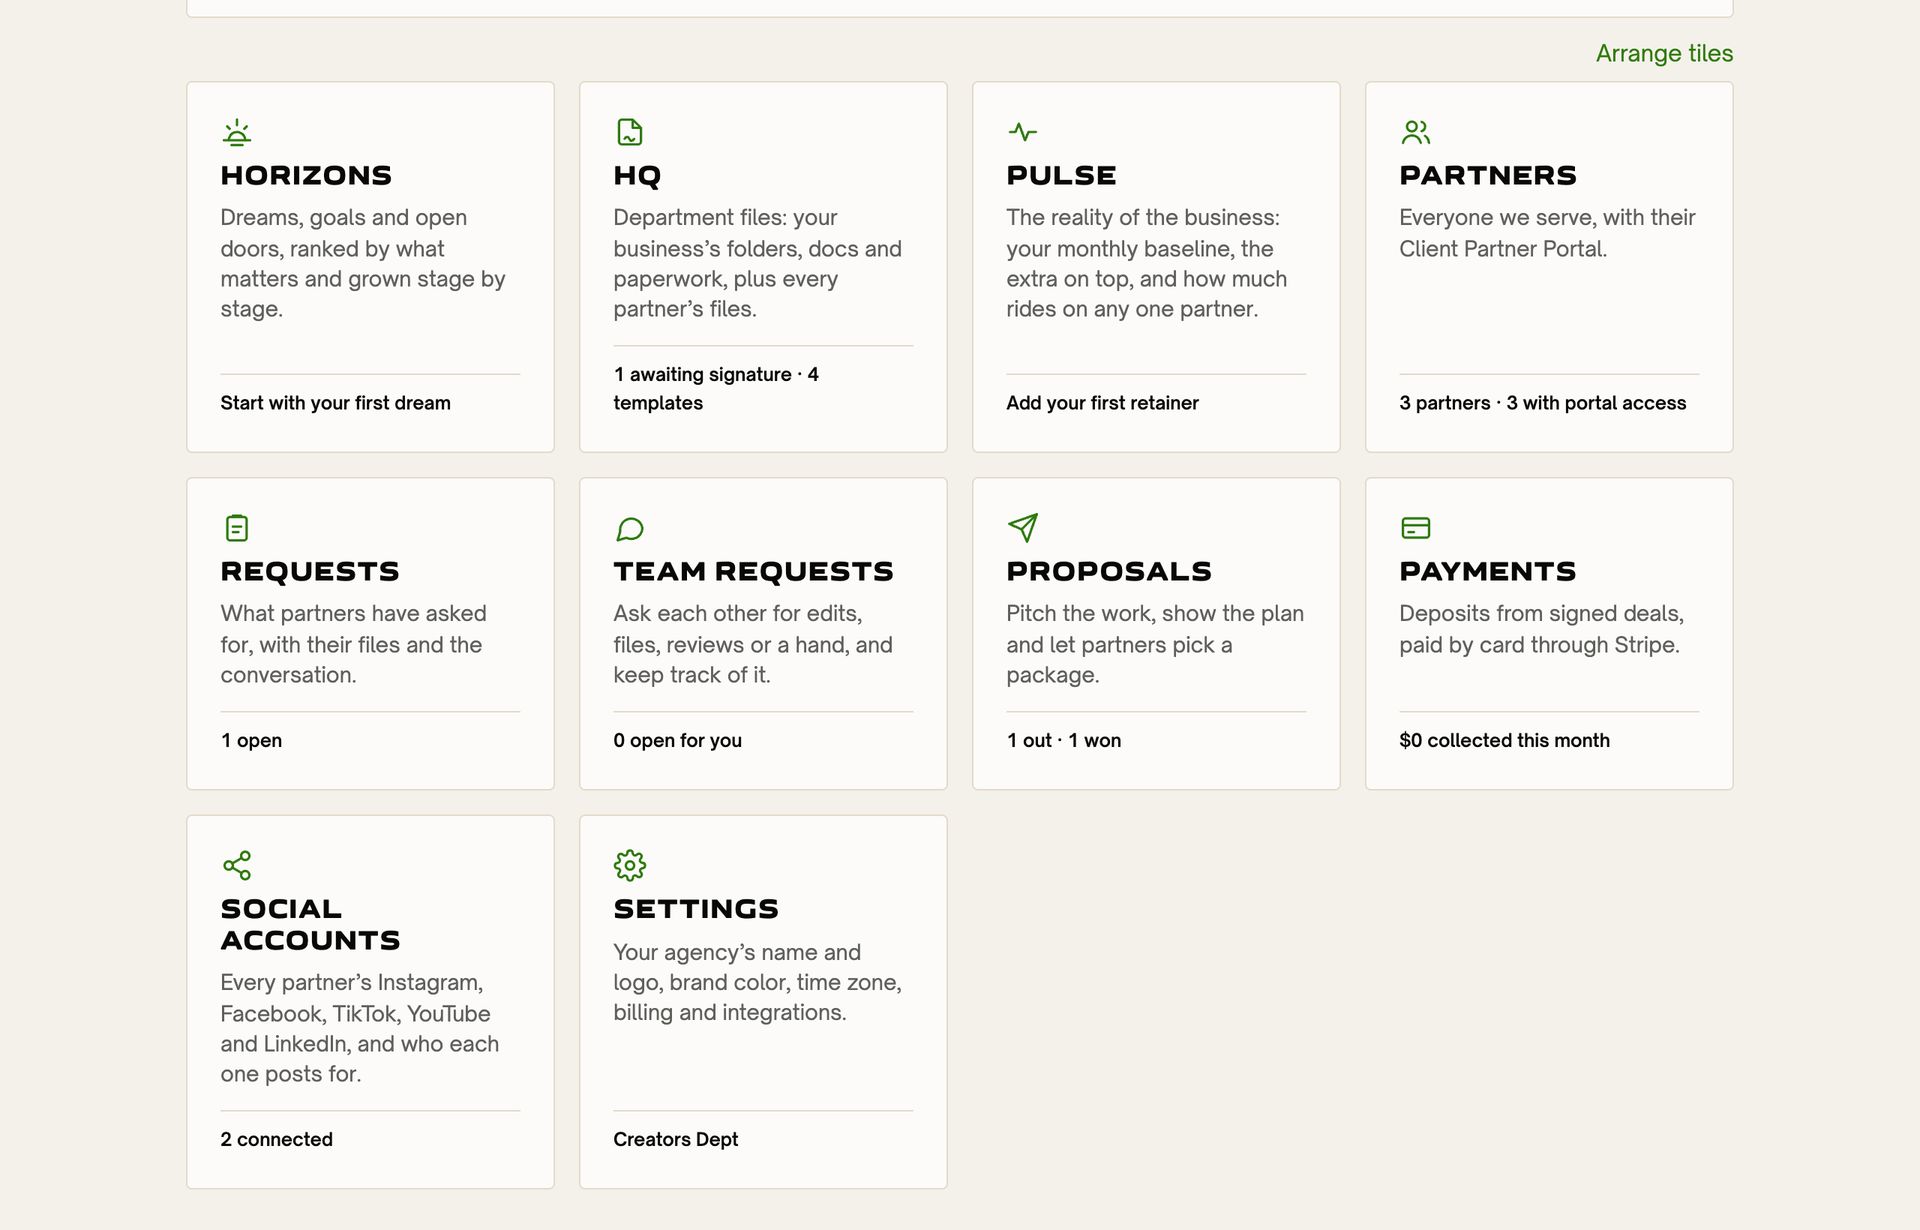
Below that, a tile for each part of the app shows what's happening at a glance. Choose Arrange tiles to drag them into your own order or switch off the ones you don't use.
03 Partners and the partner page
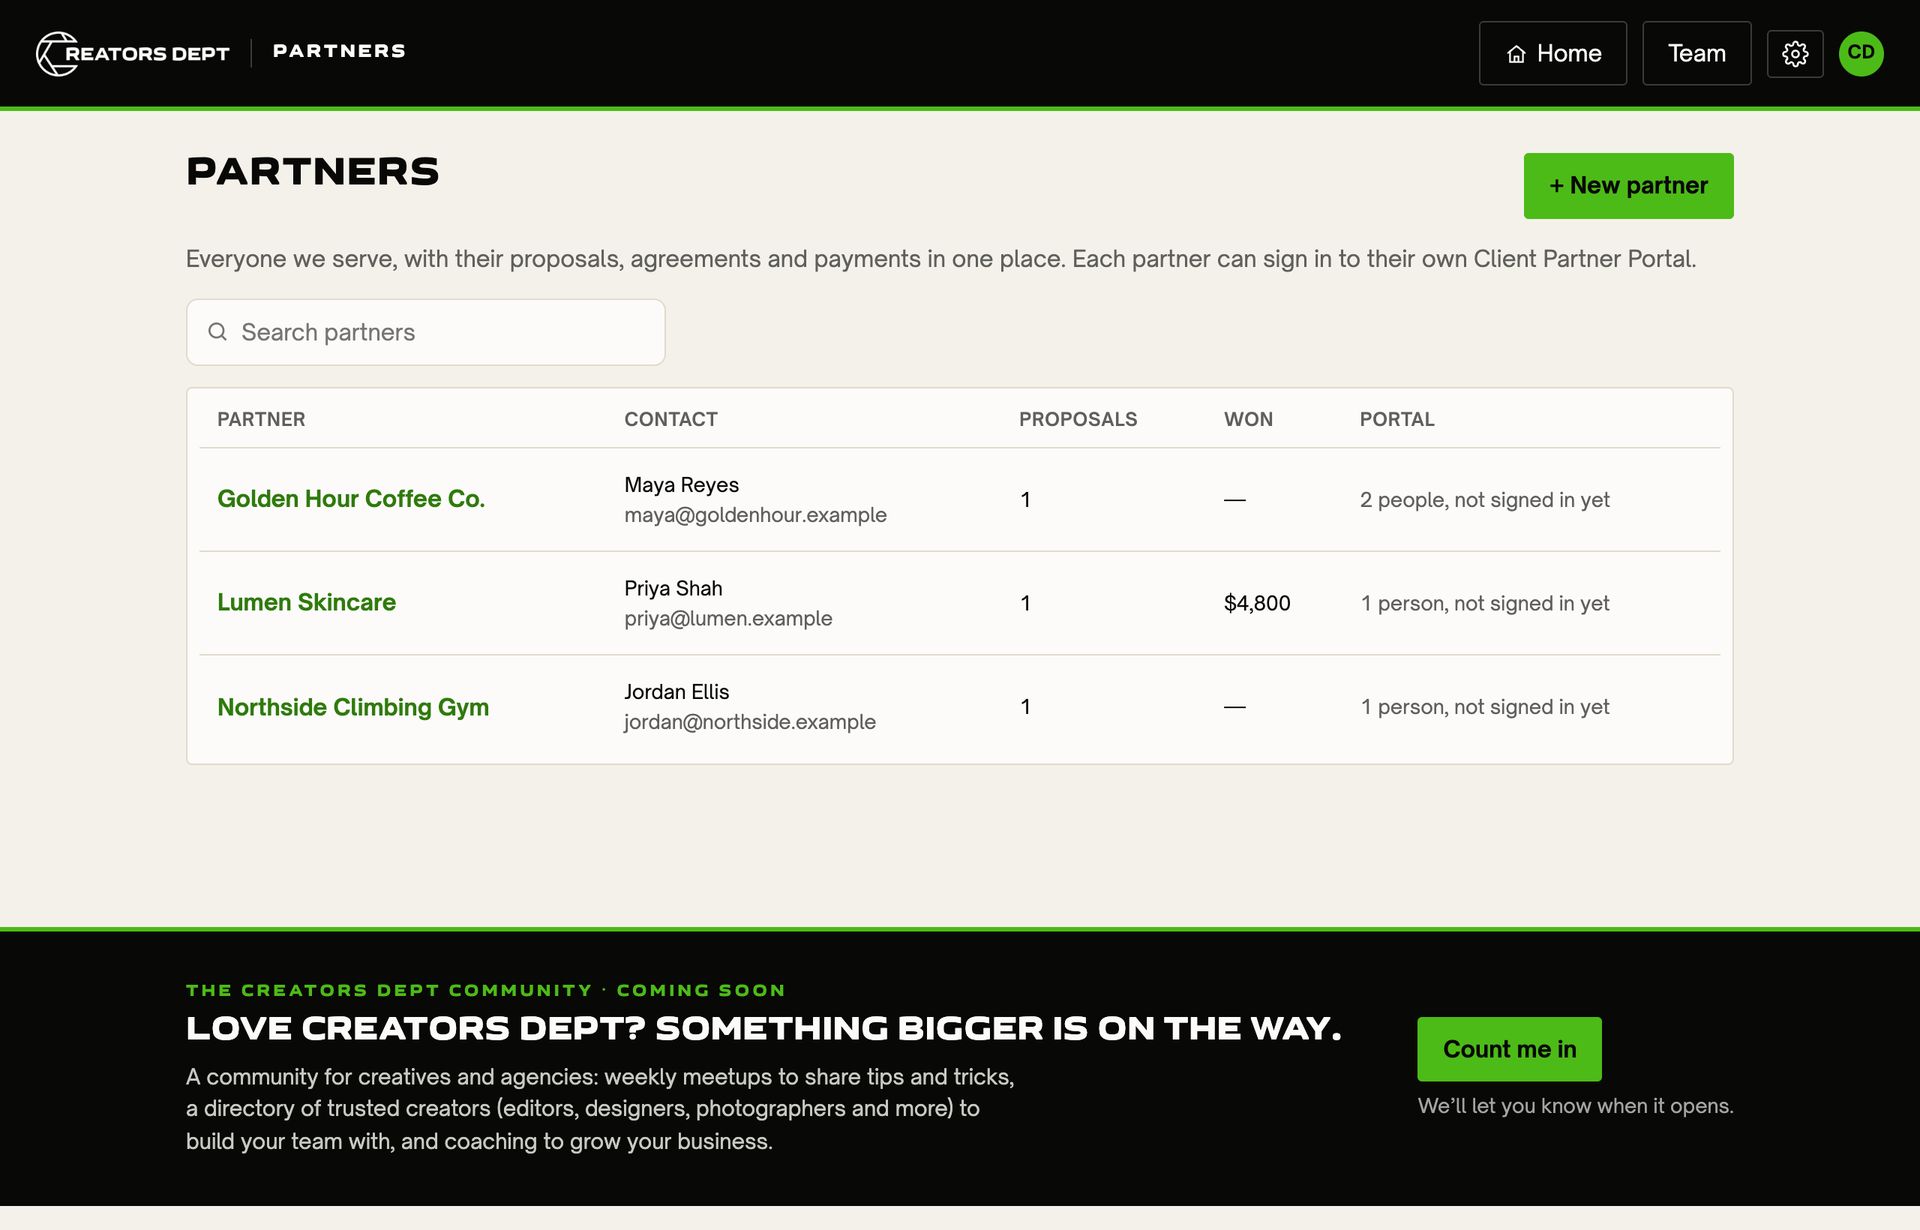
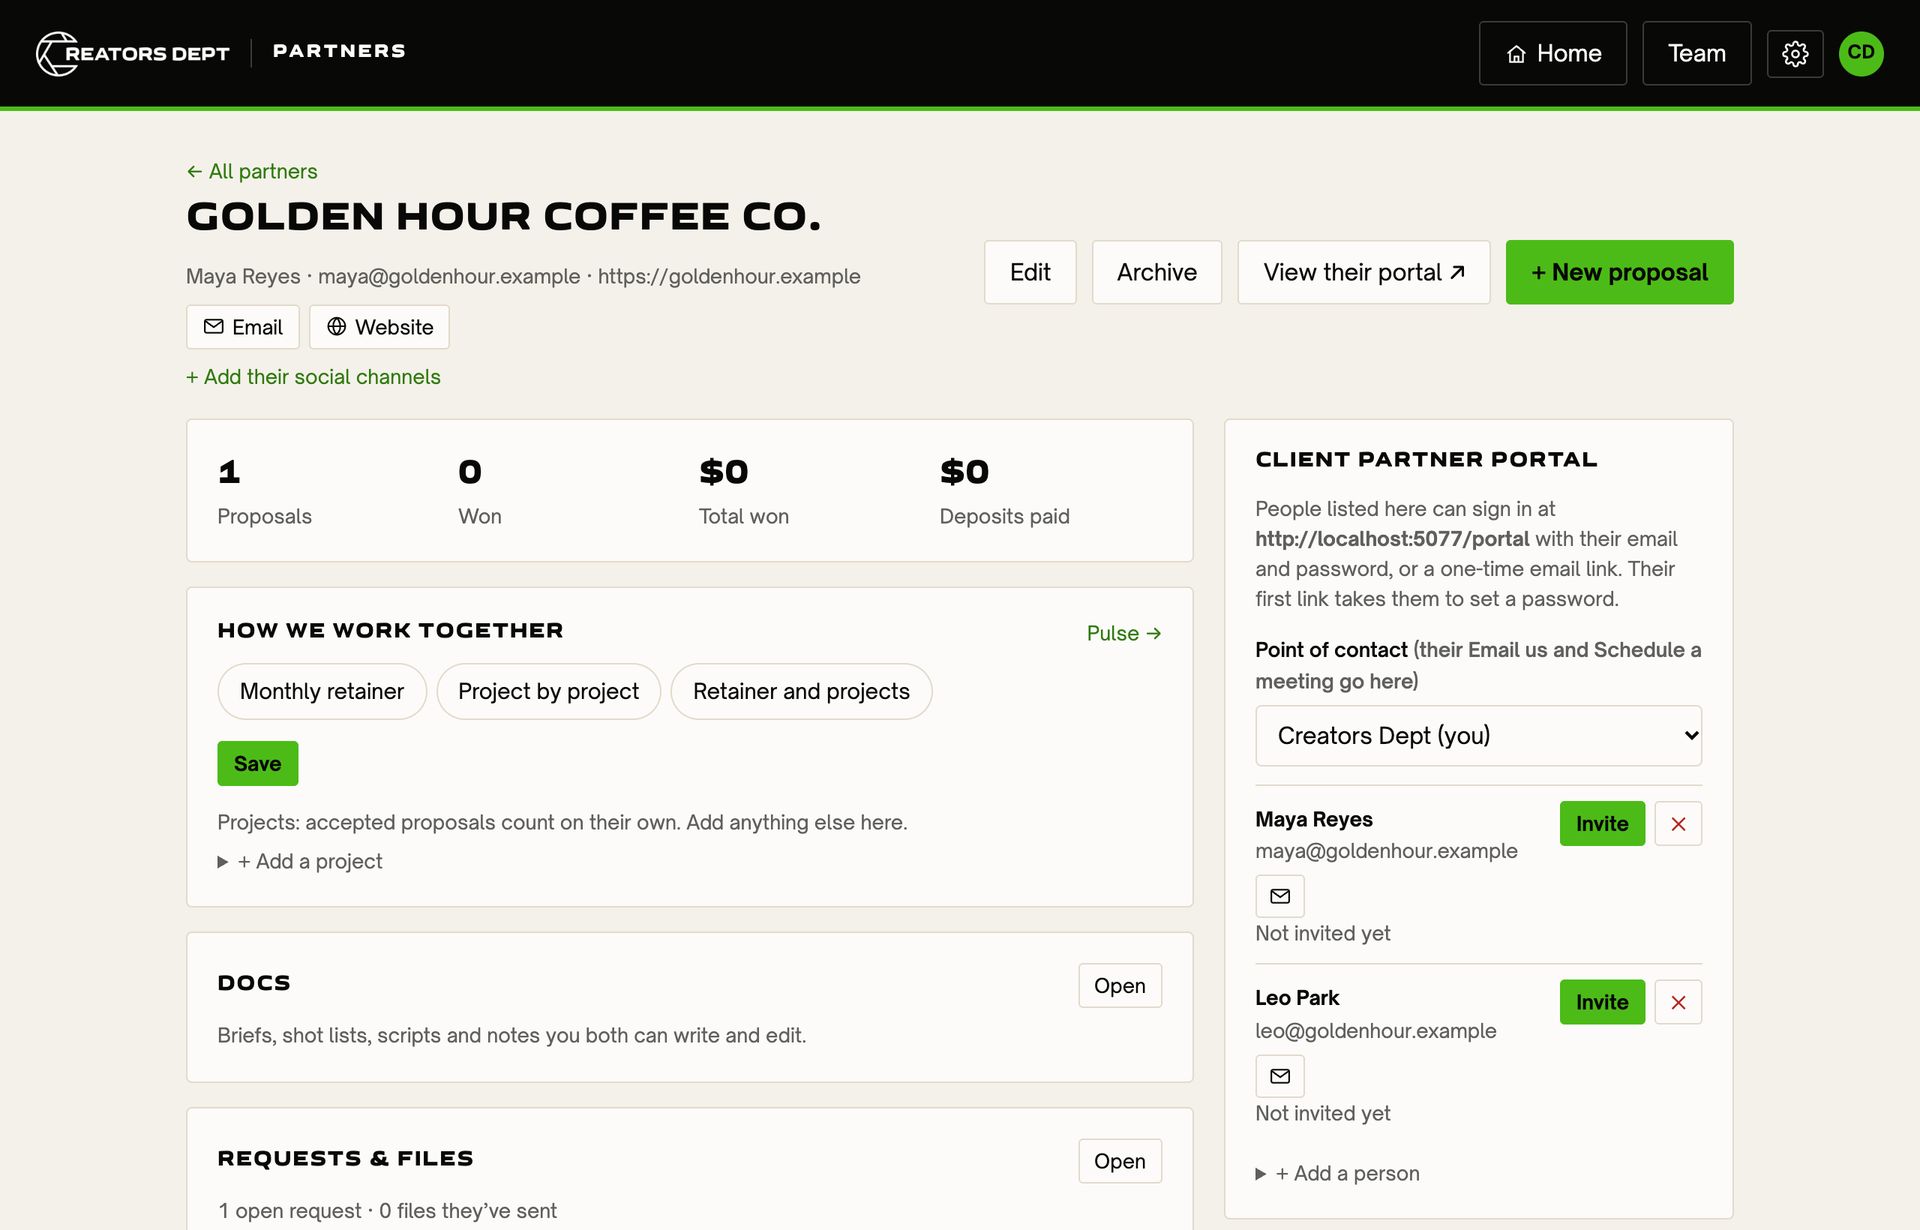
Partners lists everyone you work with, their contact, their proposals, what you've won and whether they use their portal. Choose + New partner to add one; sending a proposal to a new email also creates a partner for you.
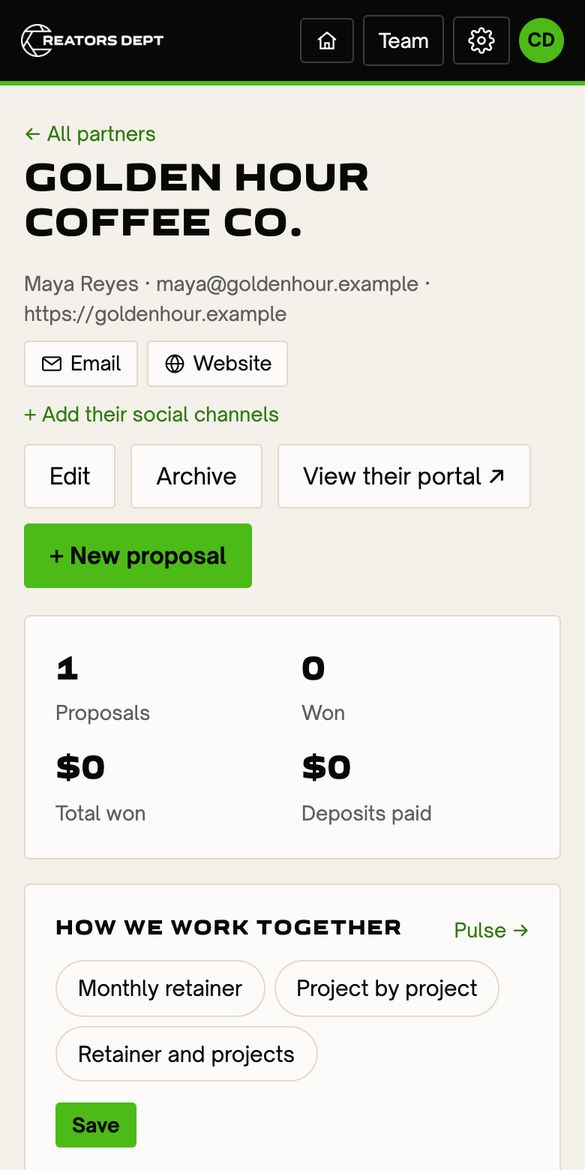
Each partner has a page that holds everything about them:
- Their proposals, agreements and payments, with totals at the top.
- How we work together: a monthly retainer, project by project, or both. This feeds Pulse, the owner's view of steady and extra income.
- Invoices (owner and managers): bill a proposal's balance, extra work or anything else, and set up monthly retainers (more under Invoices and retainers in Proposals).
- Projects: everything you're doing for them, with each project's progress (and, for the owner, its amount). + New project starts one; Record income only adds money that came in without steps.
- Docs (briefs, shot lists, scripts and notes you both edit), Requests & files, Content library, Brand & resources and Social posts.
- Client Partner Portal: the people who can sign in for this partner. Add a person, then choose Invite to send a welcome email with a one-time sign-in link.
- Run welcome steps (owner): pushes the welcome steps from Settings → Automations by hand: portal invites for everyone listed who hasn't been invited yet, the kickoff link and starter folders. Use it when automations are off, or for a partner who signed some other way. Anything already done is skipped. Your team (and anyone at your business email domain) never gets a partner portal invite, from here or from Invite.
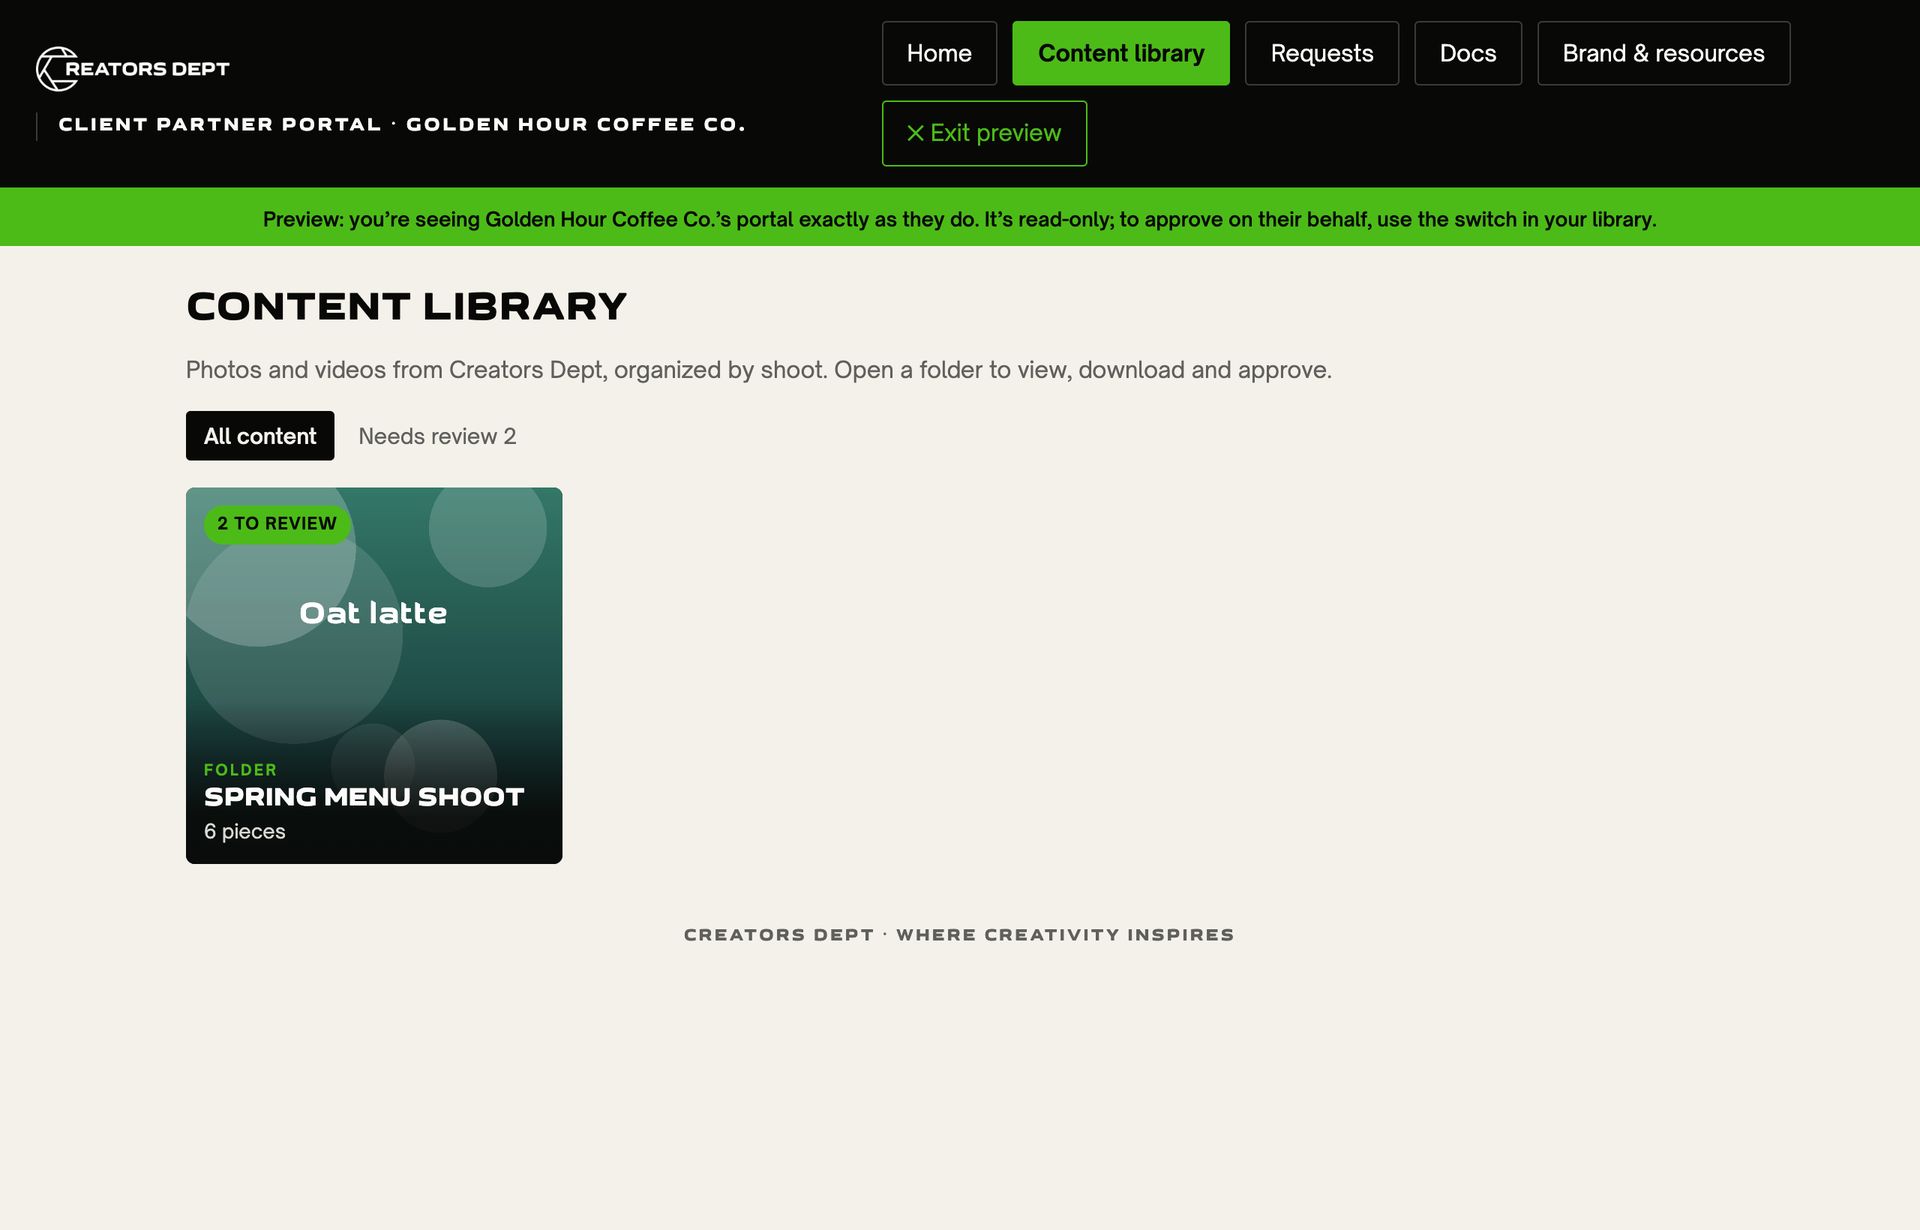
- View their portal shows exactly what they see, read-only, until you choose Exit preview.
- Activity folds away to its title; open it for the full history.
04 Leads
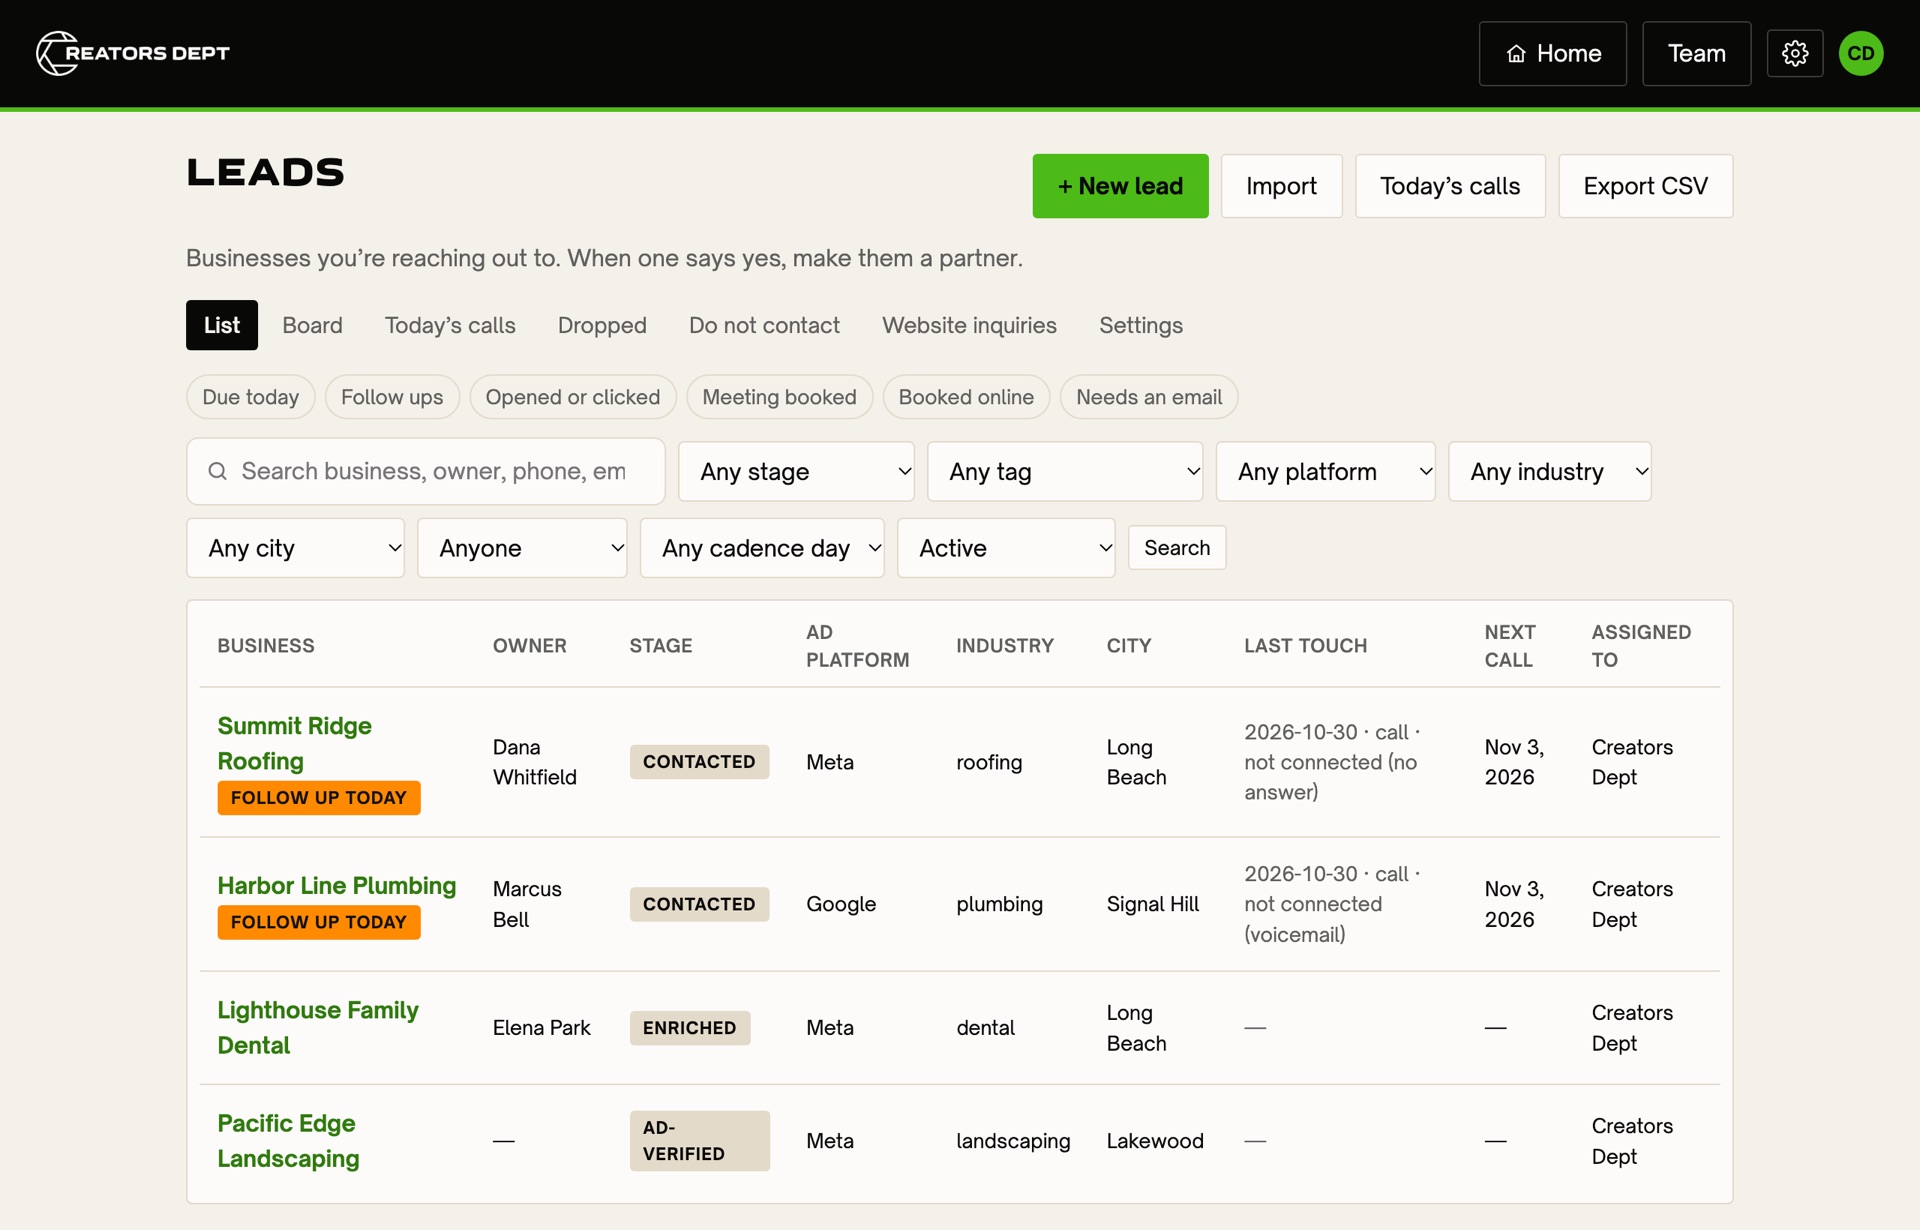
Leads is where you reach out to local businesses before they're partners: the list, the calls, and the moment one says yes. It's being switched on agency by agency, so if you don't see a Leads tile on Home yet, it isn't on for yours. Owners, managers and the team can use it; contractors don't see it.
People call and people send. The app never dials, texts or emails a lead by itself: you tap Call, talk, then log what happened with one tap, and you send each lead email yourself, one at a time.
Adding leads
- + New lead adds one business by hand.
- Import takes a CSV (from Google Sheets: File → Download → Comma-separated values). It matches your columns, then shows what will happen to every row before anything changes: new, will update, or skipped because the business was dropped, is on Do not contact or is already a partner.
- Export CSV gives the same columns back, with each lead's Lead ID in column T, so re-importing updates leads instead of adding them twice.
The same business is never added twice: leads are matched by Lead ID, then phone number (any format), then website. Type not found for anything you checked and couldn't find; leave it blank if you haven't checked yet. The app shows the two differently.
Stages
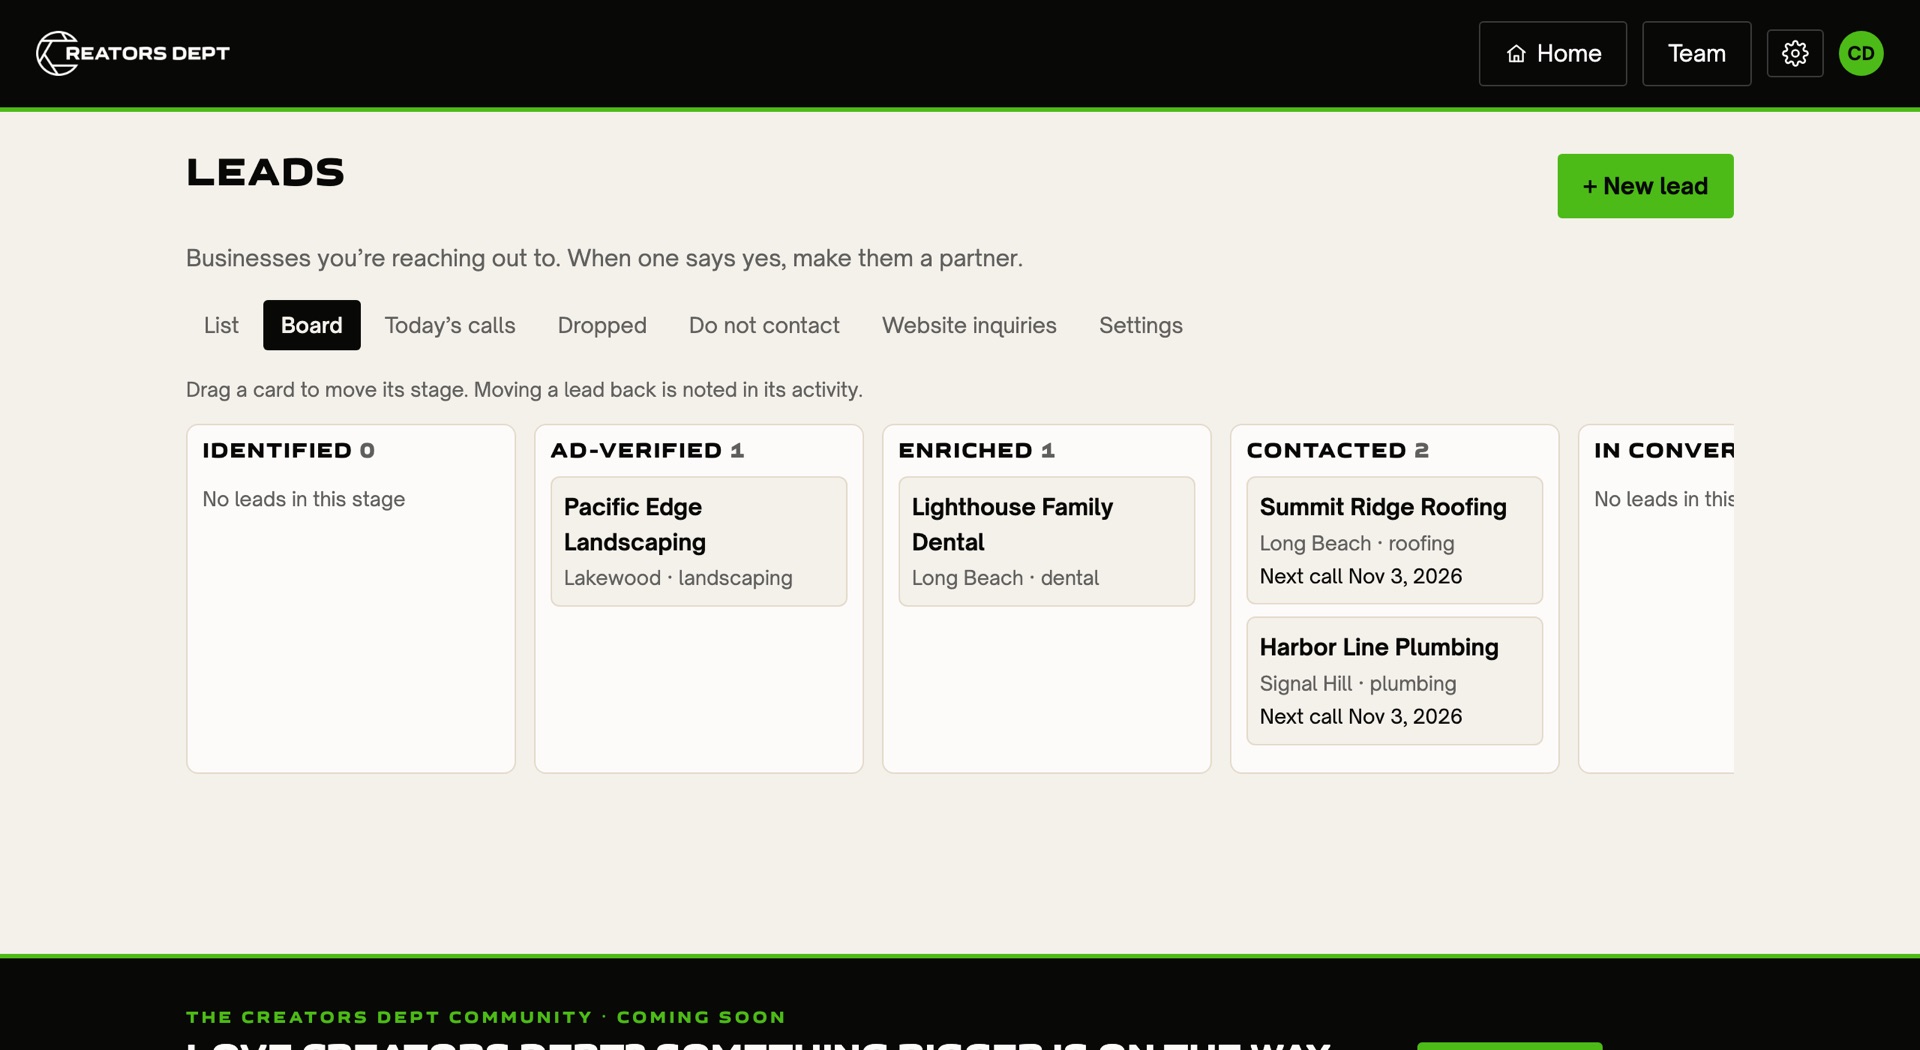
Each lead moves through Identified, Ad-Verified (the ad platform and Ad Library link are saved), Enriched (a real phone and email are saved), Contacted, In Conversation and Meeting Booked. Logging calls moves leads forward for you. Drag a card on the Board to move it by hand; moving a lead back is noted in its activity.
Today's calls
Today's calls shows one lead at a time: the owner, the business, a big Call button, the ad hook and the call script with their details filled in. Tap what happened: Connected, Gatekeeper, Got the owner's email, No answer, Left voicemail, Booked a meeting or Do not call. Tapped the wrong one? Undo shows for a few seconds.
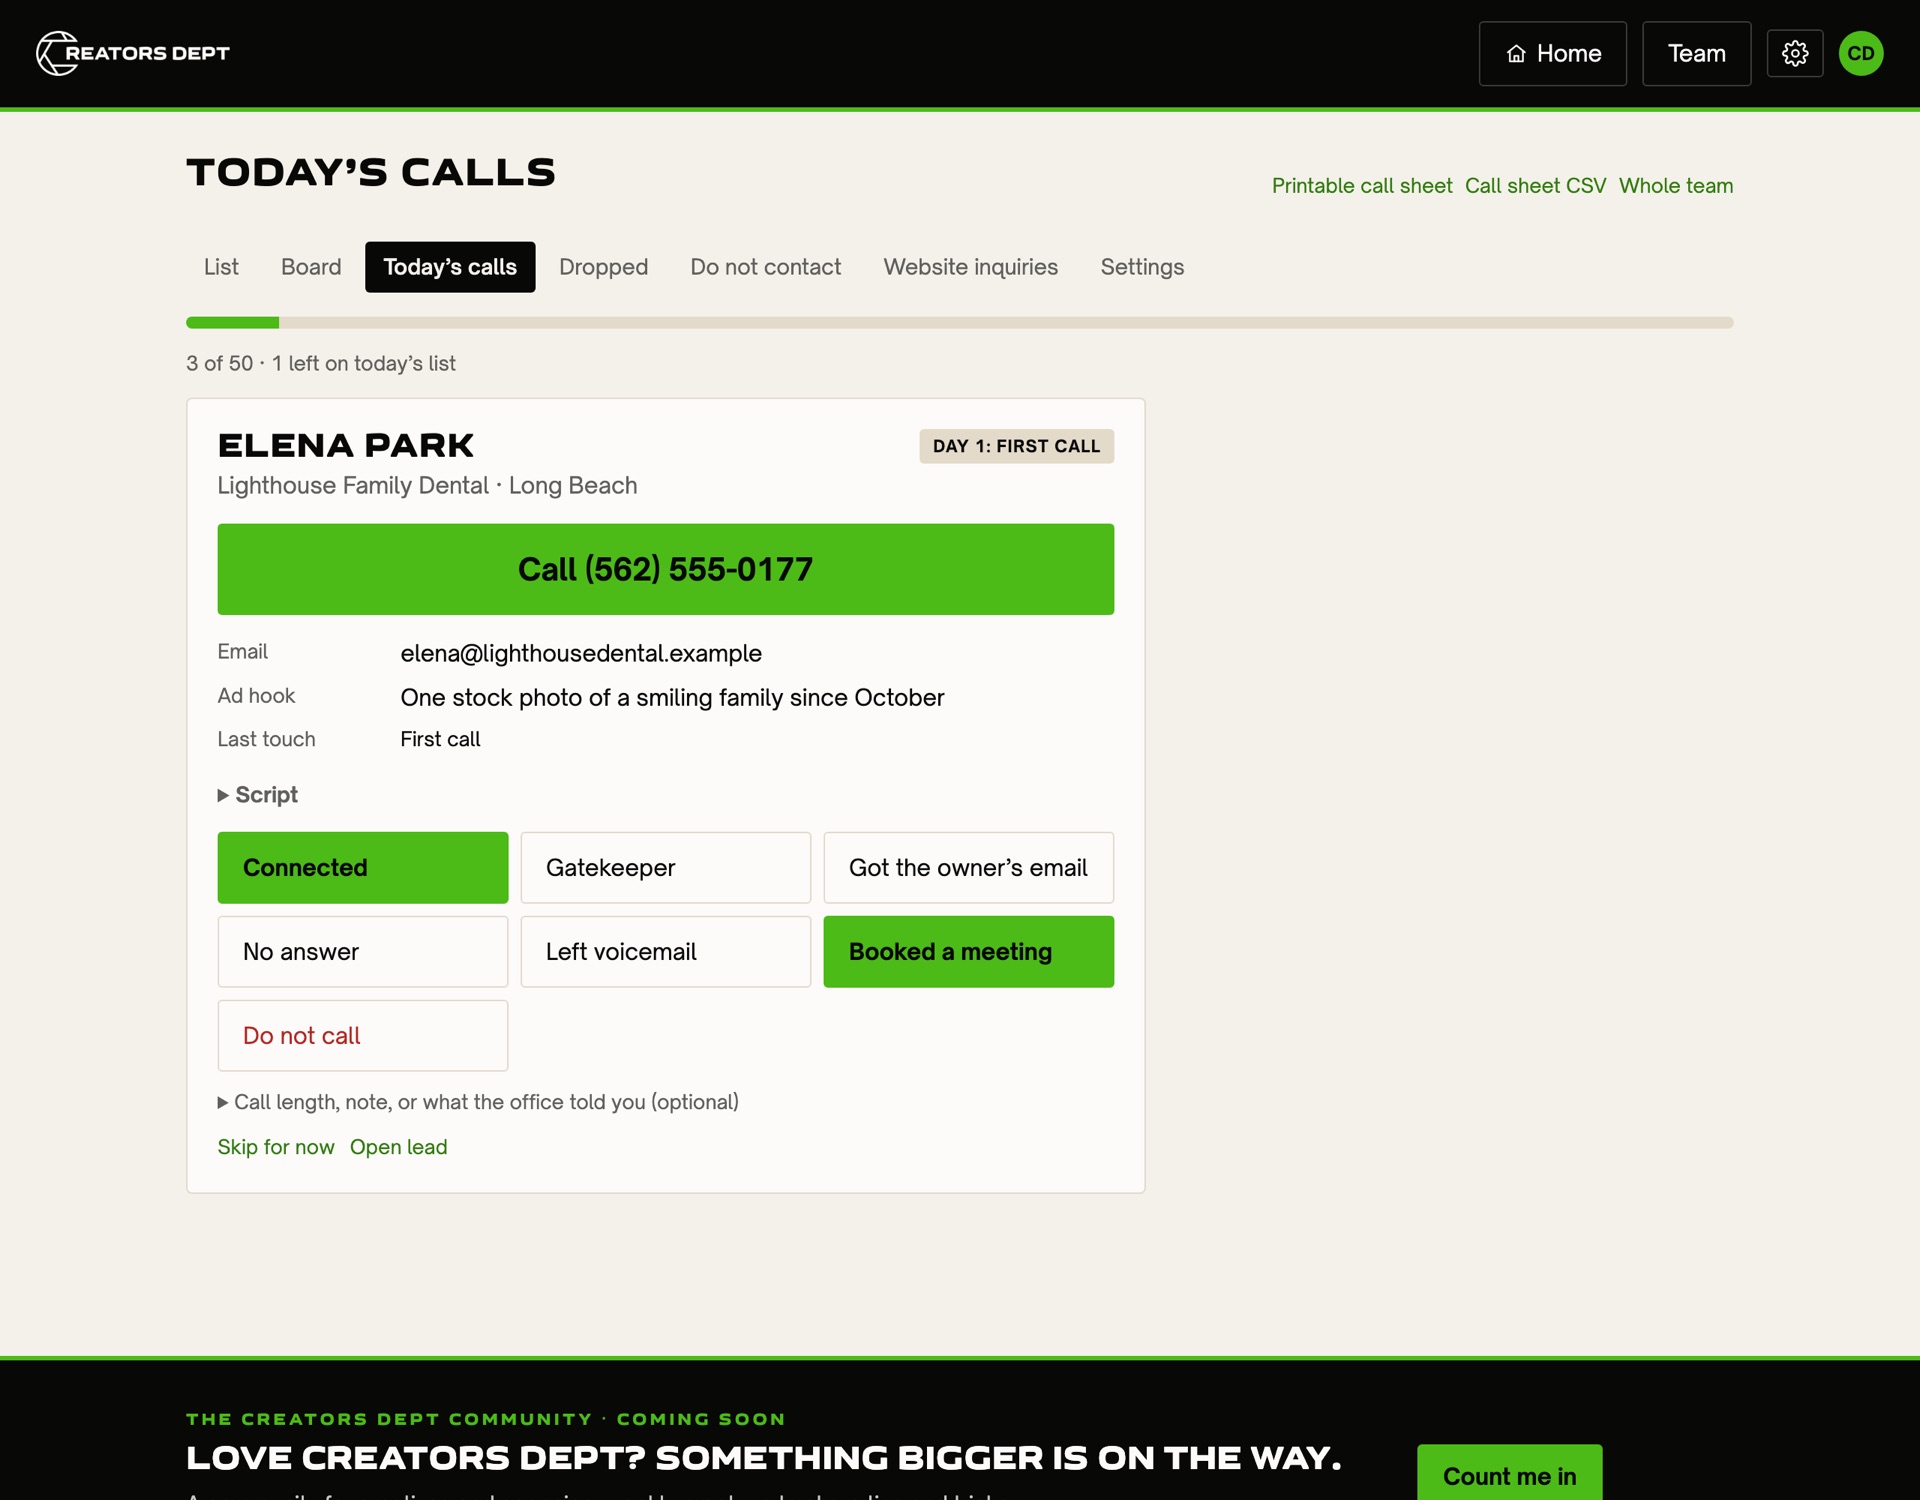
New enriched leads come first, then follow-up calls on Day 3, 6 and 10 (weekdays only). A real conversation, a booked meeting or a reply ends the schedule. No answer and Left voicemail add Follow up today: send them one email before the day ends (see Emailing leads below).
If someone books through your booking page with a lead's email, the lead moves to Meeting Booked on its own and shows up in Needs attention.
Emailing leads
Follow-ups lists everyone who needs an email today (no answer or voicemail on today's call) and anyone who opened or clicked one of your emails, with the email we suggest. It also counts how many of today's follow-up emails are sent. Tap Review and send, or tap Email on any lead.
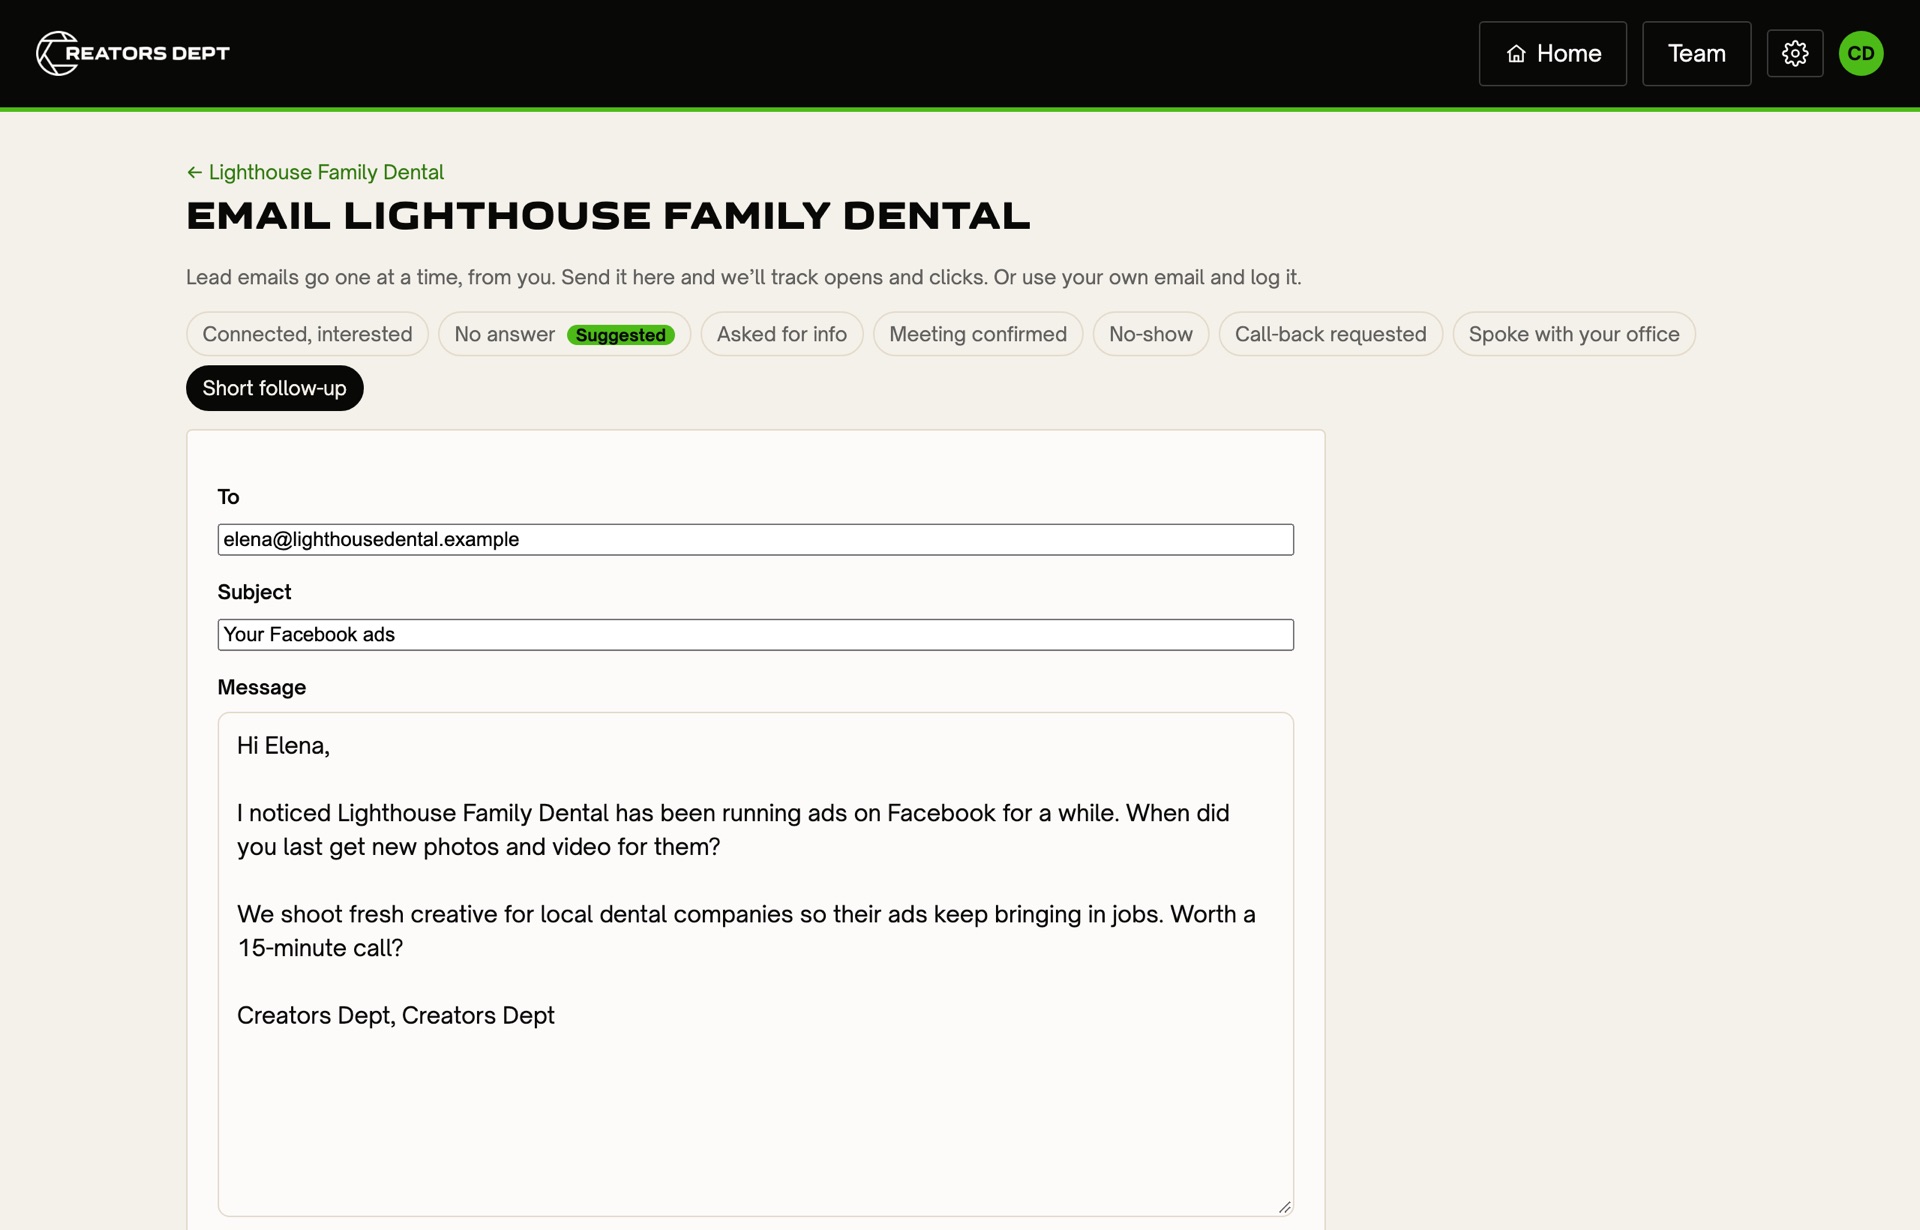
Pick a snippet (the suggested one is marked), and the lead's name, business and your details fill in for you. Anything still in [CAPITALS IN BRACKETS] is highlighted, and the email can't go out until you fill it in. If a lead only runs Google ads, the app catches the word "Facebook" and offers to change it. Your business mailing address and a "Not a fit? Just reply "no"" line are added under every lead email and can't be removed.
Then send it one of two ways:
- Send from Gmail sends it from your own Gmail, so it shows up in your Sent folder and replies come to your inbox. Opens and clicks are tracked: the lead gets an Opened email or Clicked email tag and shows up in Follow-ups. Connect Gmail once from Your profile → Google, or from the Connect Gmail button in the email. Google asks permission to send email for you; the app can't read your inbox.
- Copy email or Open in mail app to send it from anywhere else, then tap Log email sent. These aren't tracked; if you know they opened or clicked, add the tag on the lead.
When they reply, tap They replied on the lead (a "no" goes to Do not contact). Owners and managers can edit the email snippets, or add new ones, from Settings → Leads → Edit email snippets.
Opening a sent email in your own Gmail can count as an open, so treat "Opened email" as a nudge, not proof.
The lead page
Everything about one business: contact details, their ads, Google profile, the call schedule, the meeting and every call, email and note.
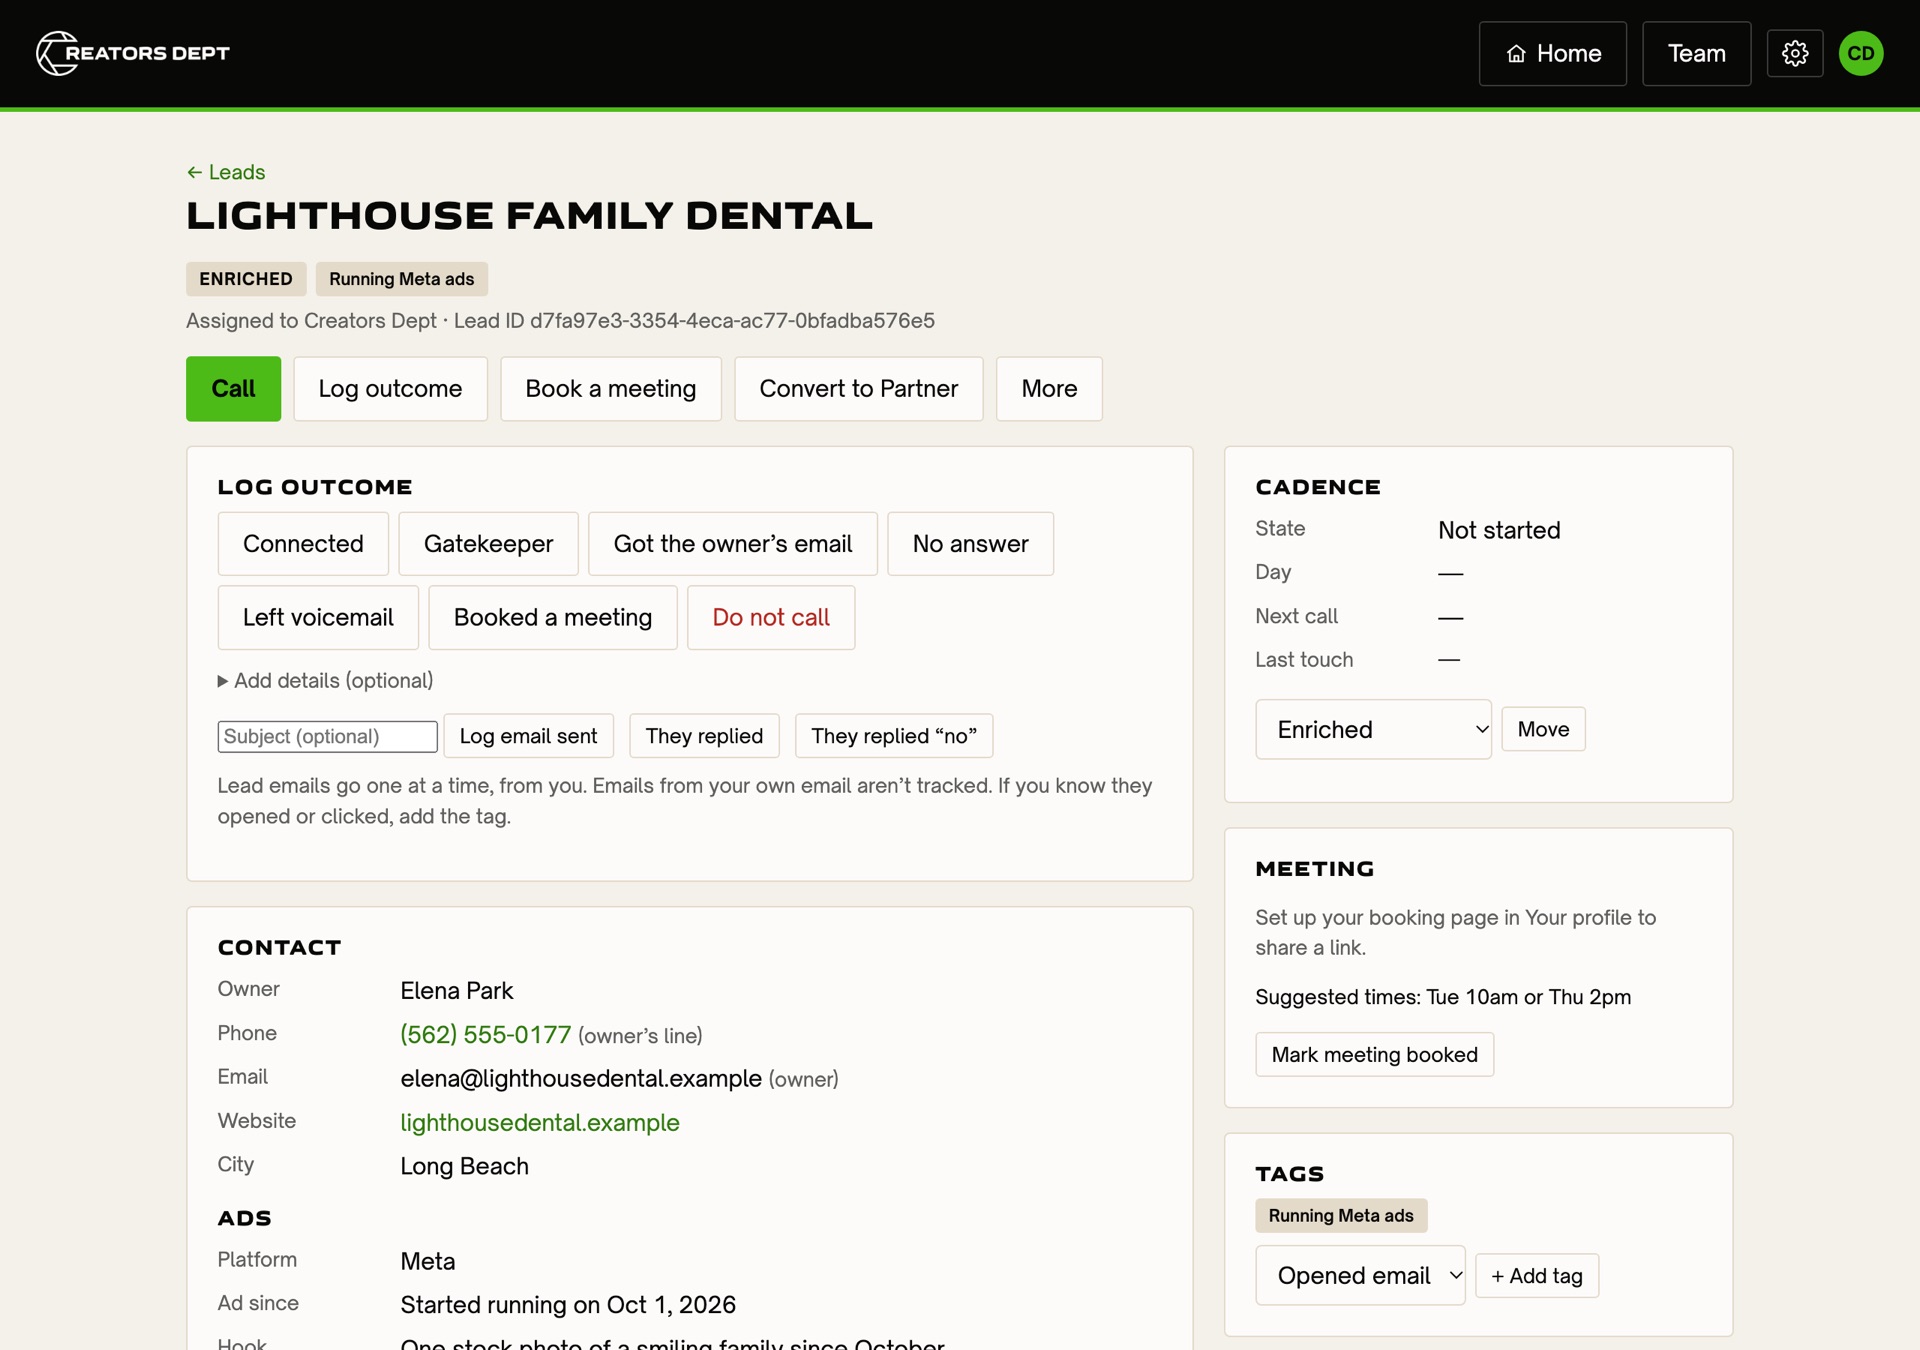
- Do not contact is permanent: no calls and no emails, on any list, ever again. If it was a mistake, the owner can undo it on the same day only.
- Drop lead is for businesses that didn't pass the ad check. They move to Dropped and won't be added again.
- Convert to Partner creates the partner (or links the one you already have), carries over the notes and opens a proposal draft. It doesn't invite anyone to the Client Partner Portal; you do that when you're ready.
The daily call target, your two suggested meeting times and your business mailing address are under Settings → Leads.
05 Proposals
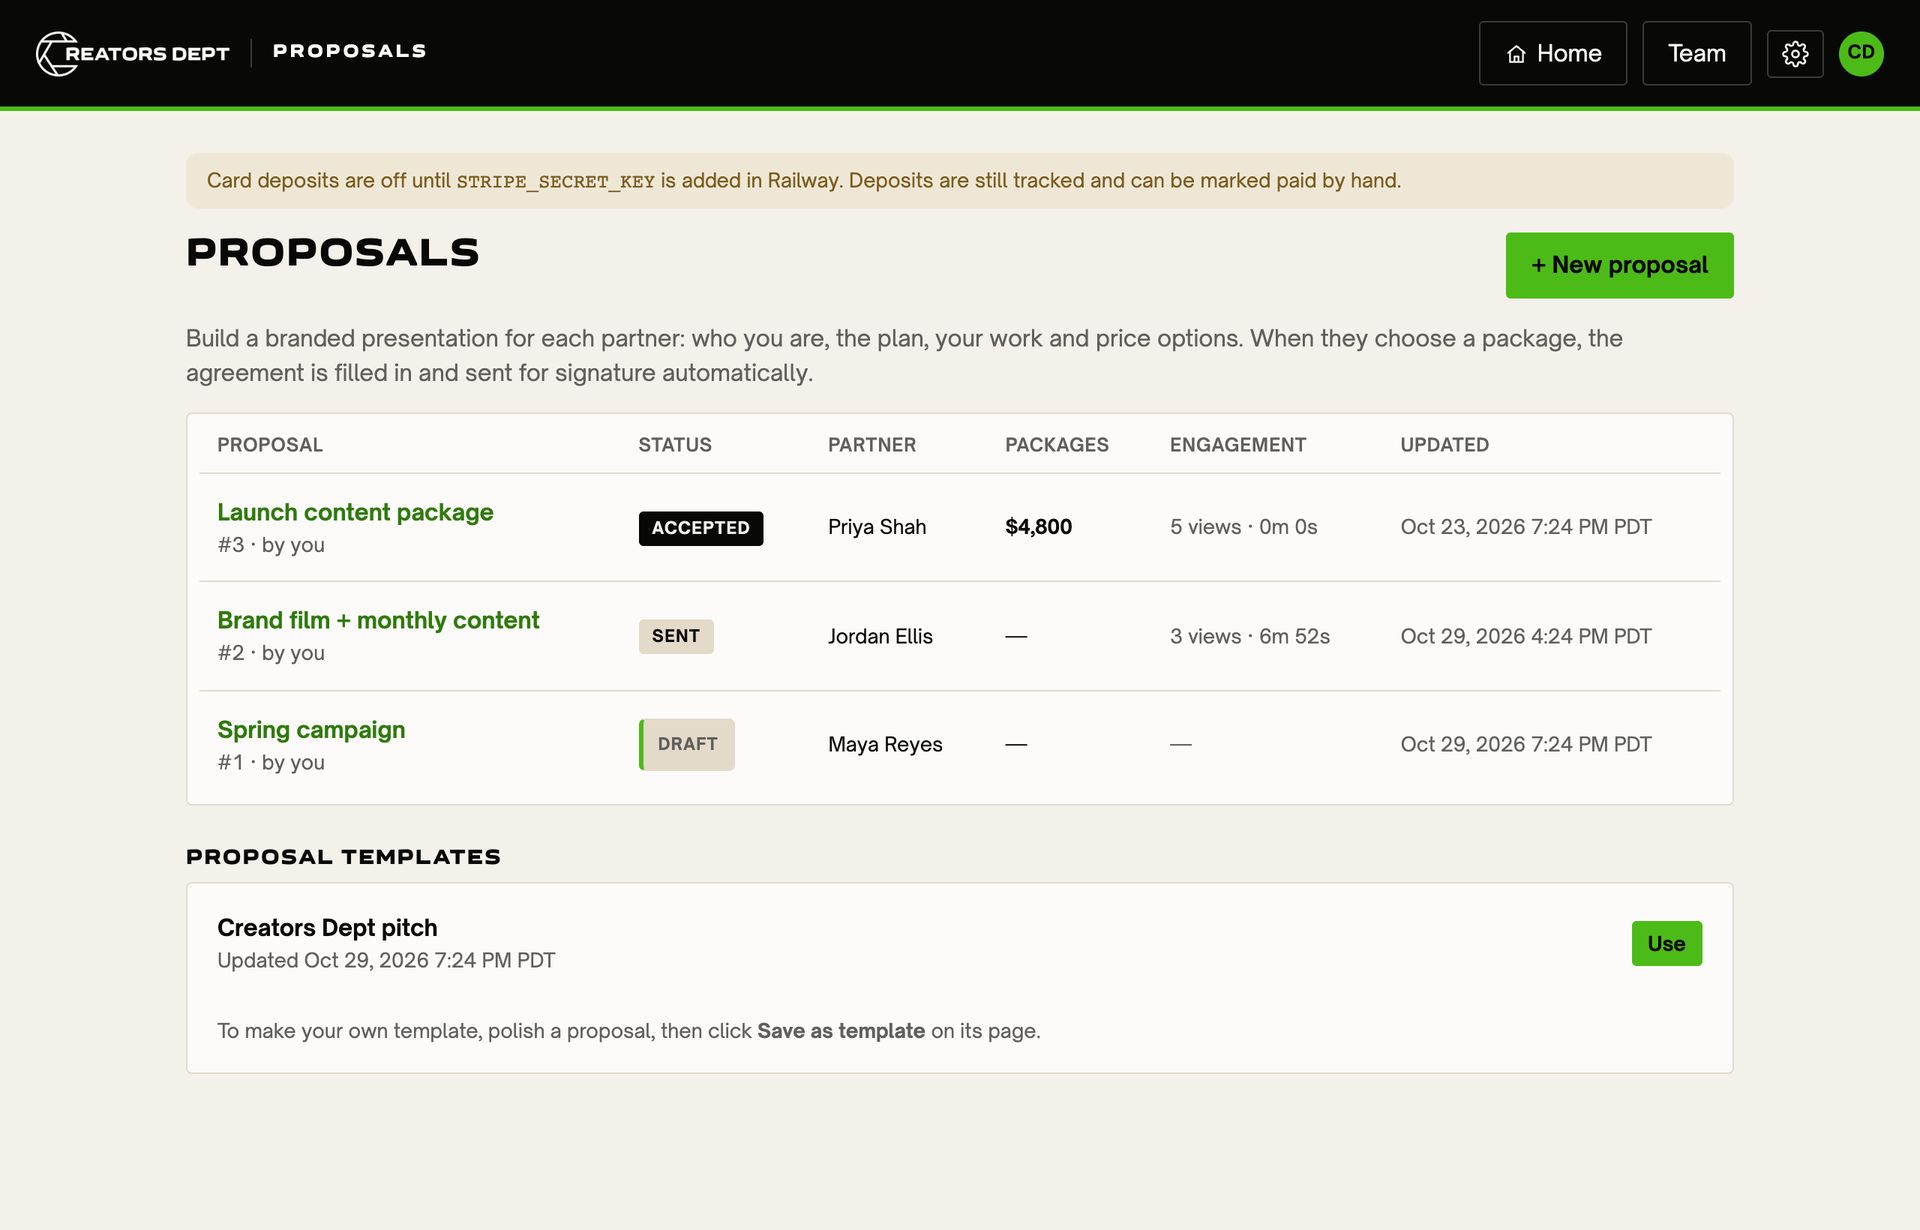
A proposal is a branded presentation with a private link. Start one from + New proposal on Home, the Proposals page or a partner's page.
In the editor you set the project title, the partner, an optional expiry date, anyone else who should get the link, and the message in the email. Then shape the sections: cover photo, who we are, what we do, the plan, your work (photos and videos), testimonials, packages and add-ons, and next steps. Show, hide or reorder any section. Text in [[double brackets]] is a placeholder; a proposal can't go out until those are filled in and every package has a price.
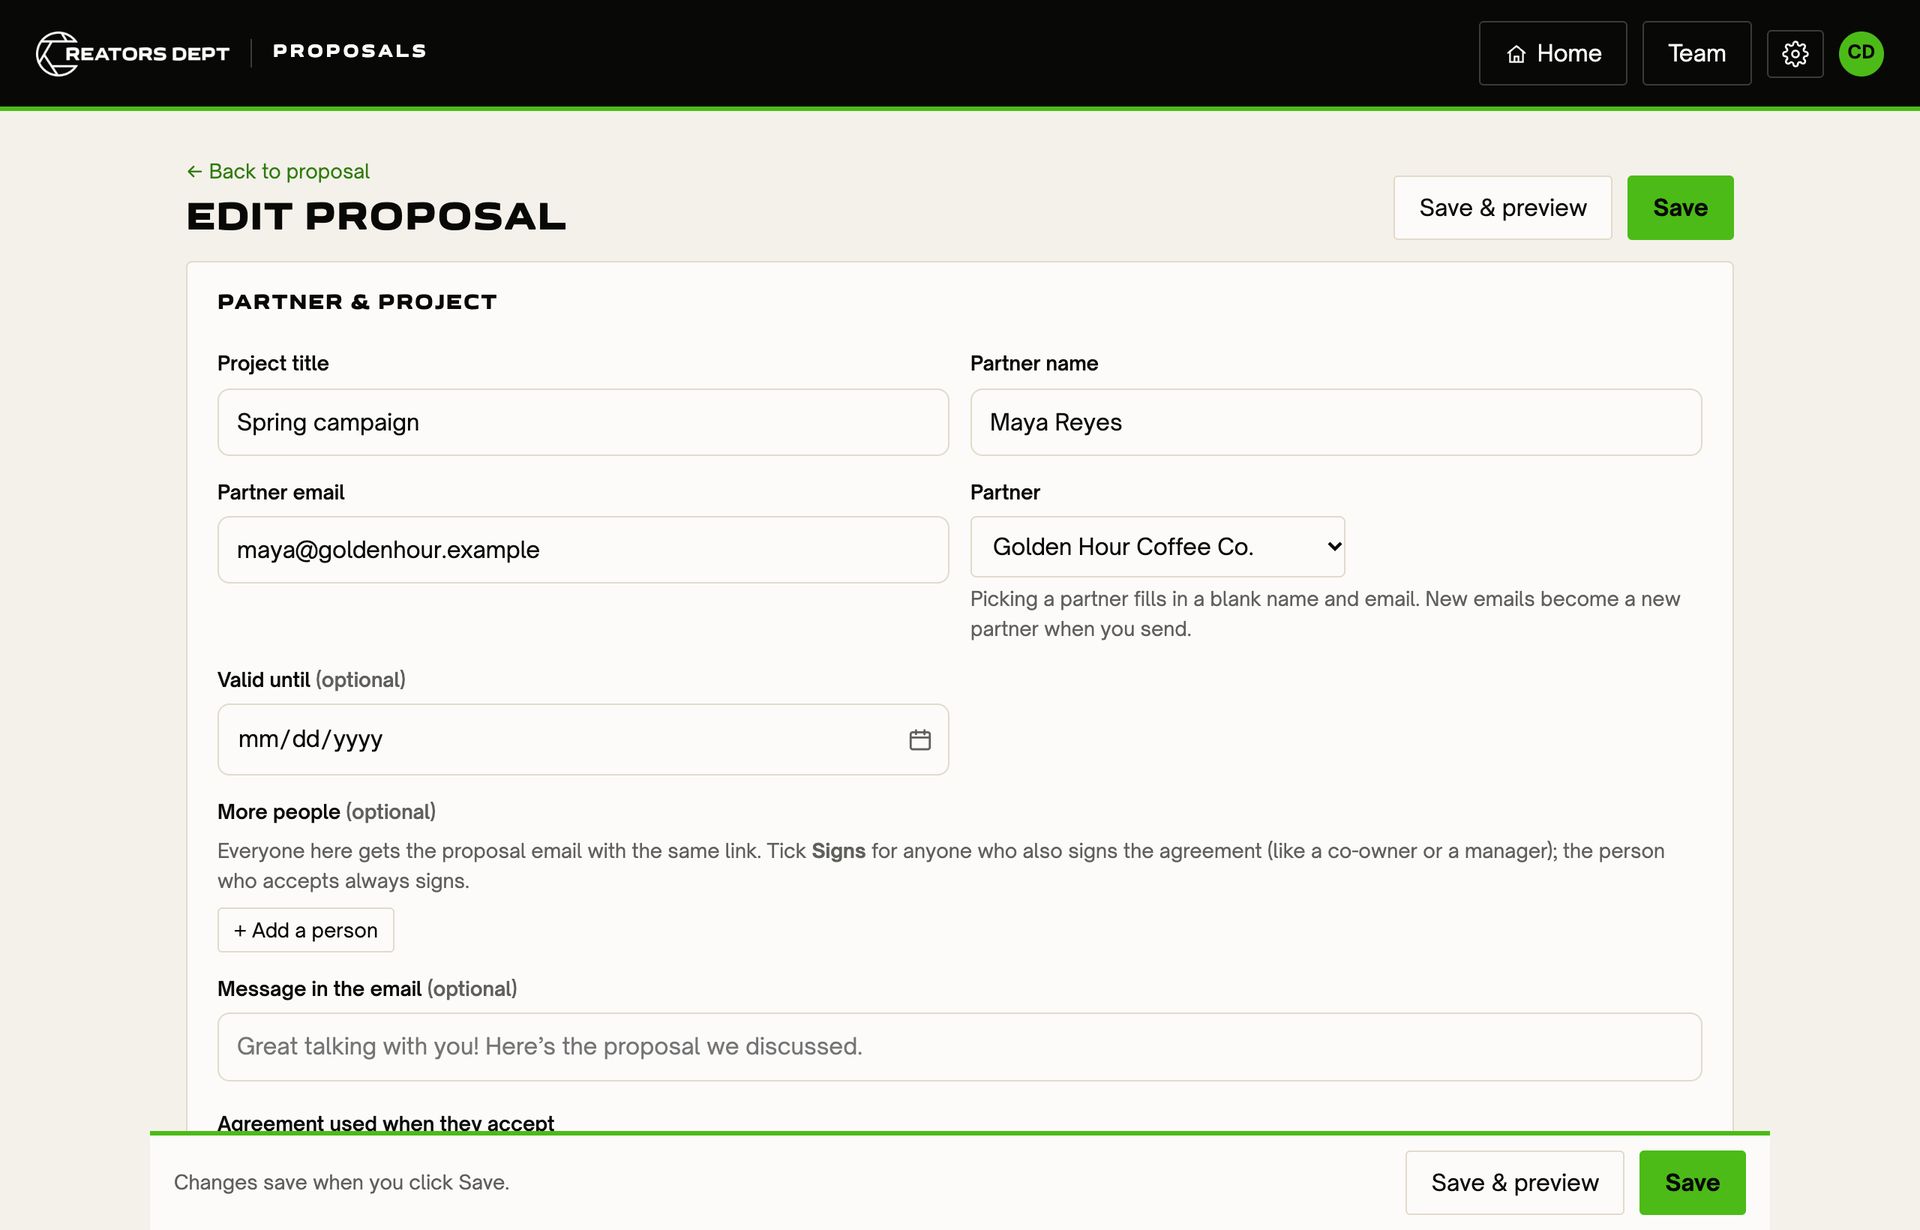
Your partner opens a full-screen presentation, picks a package and add-ons, sees a live total and chooses Accept. You can watch how many times they opened it, how long they spent and which section held their attention.

When a partner accepts, the agreement is filled in with their package, add-ons, total and deposit, sent for signature, and they land straight on the signing page. If you take a deposit, a Pay deposit button appears right after they sign.
Polished a proposal you'll use again? Choose Save as template.
Delete works on drafts and on proposals nobody has accepted (sent, viewed or declined). The proposal moves to Recently deleted (linked at the top of Proposals), where Restore brings it back exactly as it was for 30 days. After that it's removed for good, or right away with Delete now. A deleted proposal's link stops working for the partner. Accepted and signed proposals are records, so those can only be archived.
Invoices and retainers
The deposit is paid when they sign. For everything after that, open Invoices on the partner's page.
- + New invoice: give it a title and one or more lines (what it's for and the amount), pick a due date (two weeks out to start) and choose Send invoice, or Save draft to send later. Under Bill a balance, a proposal that still has money left on it fills the form for you, and the proposal page has an Invoice the balance button once the deposit is in.
- The partner is emailed a link, and the invoice shows in their portal under Agreements & payments. With Stripe connected they pay by card, the invoice turns Paid by itself, they get a receipt and you're emailed. Paid another way? More → Mark paid.
- An invoice still open a day after it's due gets one friendly reminder. Remind sends another whenever you like. Cancel invoice stops it showing as due; a draft nobody has seen is simply removed.
- Monthly retainers: choose + Set up a monthly retainer, enter what it's for, the amount and the day of the month, and a new invoice is made and emailed on that day every month (due a week later, or whatever you choose). Tick Also send this month's invoice today to start now. Pause stops new invoices until you Resume. The form starts from the retainer you entered under How we work together, which stays the number Pulse uses.
The money goes to the same Stripe account as deposits, and only the owner and managers see invoices.
Pricing a project: the Creators Dept Calculator
Not sure what to charge? Open Calculator at the top of Proposals and choose + New estimate. It prices a project from the hours it really takes:
- Your overhead. Put in your total monthly expenses (your pay, rent, software, insurance, gear) and your working hours per month (173 is full time). That gives your break-even hourly rate: what an hour of your time costs.
- The work. Add the hours for discovery, pre-production, production and post-production. In post, raw content captured × the editing multiplier is the time to edit (3 is neutral, up to 5 for a complicated project or client). Each phase uses your break-even rate unless you put in a team rate for it. Add or remove lines as you need.
- Contractors and expenses. What you pay others, plus meals, flights, hotels and mileage. These go in at cost unless you mark them up.
- Markup. Each phase starts at 250%, meaning 2.5× its cost. At 100% you only cover costs, with nothing left to grow on.
The summary on the right updates as you type: hard cost, proposal price, gross profit, estimated tax and net profit. Add their budget to see how far over or under you are. Save and start a proposal makes a draft proposal for the partner, with the price (in whole dollars) as its package and your deliverables as its list. Estimates are saved, so you can come back, Duplicate one for a similar project, or delete it. A new estimate starts with the overhead and tax rate from your last one.
Only the owner and managers see the calculator, since it shows your overhead and margins.
06 Agreements and signing
Documents holds every agreement: drafts, awaiting signatures, completed, declined and voided. Choose + New document to start from a template or a blank page. Paste straight from Word, Pages or Google Docs; headings, bold and bullets come through.
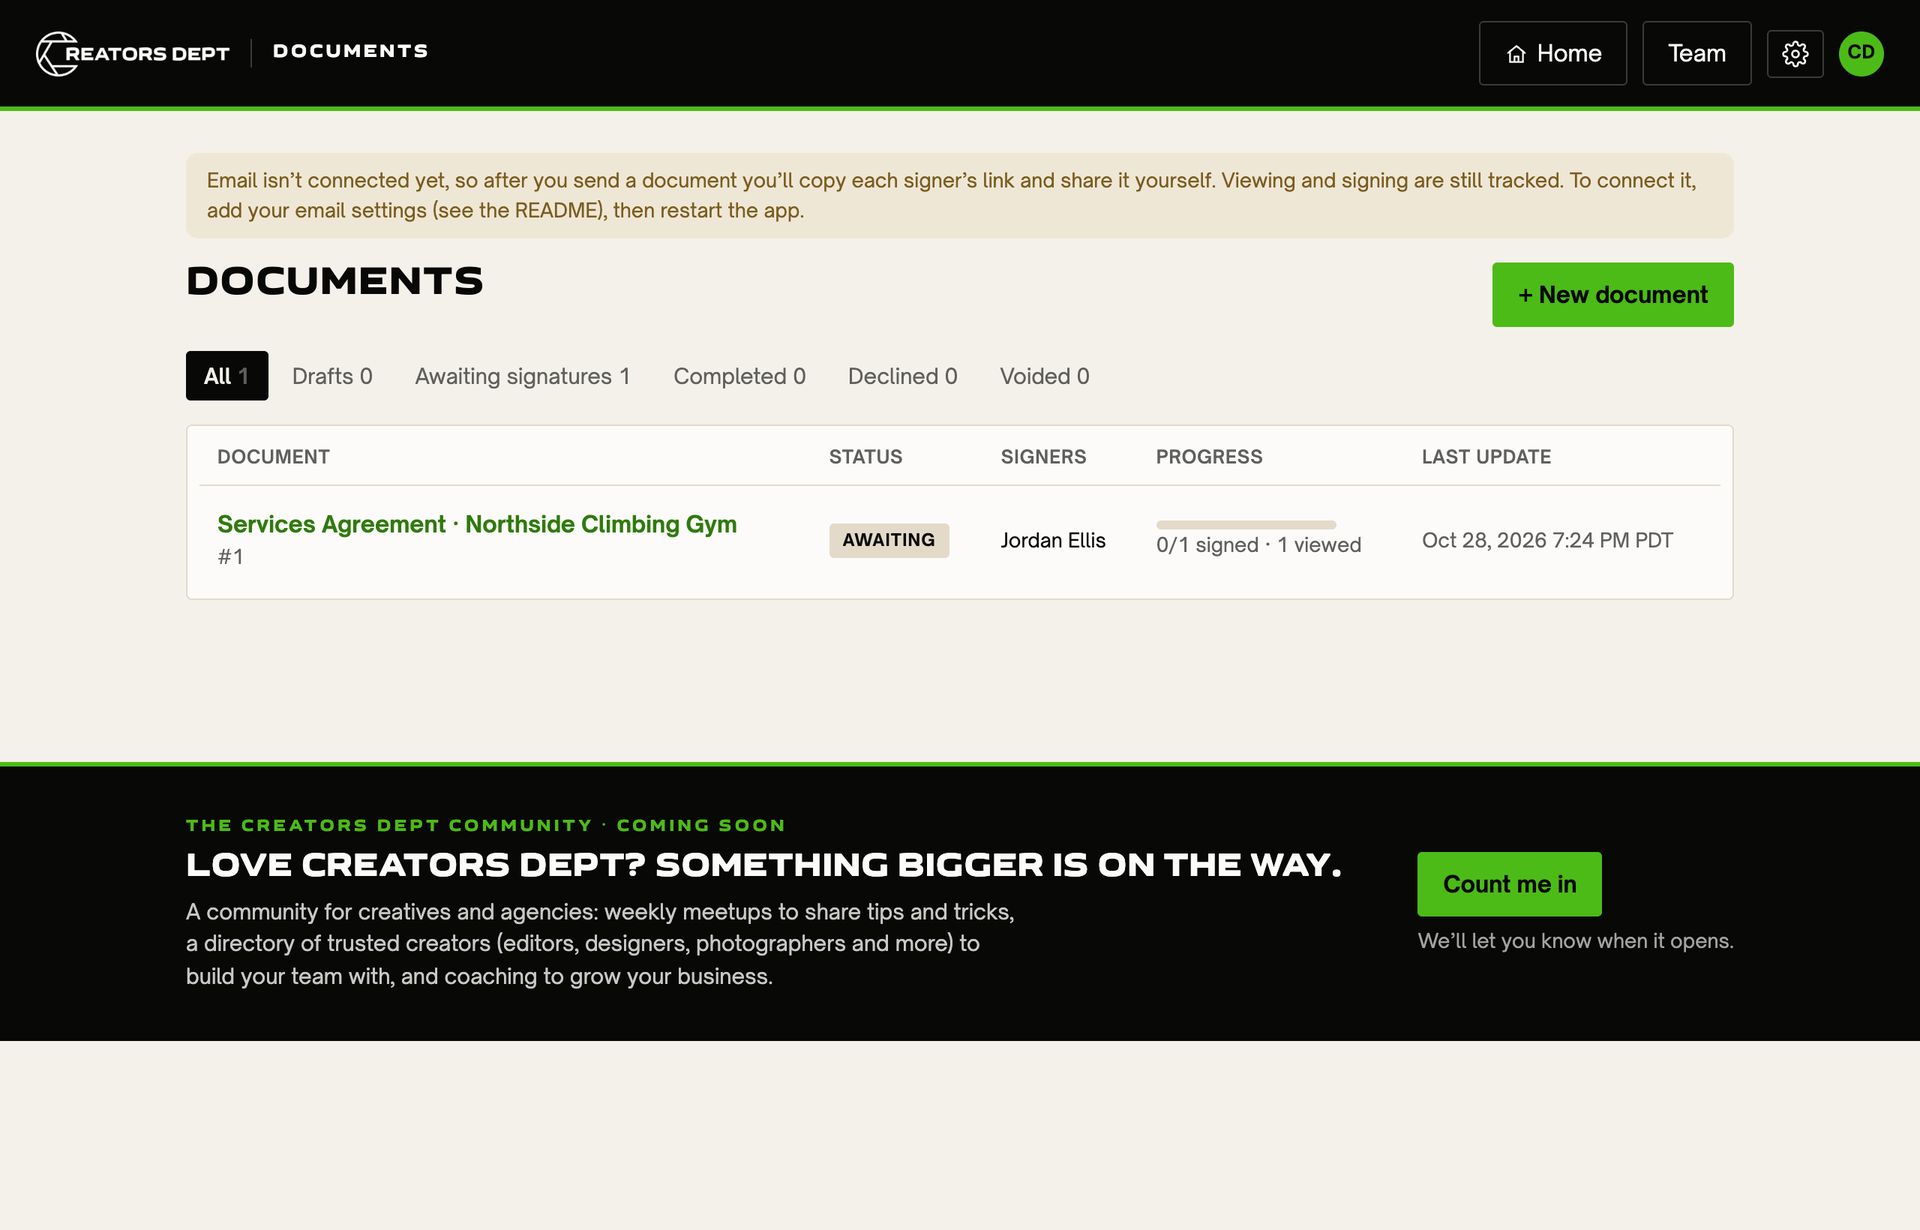
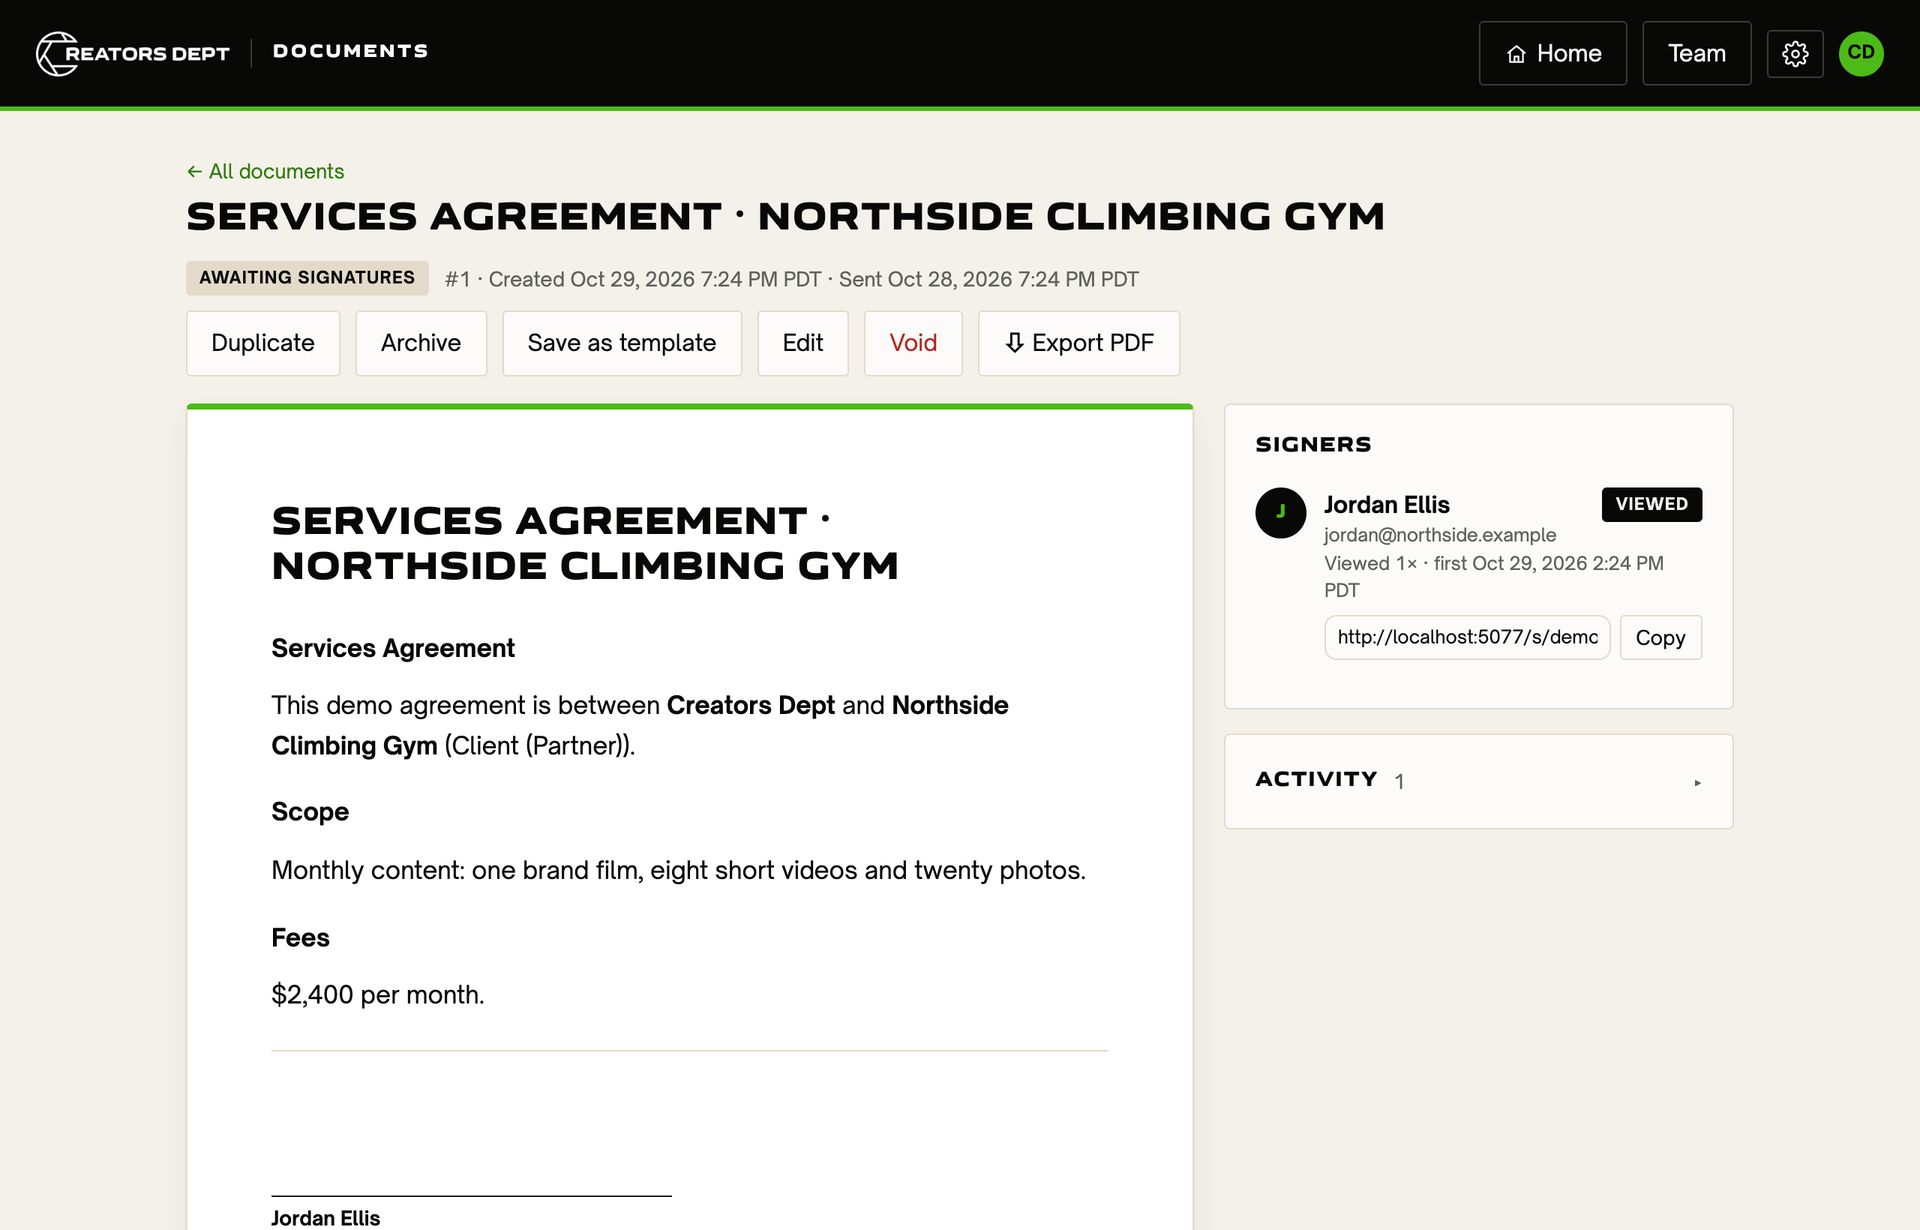
Add each signer's name and email and choose Send. Sending locks the wording and records a fingerprint of it, so nobody can change the agreement after the fact. The document page shows each signer's status (sent, viewed, signed or declined), how many times they opened it, and a complete activity trail.
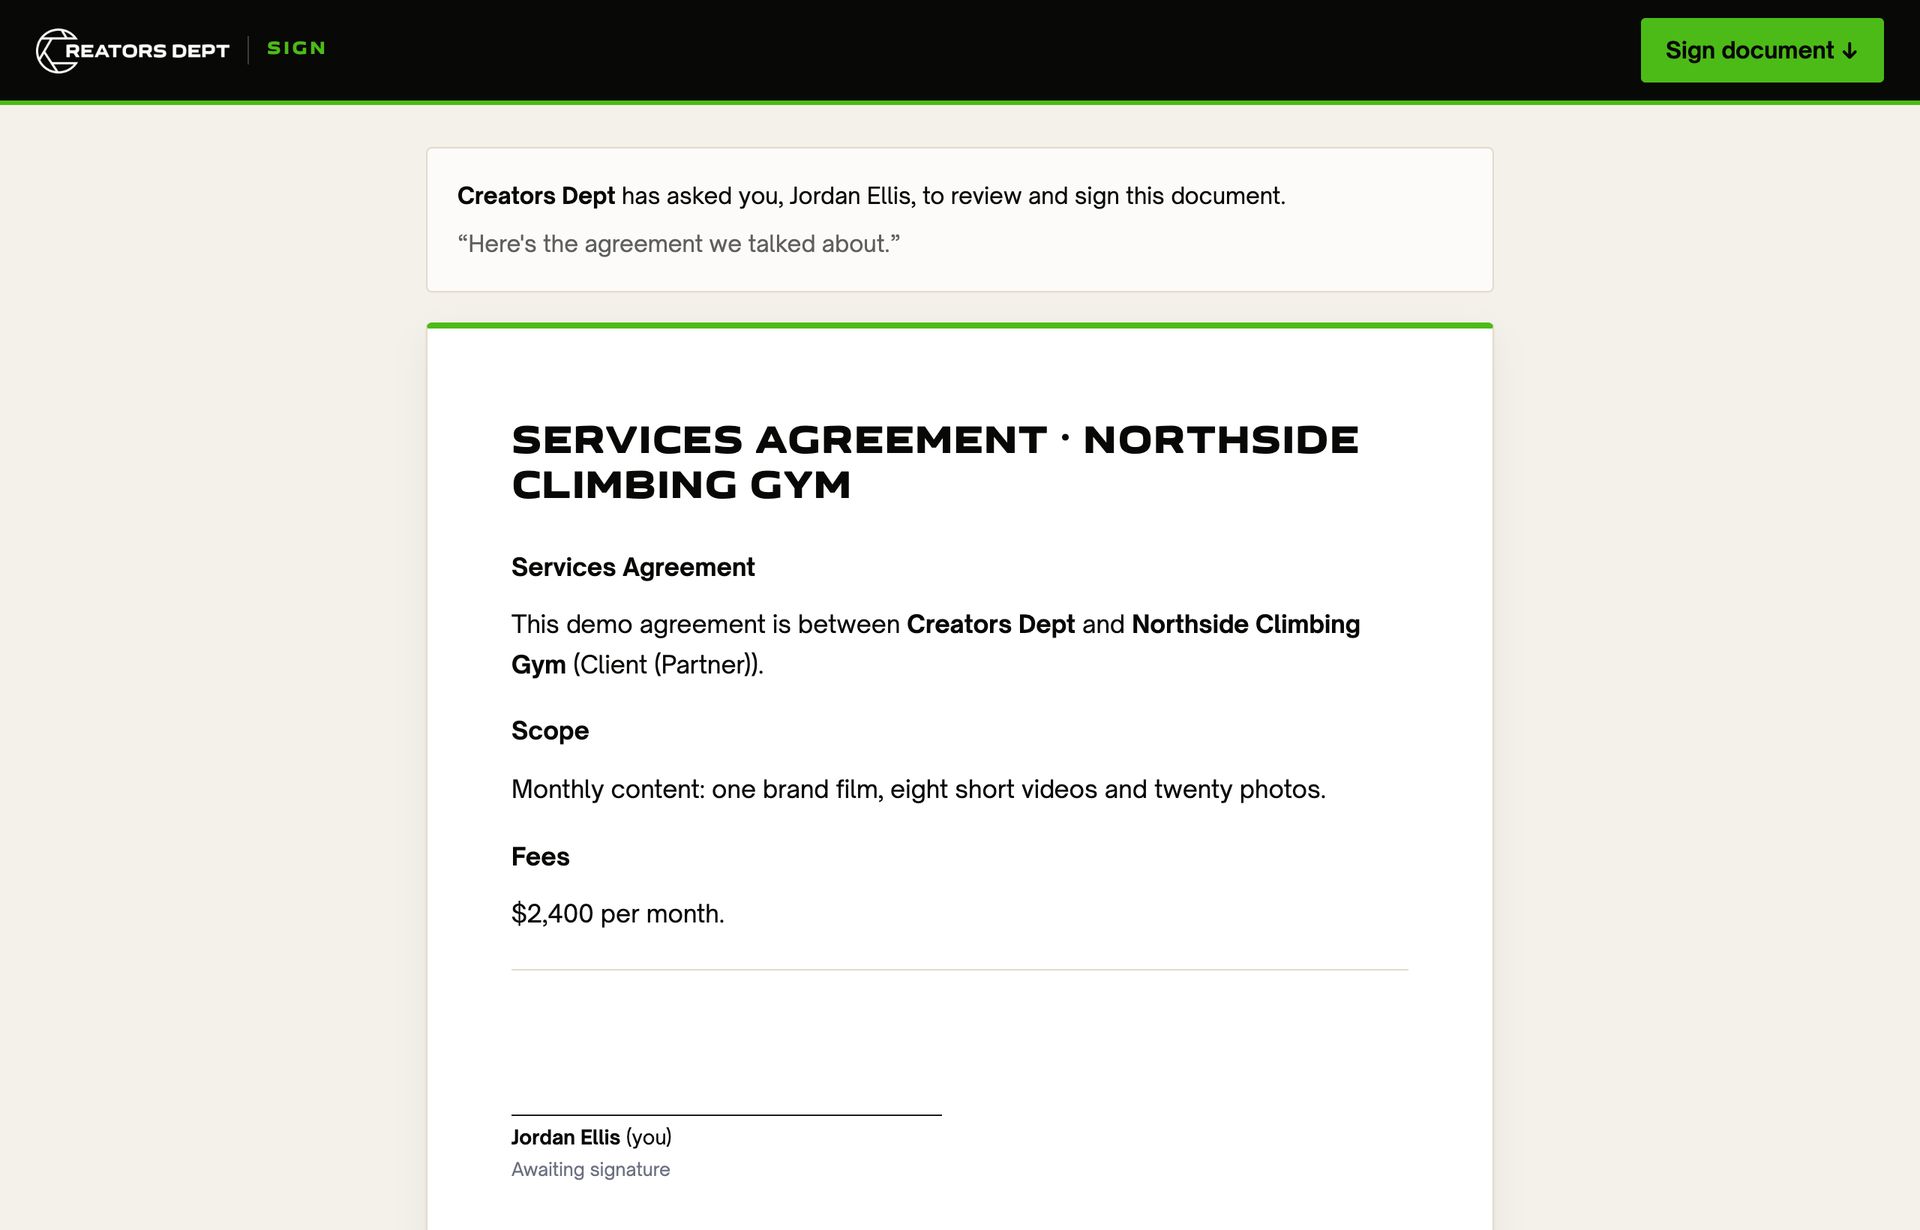
Signers draw or type their signature and agree to sign electronically. They can also decline with a reason. When the last person signs, everyone is emailed the signed PDF with a Certificate of Completion showing the audit trail.
- Templates keeps your standard agreements; Save as template turns any document into one.
- Duplicate copies a document and its signers. Void cancels one that's out for signature.
- Archive tucks finished items away without deleting anything.
Automations: welcoming a new partner
Settings → Automations sets up a new partner for you once they sign. It's off until you switch on Welcome new partners automatically. It runs in two cases:
- From a proposal: accepting a proposal adds the partner and their contact. Once they've signed the agreement, the welcome steps run. Choose whether to wait for the deposit too; with no deposit, they run at signing.
- An agreement sent without a proposal: when everyone has signed, everyone who signed for the client gets portal access on one partner. If any of them already belongs to a partner, they're added there. The partner is named from the agreement's title (the part after a "|" or " - ", as in "Creative Services Agreement | DJQ&A"), otherwise after the first signer; you can rename it on their page. Contractor agreements, anyone on your team and anyone with your business email domain are never made partners.
The welcome steps, each with its own switch:
- Email their Client Partner Portal invite, with your personal note at the top
- Include a link to book the kickoff call (their point of contact's booking page, once it's open)
- Create starter folders in their content library
- Mark them Project by project on Pulse, if how you work together isn't set yet. The proposal's money already counts on Pulse.
- Email their point of contact, when that's someone on your team
Signed before automations were on? Open the signed agreement. Its Partner card has Set up as partner: check the name, click it, and everyone who signed gets portal access and the welcome steps run. Once the partner exists, the card links to them and offers Run welcome steps instead.
Each partner gets these once. Nobody is invited twice and no folder is doubled. Recent runs lists what happened, and so does the partner's Activity. If email isn't connected, the invite waits; choose Run welcome steps on their page later to send it.
07 Docs
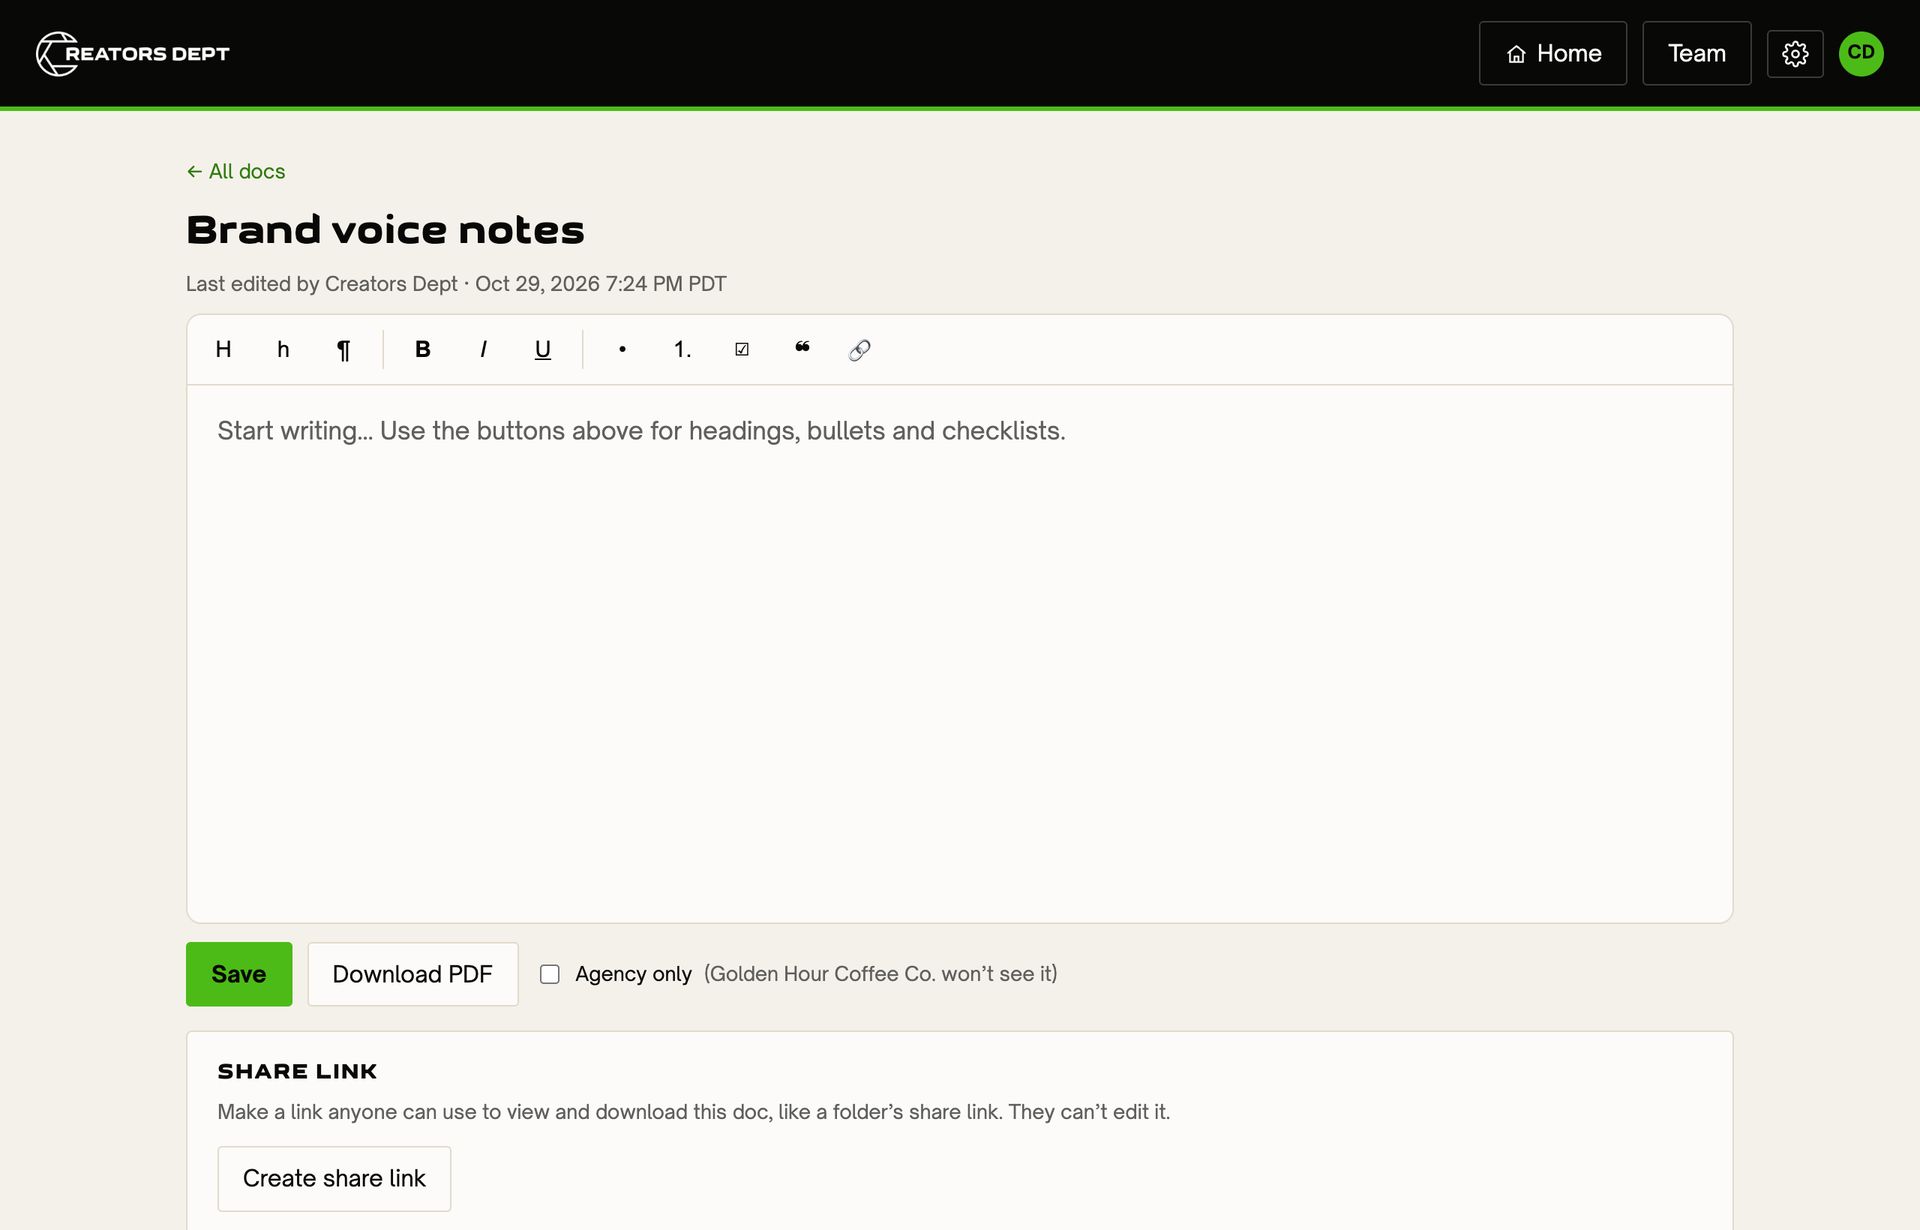
Every partner page has Docs: briefs, shot lists, scripts and notes that you and your partner both write and edit. Format with headings, bullets and checklists, download a PDF, or tick Agency only to keep a doc to your team. Create share link gives a view-only link for anyone else.
Your own business files (contracts, pricing, SOPs, brand files, plans) live in HQ, with folders for the whole team or the owner only.
08 Content library and uploads
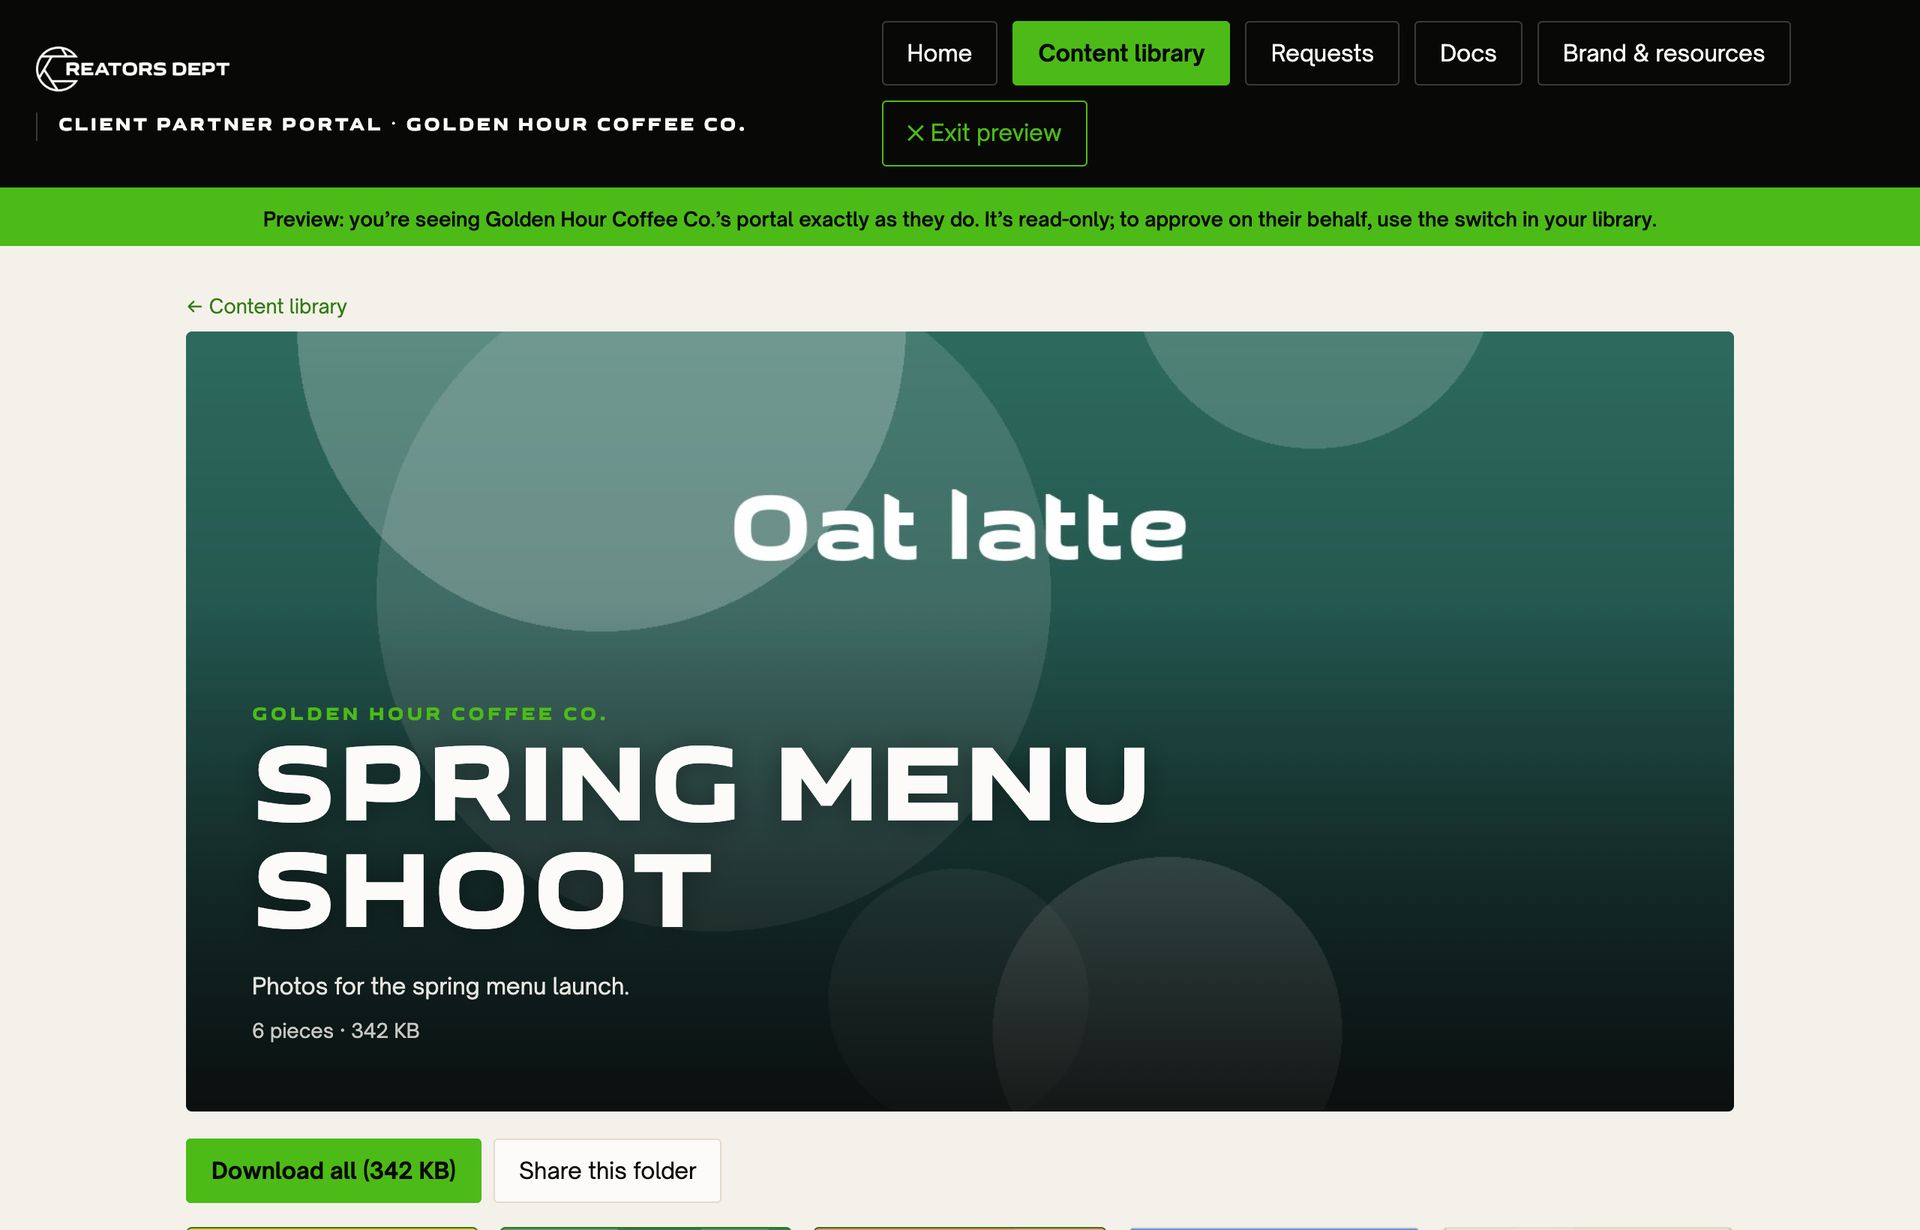
Each partner has a content library, organized in folders: one per shoot or batch. Open the partner's page → Content library, name a folder and choose Create folder.
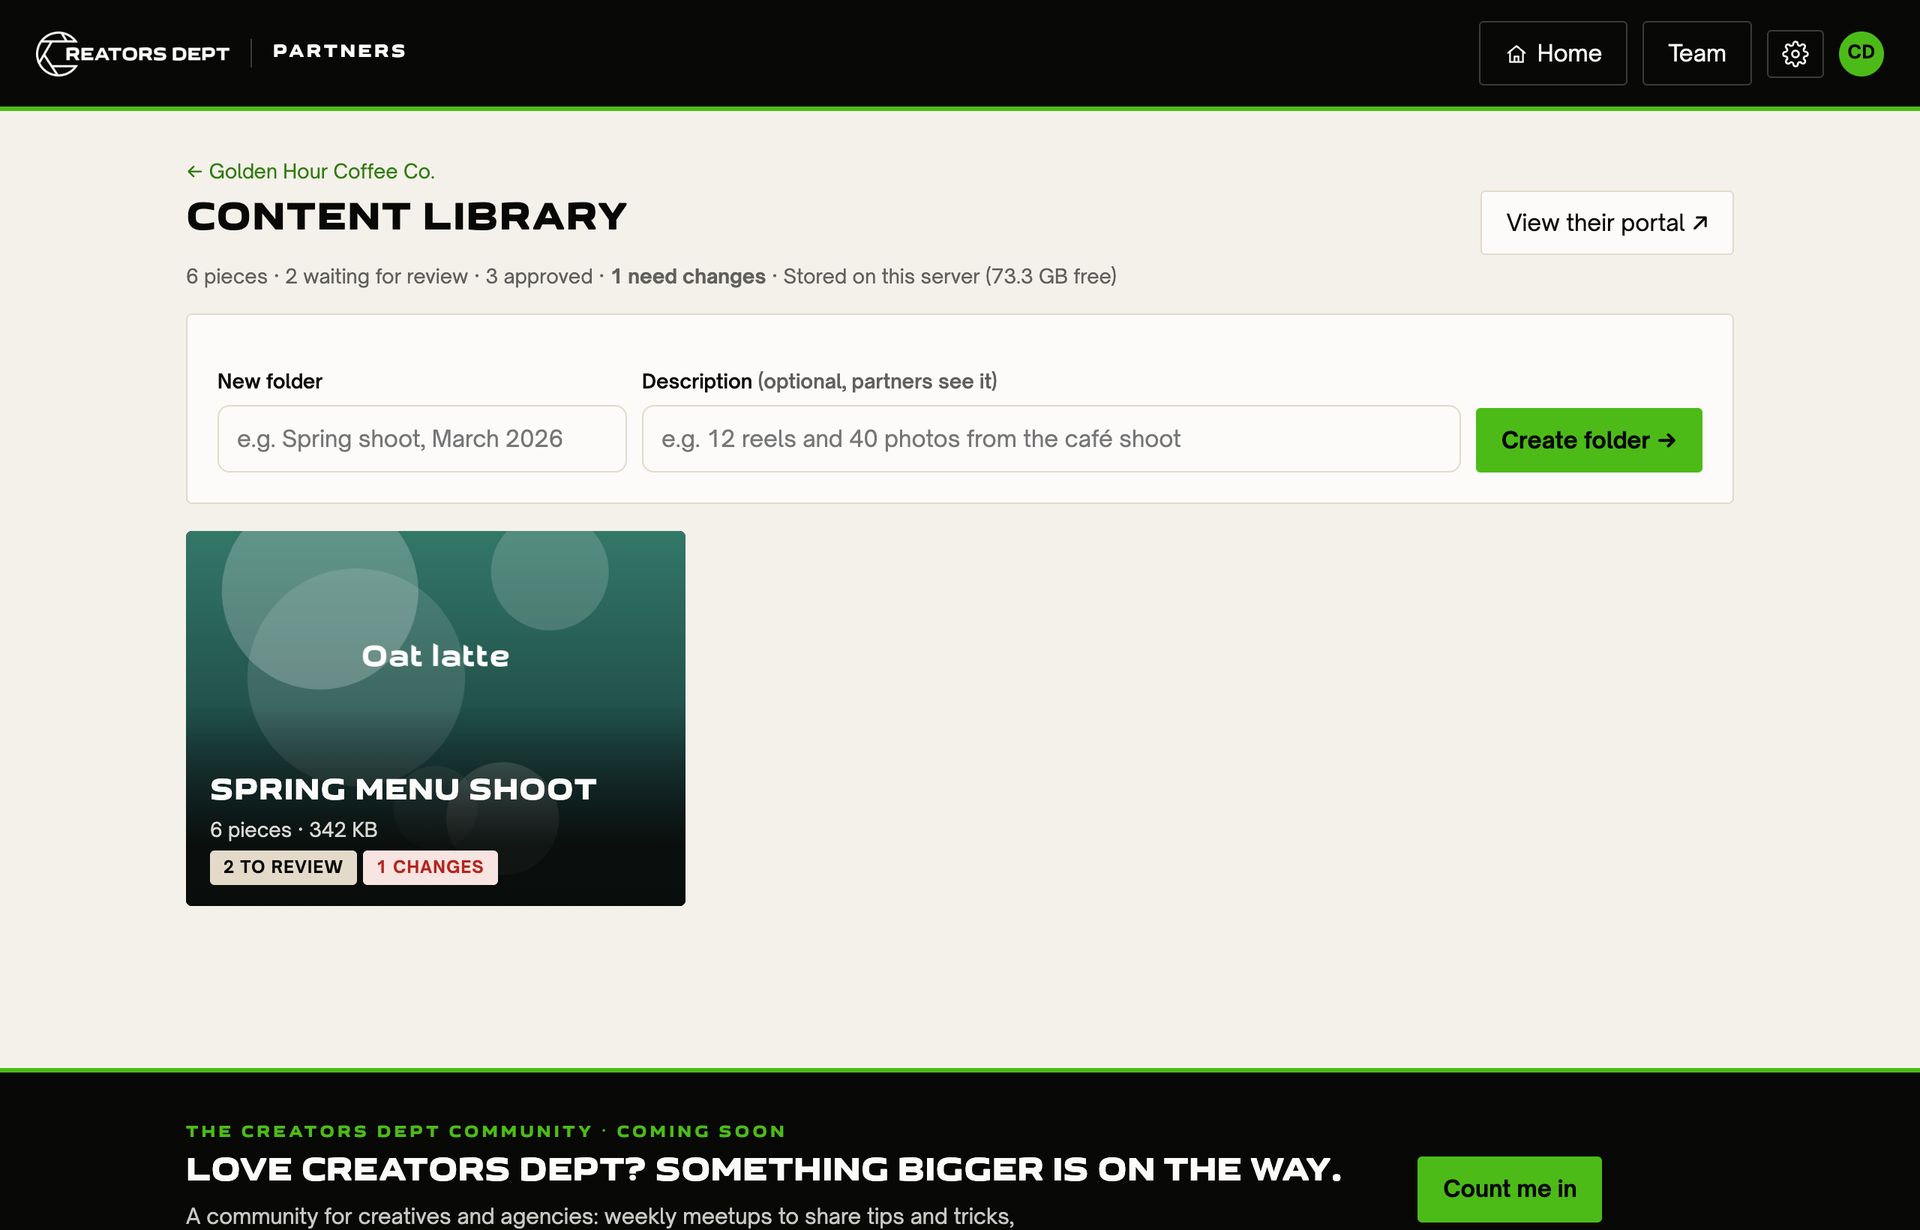
Drop photos, videos and files into a folder, or click to choose them. Videos can be up to 10 GB each, and originals are never altered. Each video's tile shows a frame from about a second in; for an iPhone .mov or a Drive or Dropbox import it can take a minute to appear. To rename a file, open its Edit (photos and videos) or choose Rename (documents); the file type stays the same, so it still opens in the right app. Files partners send and files in HQ have Rename too. If your agency connected them, Google Drive, Dropbox and Canva buttons bring files in directly. Give the folder a cover photo, then choose Tell them it's ready to email everyone on the partner's portal a link.
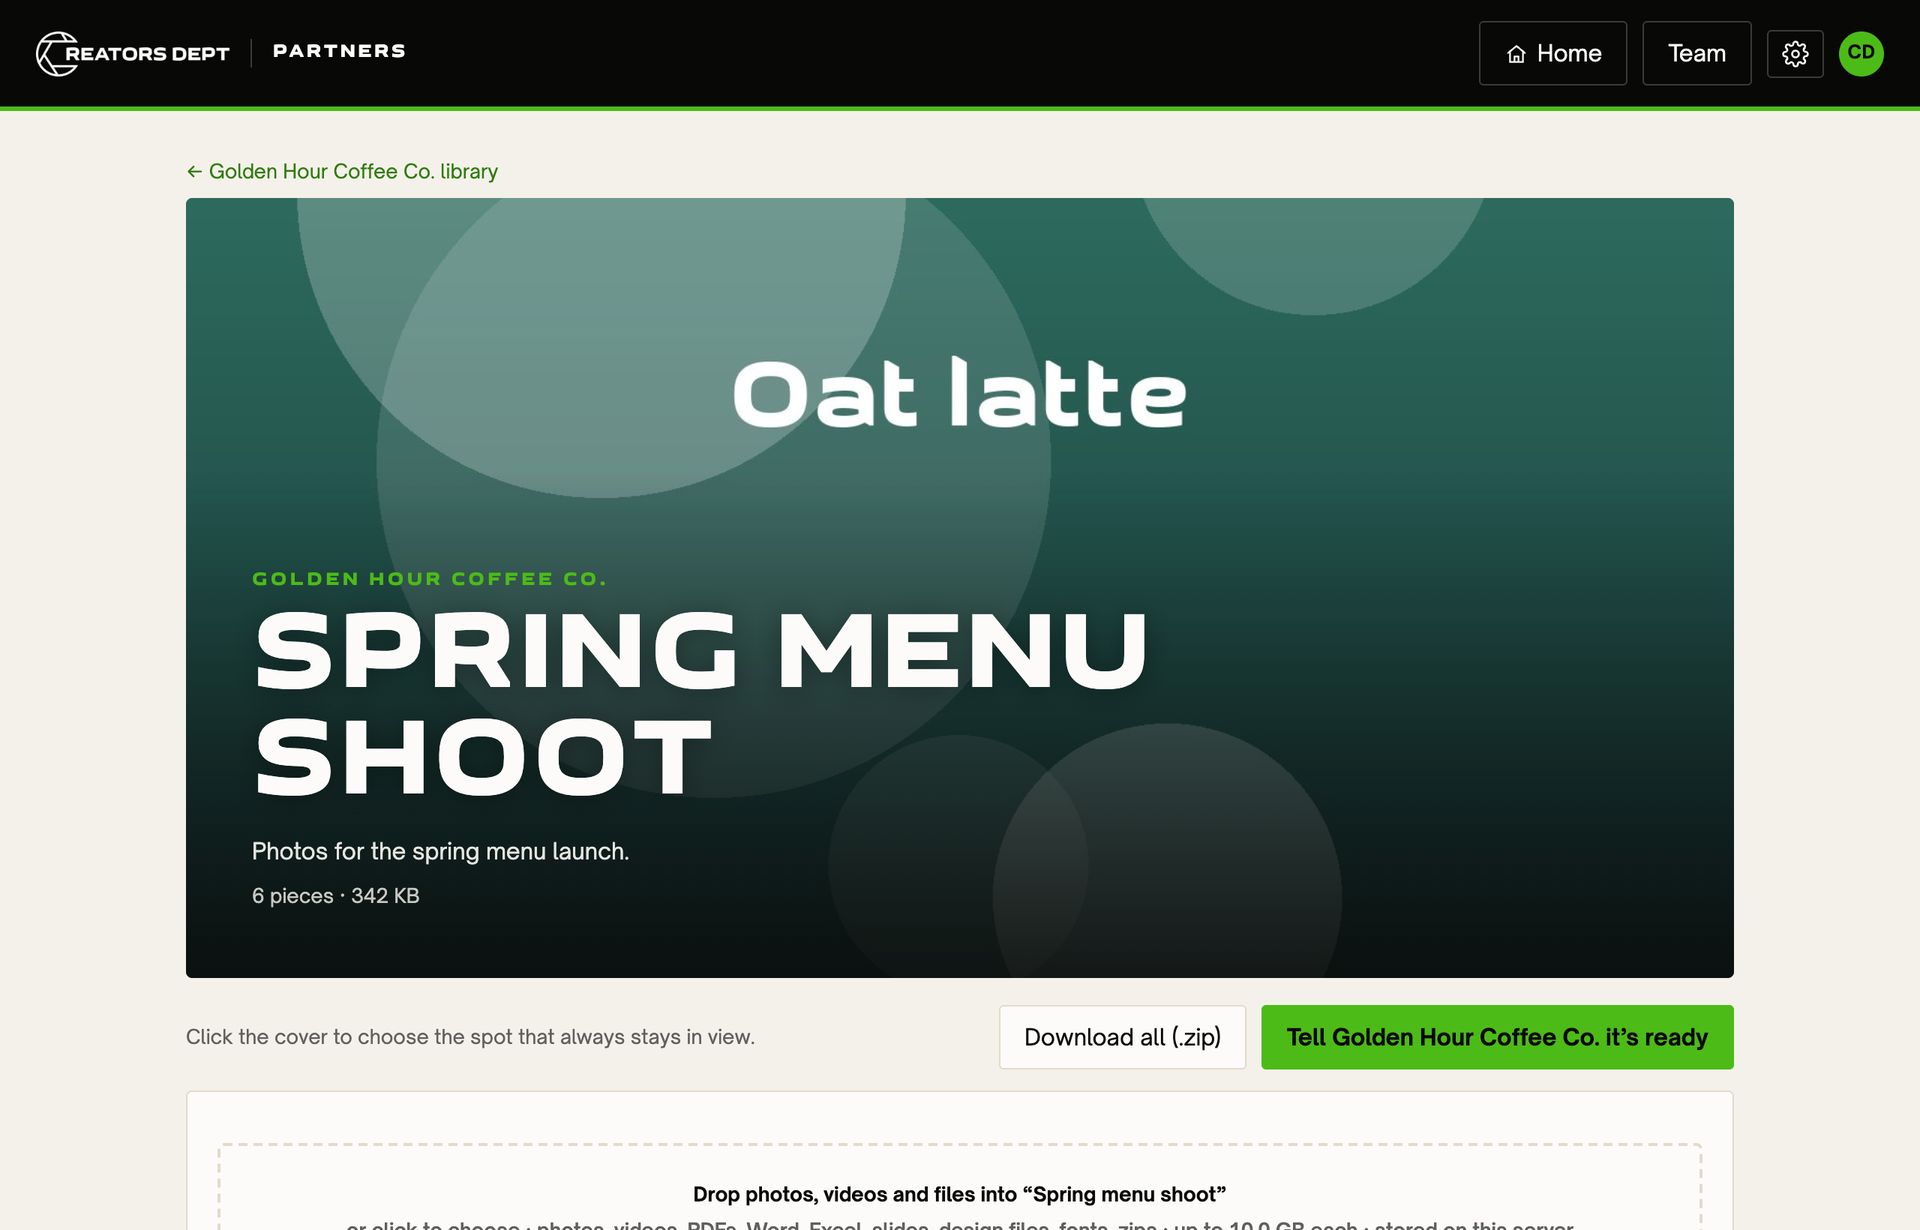
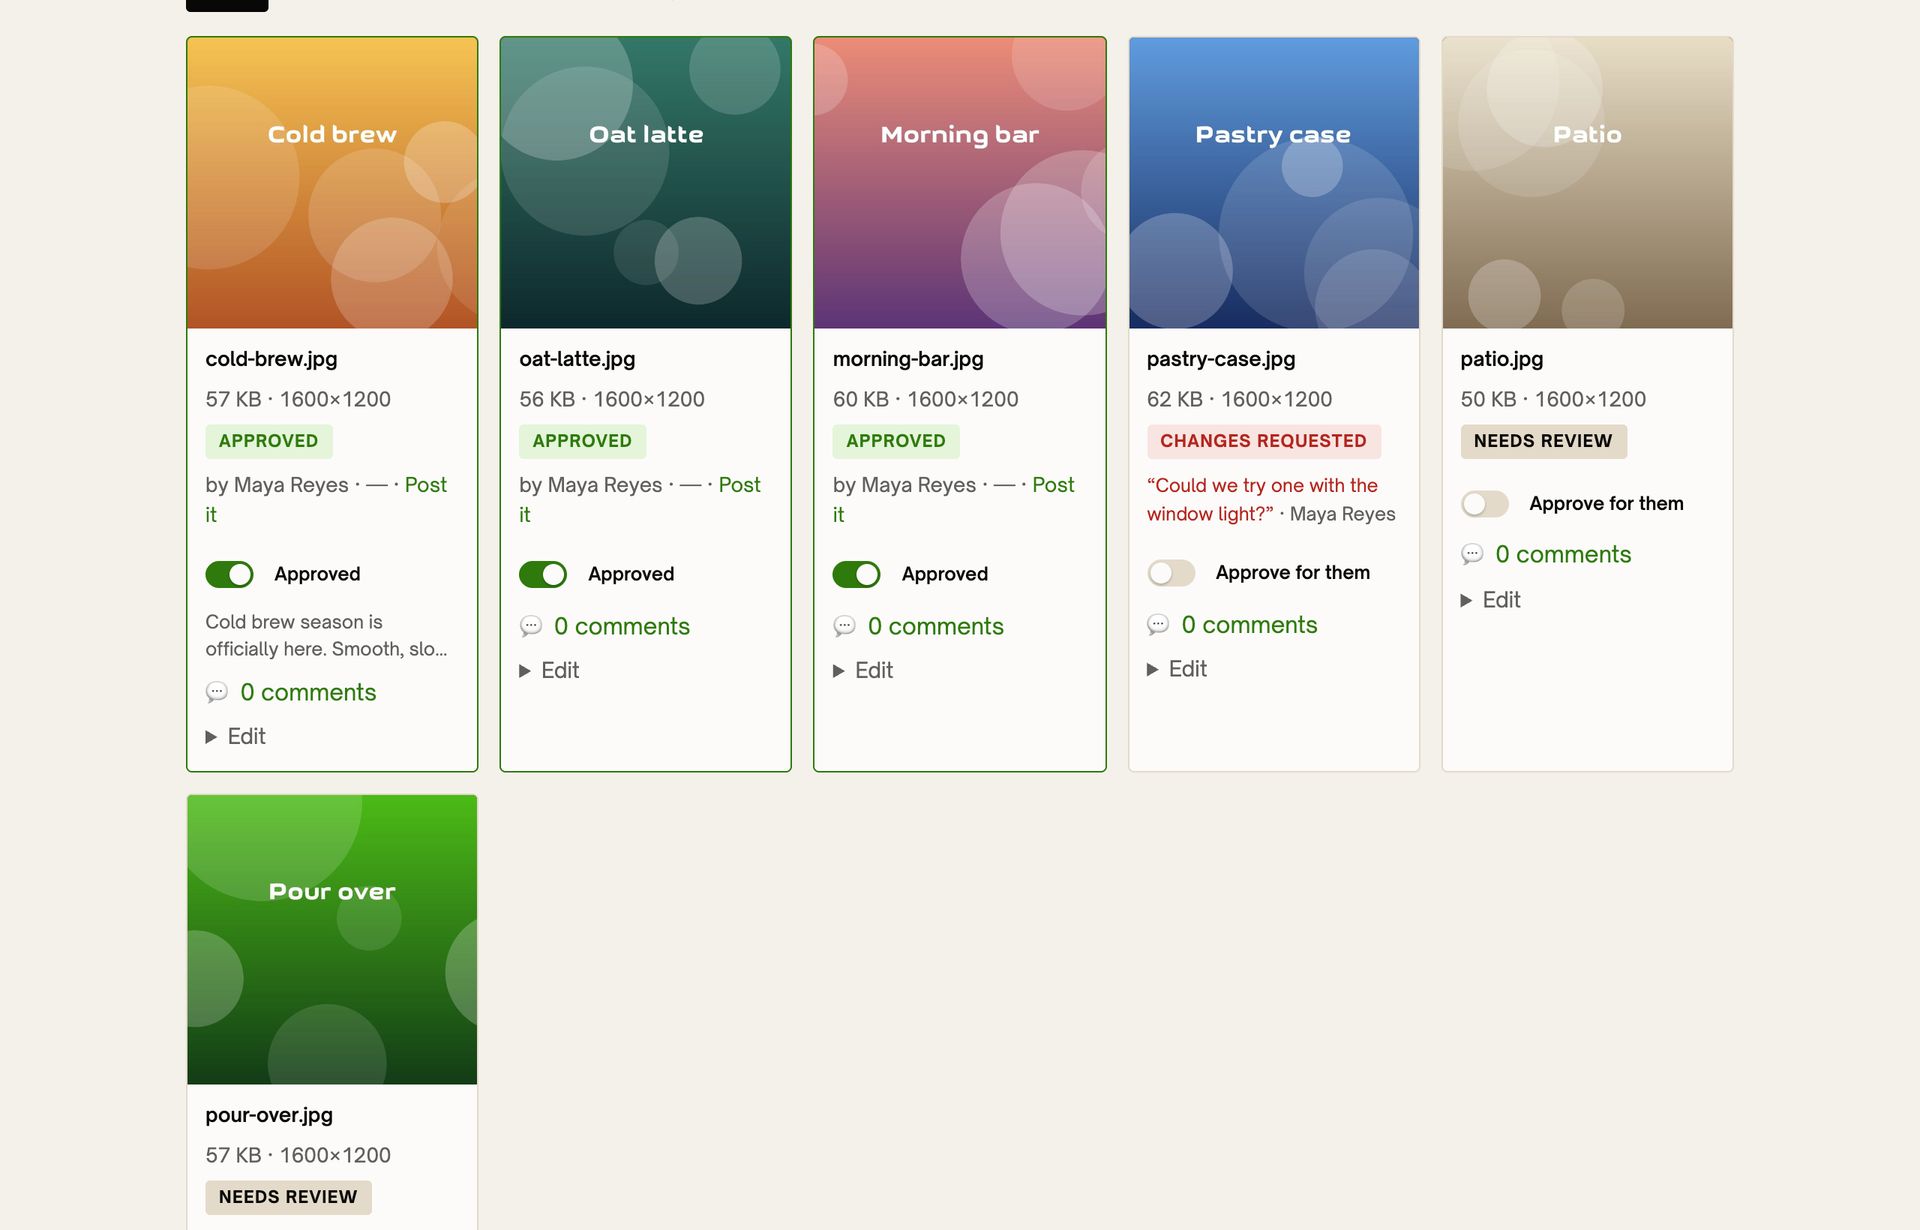
Every piece shows its review status: Needs review, Approved or Changes requested, with the partner's note. Open any piece to see it full size, comment, and write a caption for socials. ✨ Draft in brand voice writes caption options in the partner's voice for you to edit. Approve for them records a yes your partner gave you by phone or text.
Download all (.zip) gets a whole folder at once, and Share this folder makes a private link anyone can view and download from, no sign-in needed.
09 Requests and files from partners
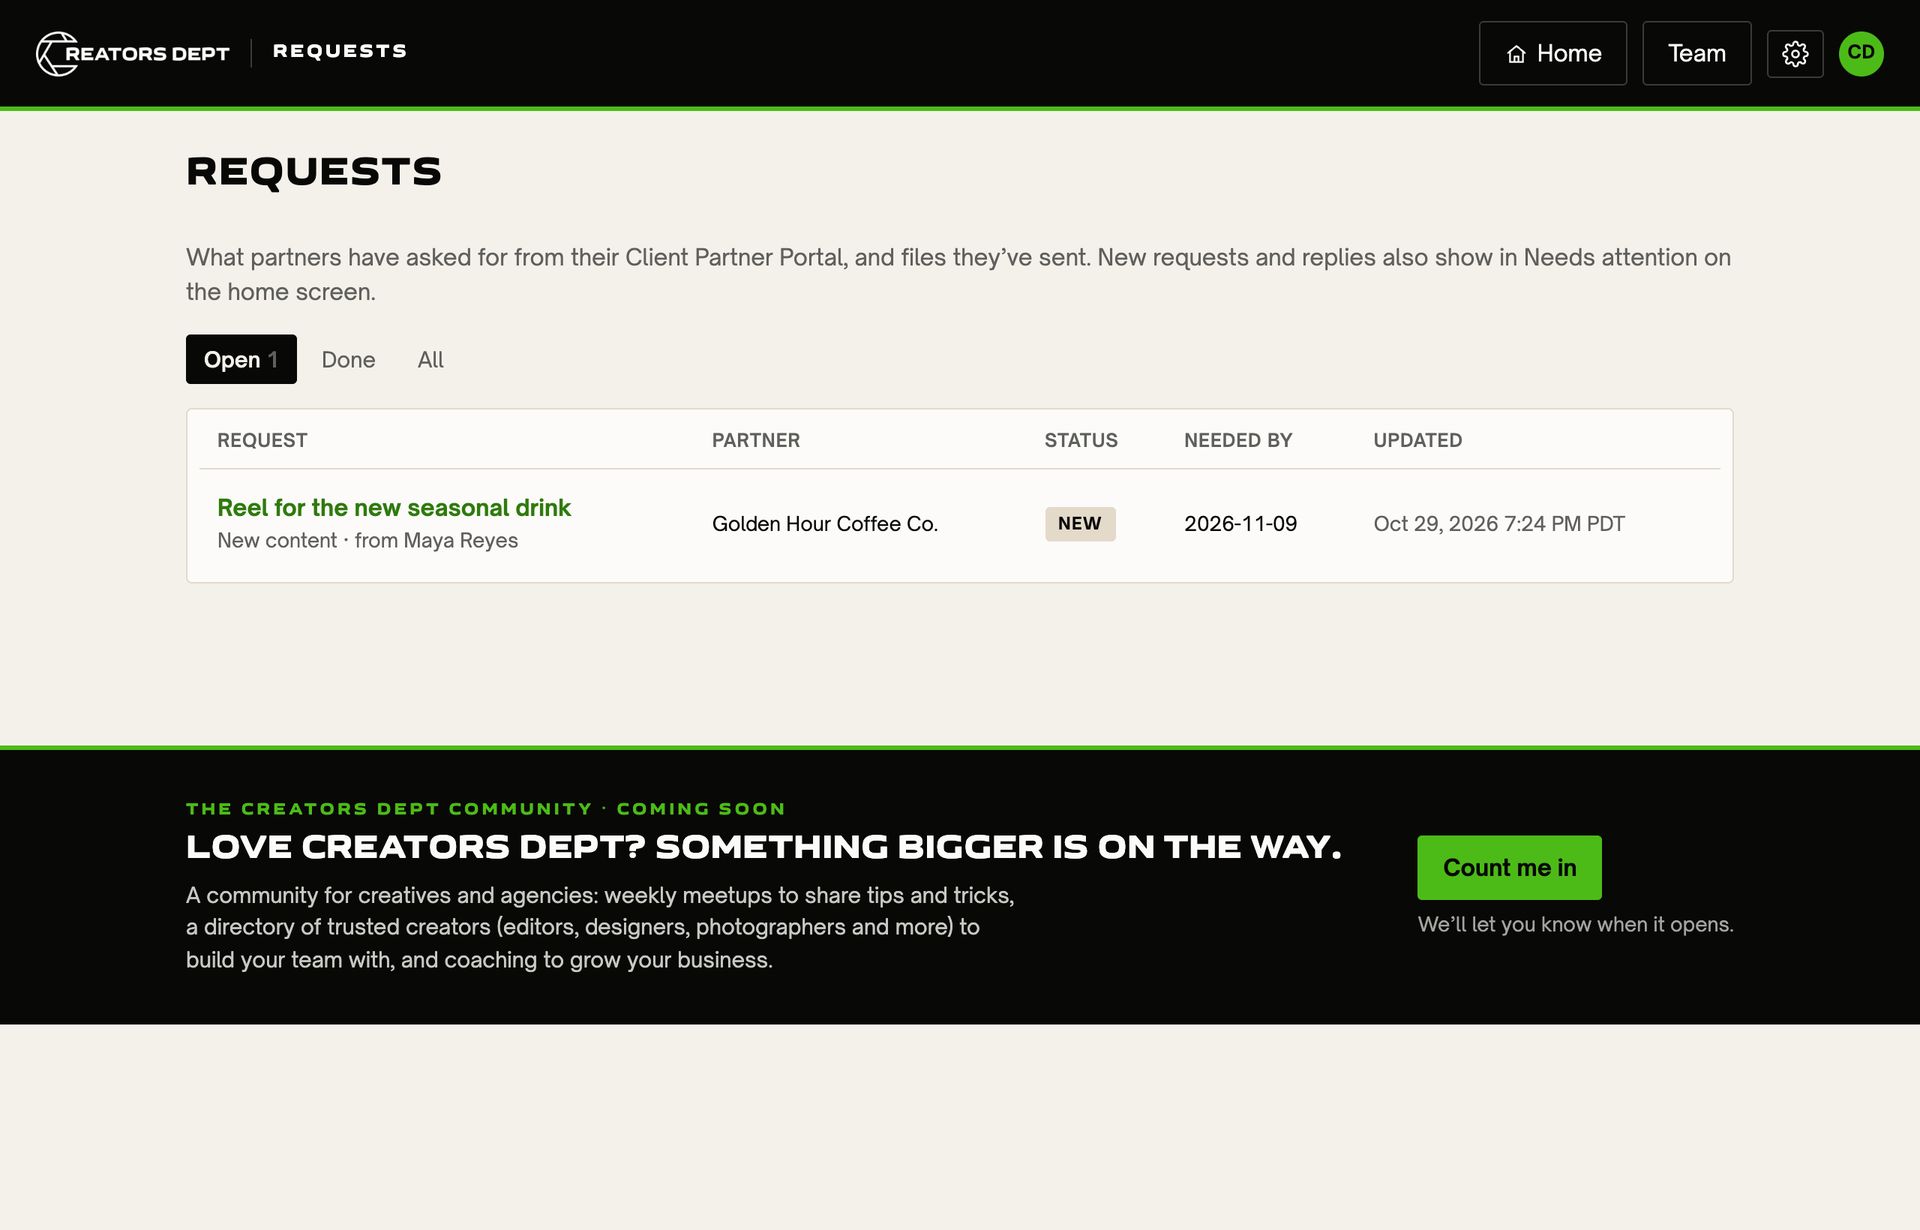
Partners ask for anything from their portal: new content, an edit, a design, a website change or a question, with a due date and attachments. New requests show on Home under Needs attention and on the Requests page. Reply and move a request along (New, In progress, Done); your partner is emailed each time. Photos and videos they send can move straight into their content library.
Asking a partner for something
It works the other way too. On a partner's page, choose + Ask them for something (for example: send files, approve something, or answer a question), and add a due date if you need one. Their people are emailed, and it sits at the top of their portal's Requests page under We need from you. They can reply, add files, or click Mark done, and you're emailed when they do. Requests you sent say You asked in the list and Waiting on them until they're done. If one goes past its due date, it shows on Home under Needs attention.
Inside the team, Team requests does the same between teammates.
My to-dos
For things you'll do yourself, open Team requests → My to-dos. Type the to-do, and add a due date or a partner if you like. Tap the circle when it's done; it moves to Done, and tapping it again brings it back. Edit changes the wording or the date, or removes it.
Your to-dos are yours alone: nobody else sees them, not even the owner, and nobody is emailed. Anything due today or overdue shows on Home under Needs attention, and the Team requests tile counts what's left. To hand something to someone else, use Ask the team instead.
Projects
A project is a to-do with steps. Open Team requests → Projects and choose + New project (or Turn into a project on any to-do, or + Start a project on a partner's page). Give it a name, an optional partner and finish date, and list the steps in order. Each step goes to you, a teammate, anyone, or the partner, with its own due date.
- When a step is ticked off, everyone on the team who's on the project is emailed, and whoever has the next step hears it's their turn.
- With a partner and Show it in their portal on, the partner sees every step and how far along it is, and ticks off their own. They're emailed when it's their turn and when the project is done.
- Your steps also show on My to-dos, and on Home under Needs attention once they're due.
- Only the person who started a project, people with a step on it, and owners or managers can see it. Edit on a step changes it, reassigns it or moves it up or down.
- Money: owners and managers can give a project an amount and the date it comes in. It then counts on Pulse (and shows on Pulse's list, linked to the project). Leave it blank when the money is already counted, such as an accepted proposal.
- Edit project also changes the partner, so a project started without one can be moved onto the right partner's page.
11 Pulse
Pulse (from Home) is the reality of the business, for owners and managers only. Your team never sees it.
- Monthly baseline: what your retainers bring in every month before any project, plus your average month and a goal to aim for.
- Month by month: the last 12 months and the next 3, with retainers as the base of each bar and projects stacked on top. The red dashed line is your cost of doing business; a bar above it covered your costs that month.
- Cost of doing business: the quick snapshot. What comes in, what the team costs, what business costs add up to, and what's left each month. The colored bar shows where the money goes: team, rent, software and so on.
- Team pay: from each person's Pay on the Team page.
- Business costs: subscriptions, equipment, rent, insurance, ads, your bookkeeper. Choose + Add a cost, enter what it is, the kind, the amount and how often (a month, a quarter, a year or one time), and the date it renews. Click a cost to change or remove it.
- Quarterly and yearly costs are spread across the months, so a $600 yearly subscription counts as $50 a month.
- One-time buys, like a camera, show under this year's total but not in the monthly number, so one big purchase doesn't make every month look worse.
- A week before a quarterly or yearly cost renews, it shows in Needs attention on Home, so you can cancel what you don't use.
- Your money tools: buttons for your bank, bookkeeping and payments, one tap away.
Pulse is an estimate, not bookkeeping. Receipts and taxes stay in your bookkeeping tool.
12 Horizons
Horizons (from Home) holds your dreams, goals and opportunities, ranked by what matters most. Each one grows through stages instead of being checked off: Seed → Growing → In motion → Realized. Drag ⠿ to rerank, and move a card along as it grows. Your board is private until you choose Share on a card.
When one comes true, move it to Realized and add the story of how it happened. It leaves the board and goes to two places:
- Realized at the foot of the board, folded away. Open it to see the latest ones.
- The timeline (the ✨ Realized tab), where everything that's come true sits along one line, by year and month. Each shows the day it was realized, how long it took from the day it was planted, and its story.
13 Team
Team is everyone at your agency, their role and how to reach them. Under Add someone, enter their name and email and pick a role:
- Owner: everything, including private HQ files, the Horizons board and billing.
- Manager: runs the business with you: every proposal, payments, Pulse, paperwork, settings and the team.
- Team: partners and their portals, the content library, requests, docs, brand and their own proposals. No money, settings or anyone else's proposals.
- Contractor: only the partners you choose: their library, requests, docs and brand.
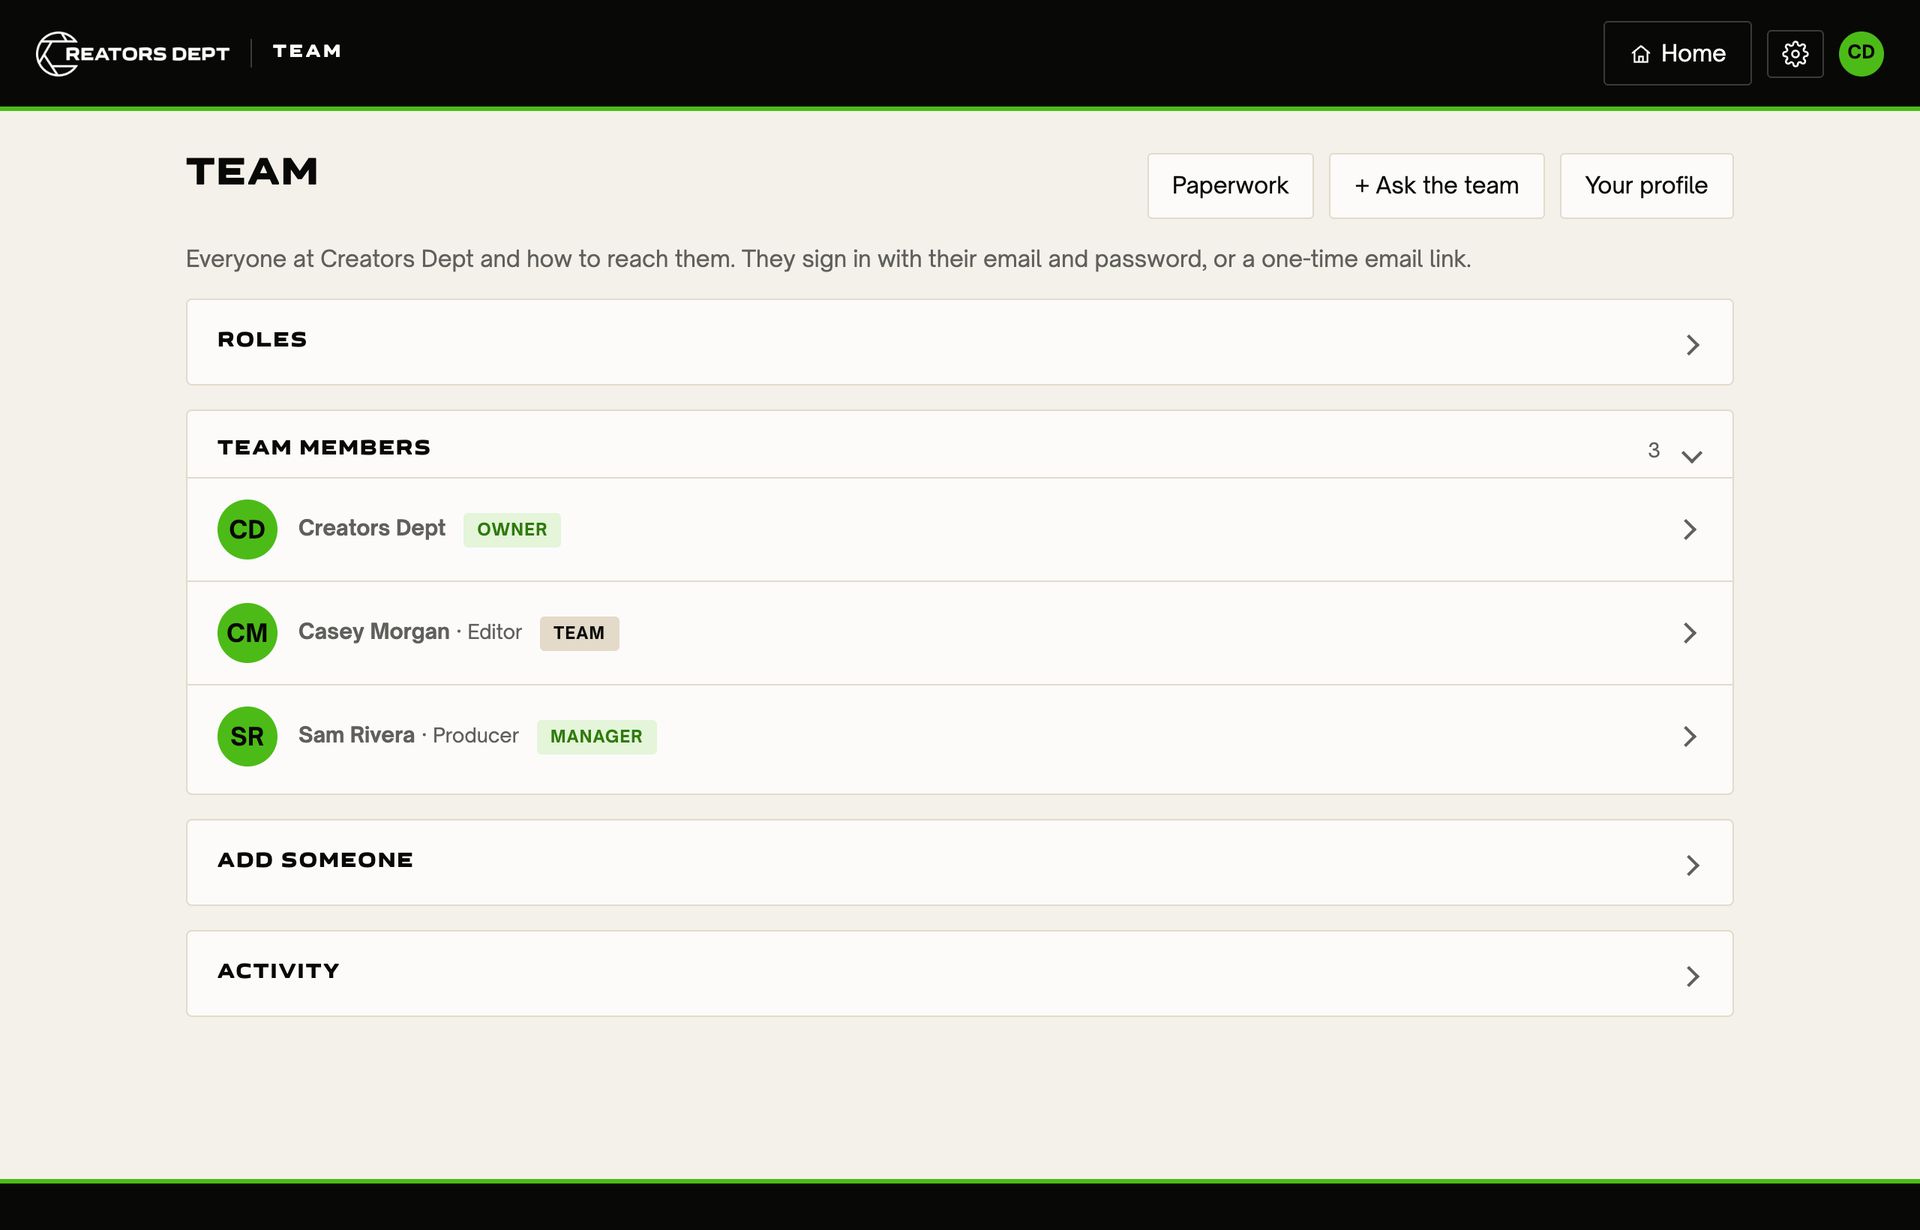
Paperwork sends a new teammate their contractor agreement and job description to sign. Each person edits their own photo, contact details and links under Your profile, where they can also connect their Google Calendar and set up a booking page with Google Meet links.
14 Settings, billing and integrations
The owner's Settings (the gear at the top) holds your agency name and logo, brand color, time zone, a little personality (movie nods in the app's messages), team reminders, billing and integrations.
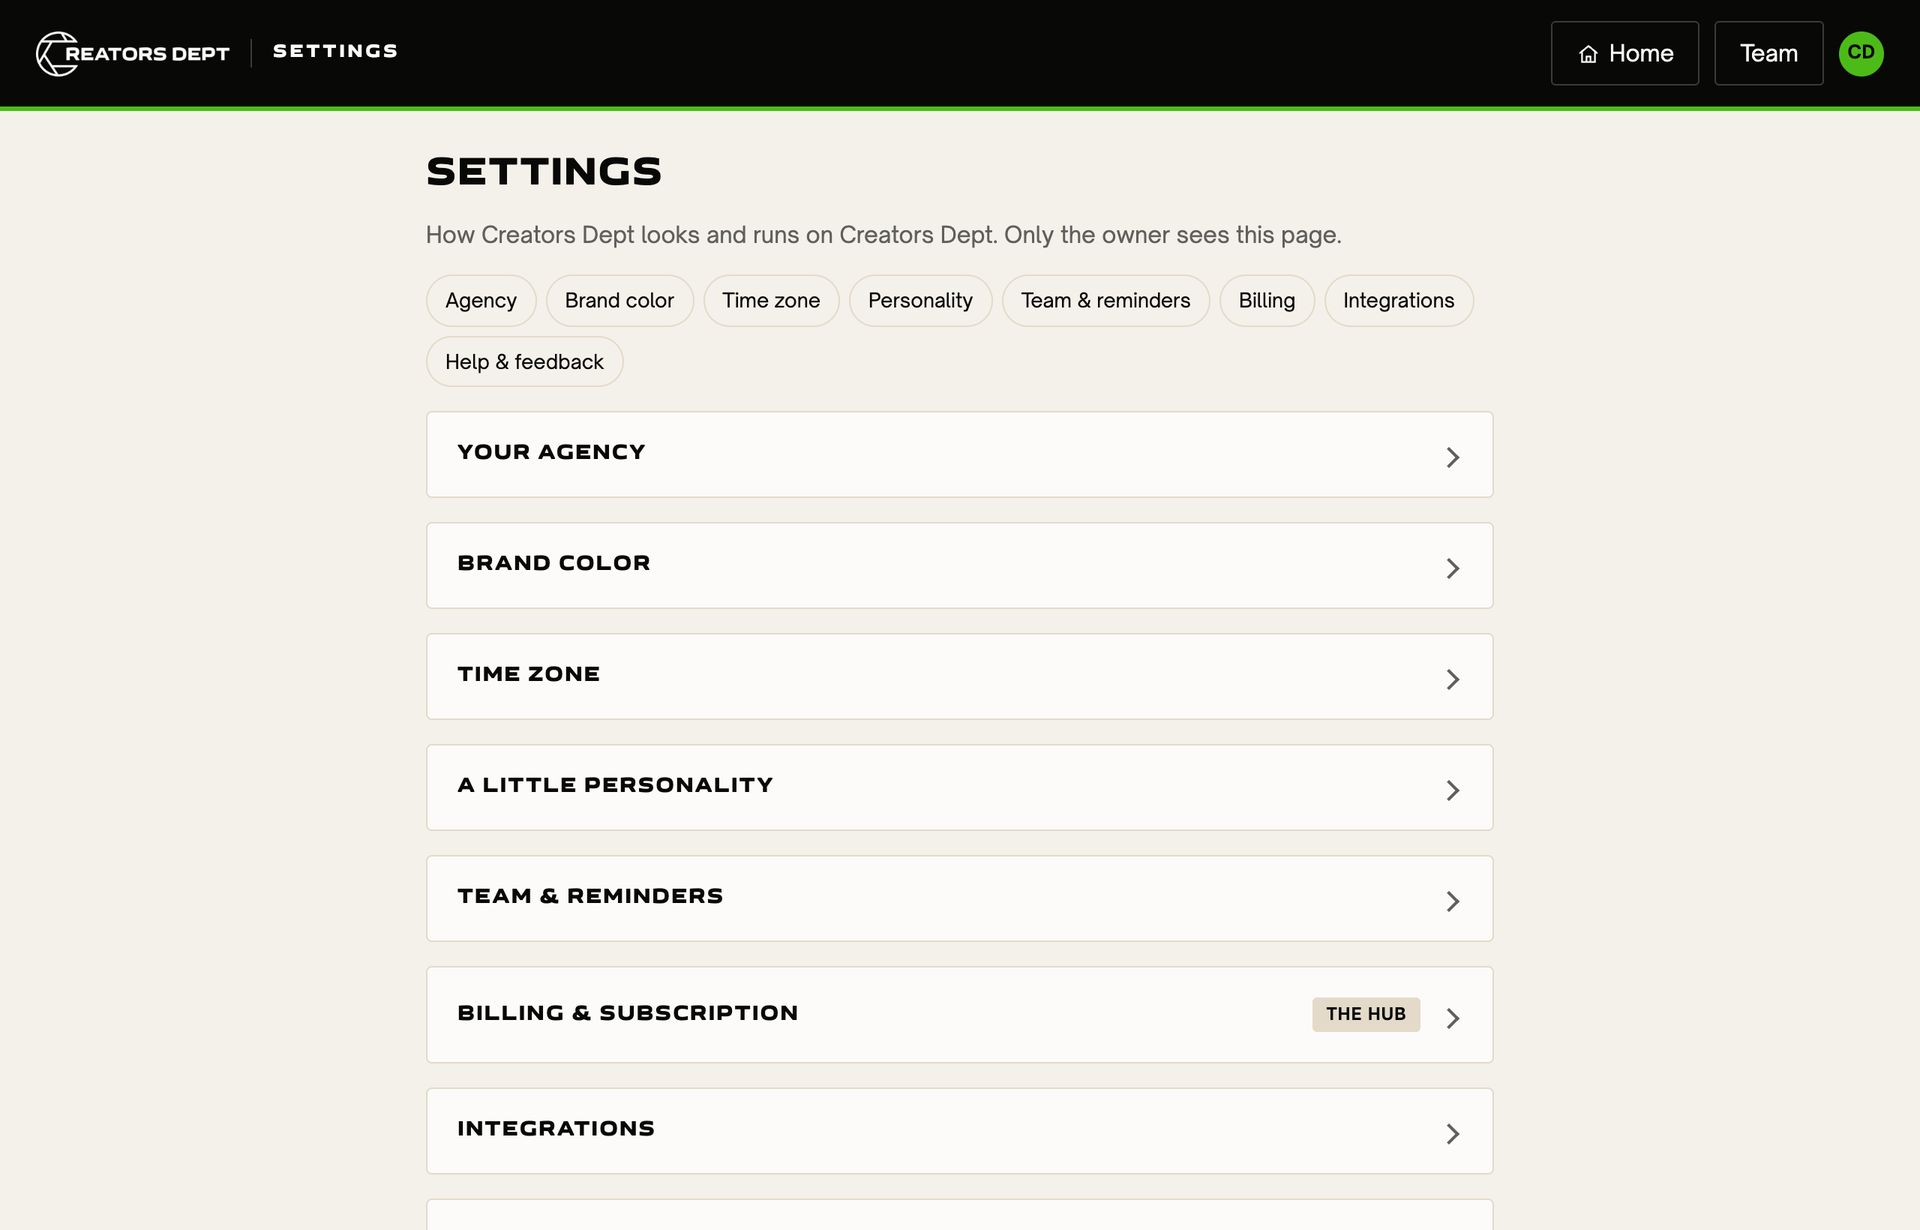
Storage shows how much space your workspace uses: the total (and your plan's limit, if there is one), split into content libraries, brand kits, files partners sent, HQ and past agreements, plus the partners using the most. Click a partner to open their library and clear out what you don't need. The same total shows at the top of each content library.
Billing & subscription shows your plan. Choose a plan, change it, update your card or cancel; payments go through Stripe's secure pages. Plans are managed on the web, not in the iPhone app.
The plans are Solo ($39 a month: 1 person, 10 partners, 100 GB), Studio ($89: 3 people, 30 partners, 500 GB) and Agency ($179: 10 people, unlimited partners, 2 TB). Paying yearly gets two months free. Extra storage is $15 a month for each 500 GB. While founding spots last, a first subscription gets the founding rate: 10% off for as long as it stays active, extra storage included, and the price never goes up while you stay. Betas who pick a plan before their beta ends aren't charged until it does.
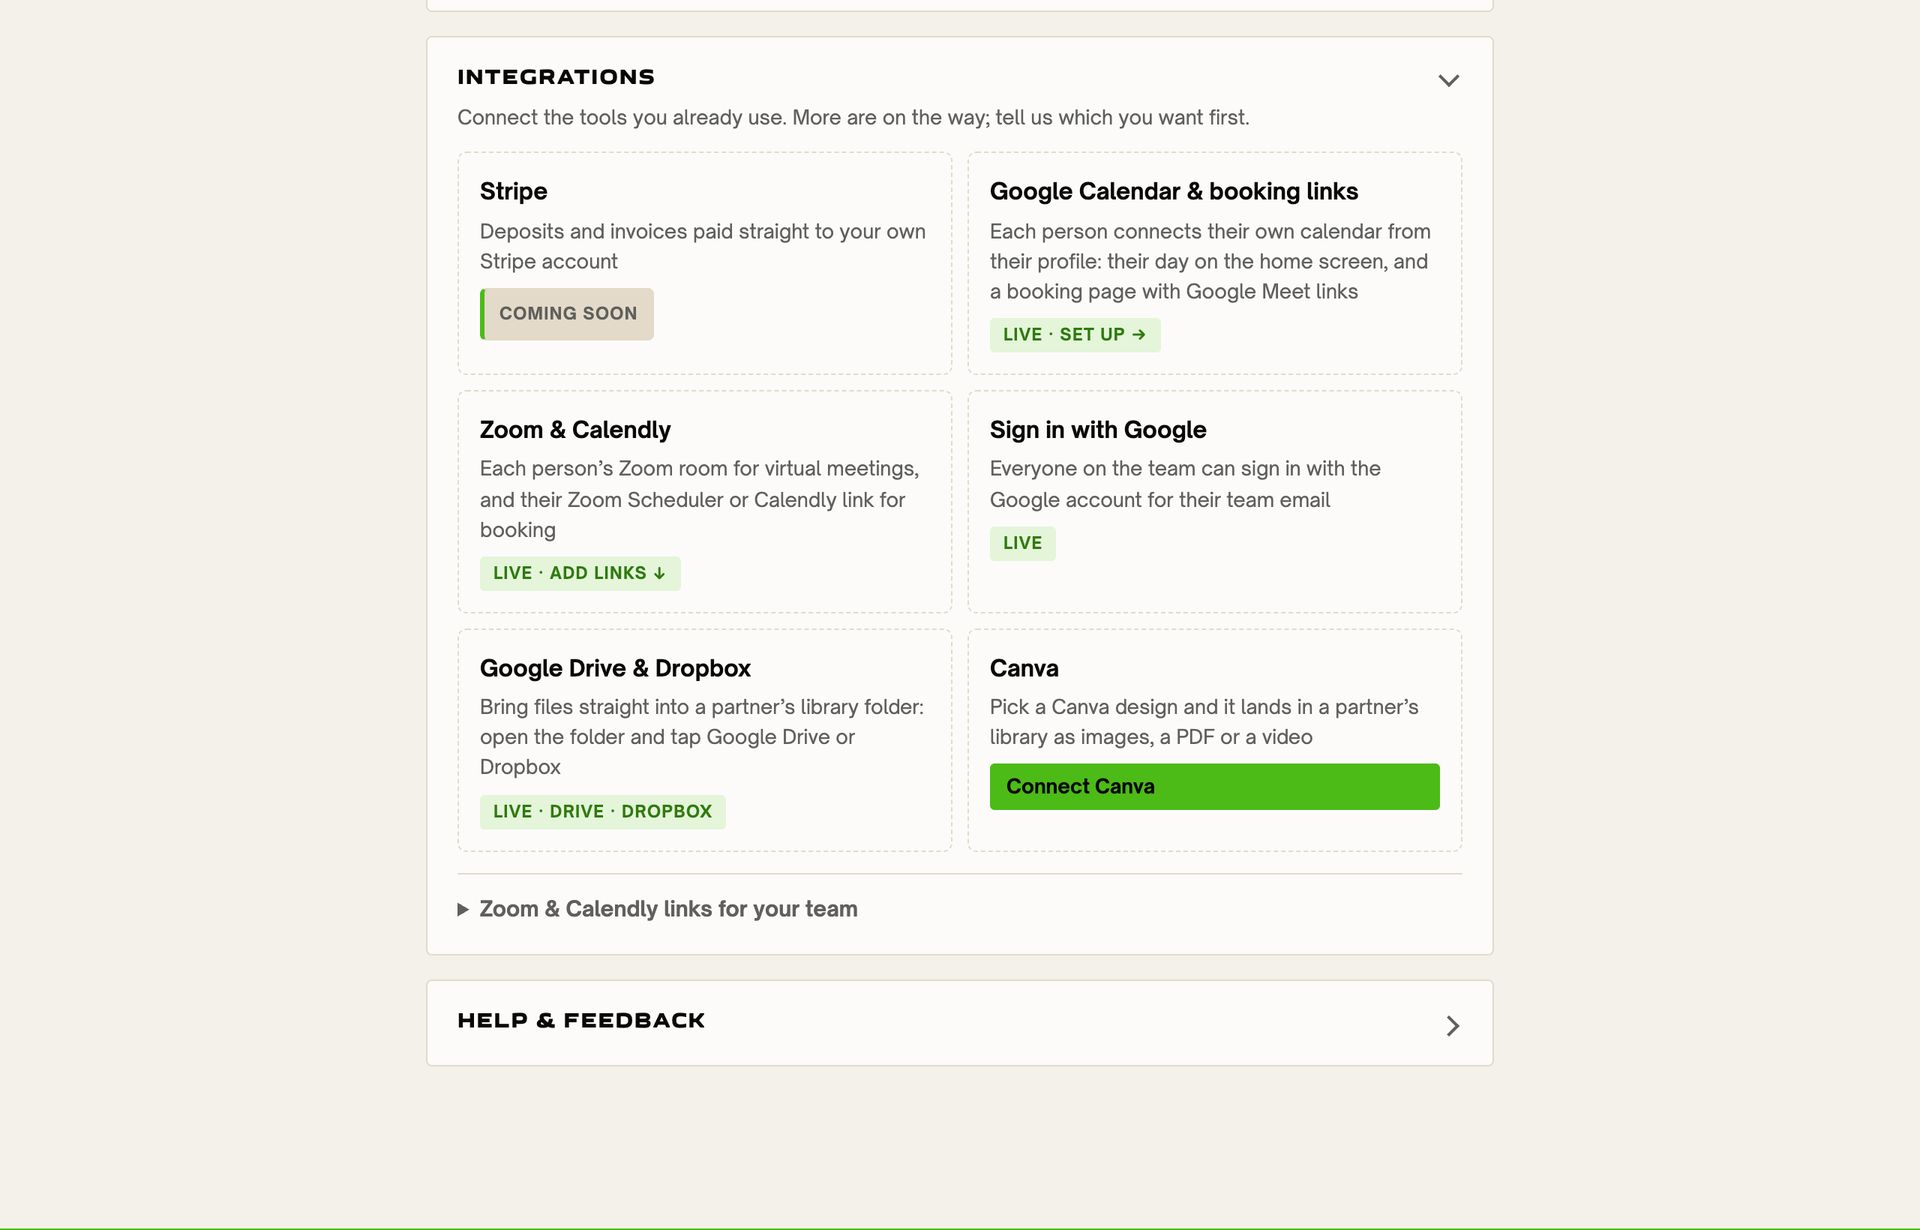
Integrations connects the tools you already use:
- Google Calendar & booking links: your day on Home and a public booking page that adds meetings to your calendar.
- Zoom & Calendly: each person's meeting room and scheduling link.
- Sign in with Google: the team signs in with their work Google account.
- Google Drive & Dropbox: bring files straight into a partner's library folder.
- Canva: pick a design and it lands in a partner's library as images, a PDF or a video.
- Meta (Instagram & Facebook) and LinkedIn: connect accounts for posting from Social accounts.
- Stripe: deposits from proposals, and invoices and monthly retainers.
15 The Client Partner Portal
Each partner gets their own portal, with your brand and theirs. Send partners the Partner Guide, a three-minute walkthrough written for them; it's linked inside their portal too. They sign in at /portal with their email and password or a one-time email link. They only ever see their own business.
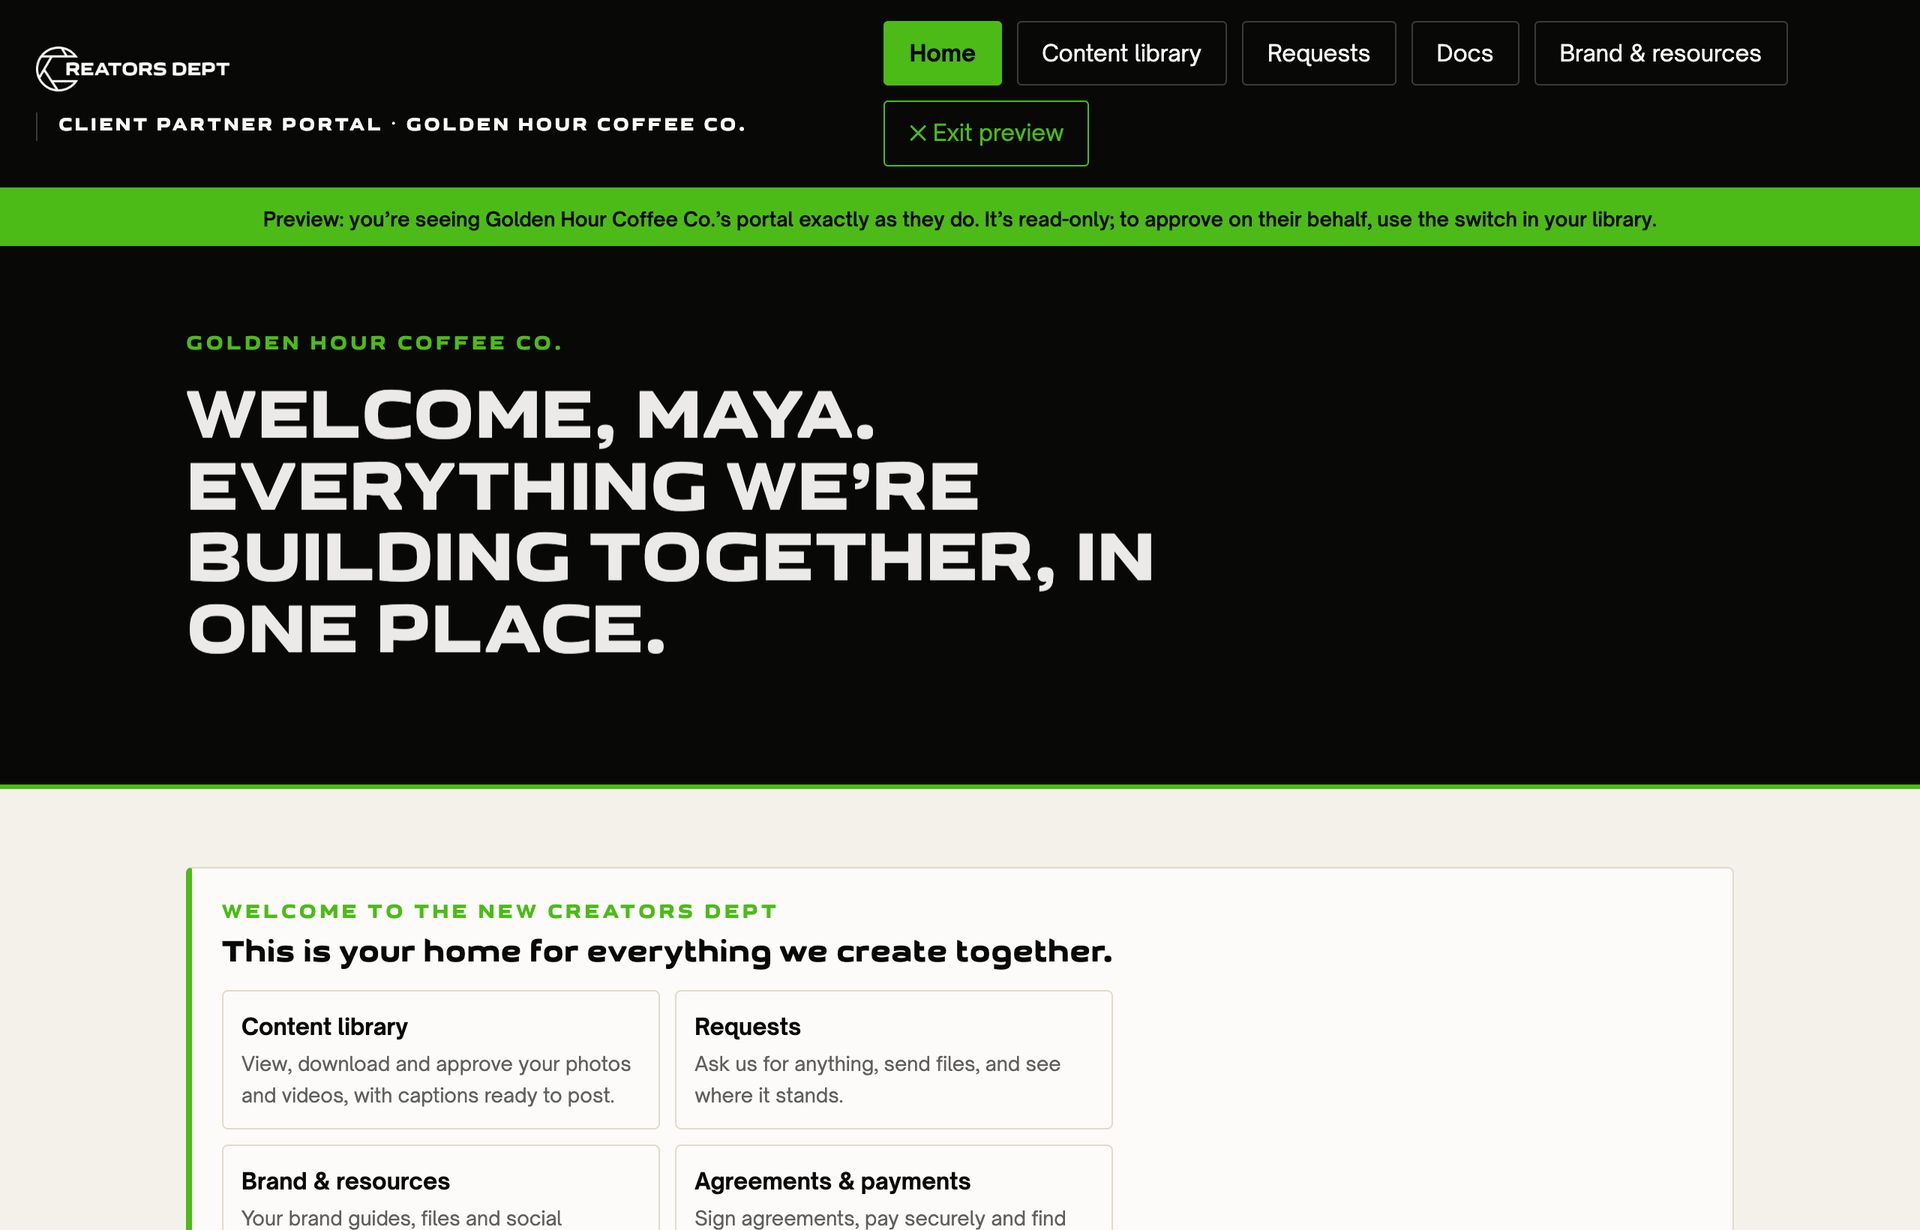
In their portal, partners can:
- See what needs them: a proposal to review, an agreement to sign, a deposit or invoice to pay, content to approve.
- Browse the Content library by folder, open pieces full size, download originals or a whole folder, and choose Approve for posting or Request changes with a note.
- Send Requests and files, and follow each one's progress.
- Write and edit Docs with you, and keep their logo, brand guides and brand voice in Brand & resources.
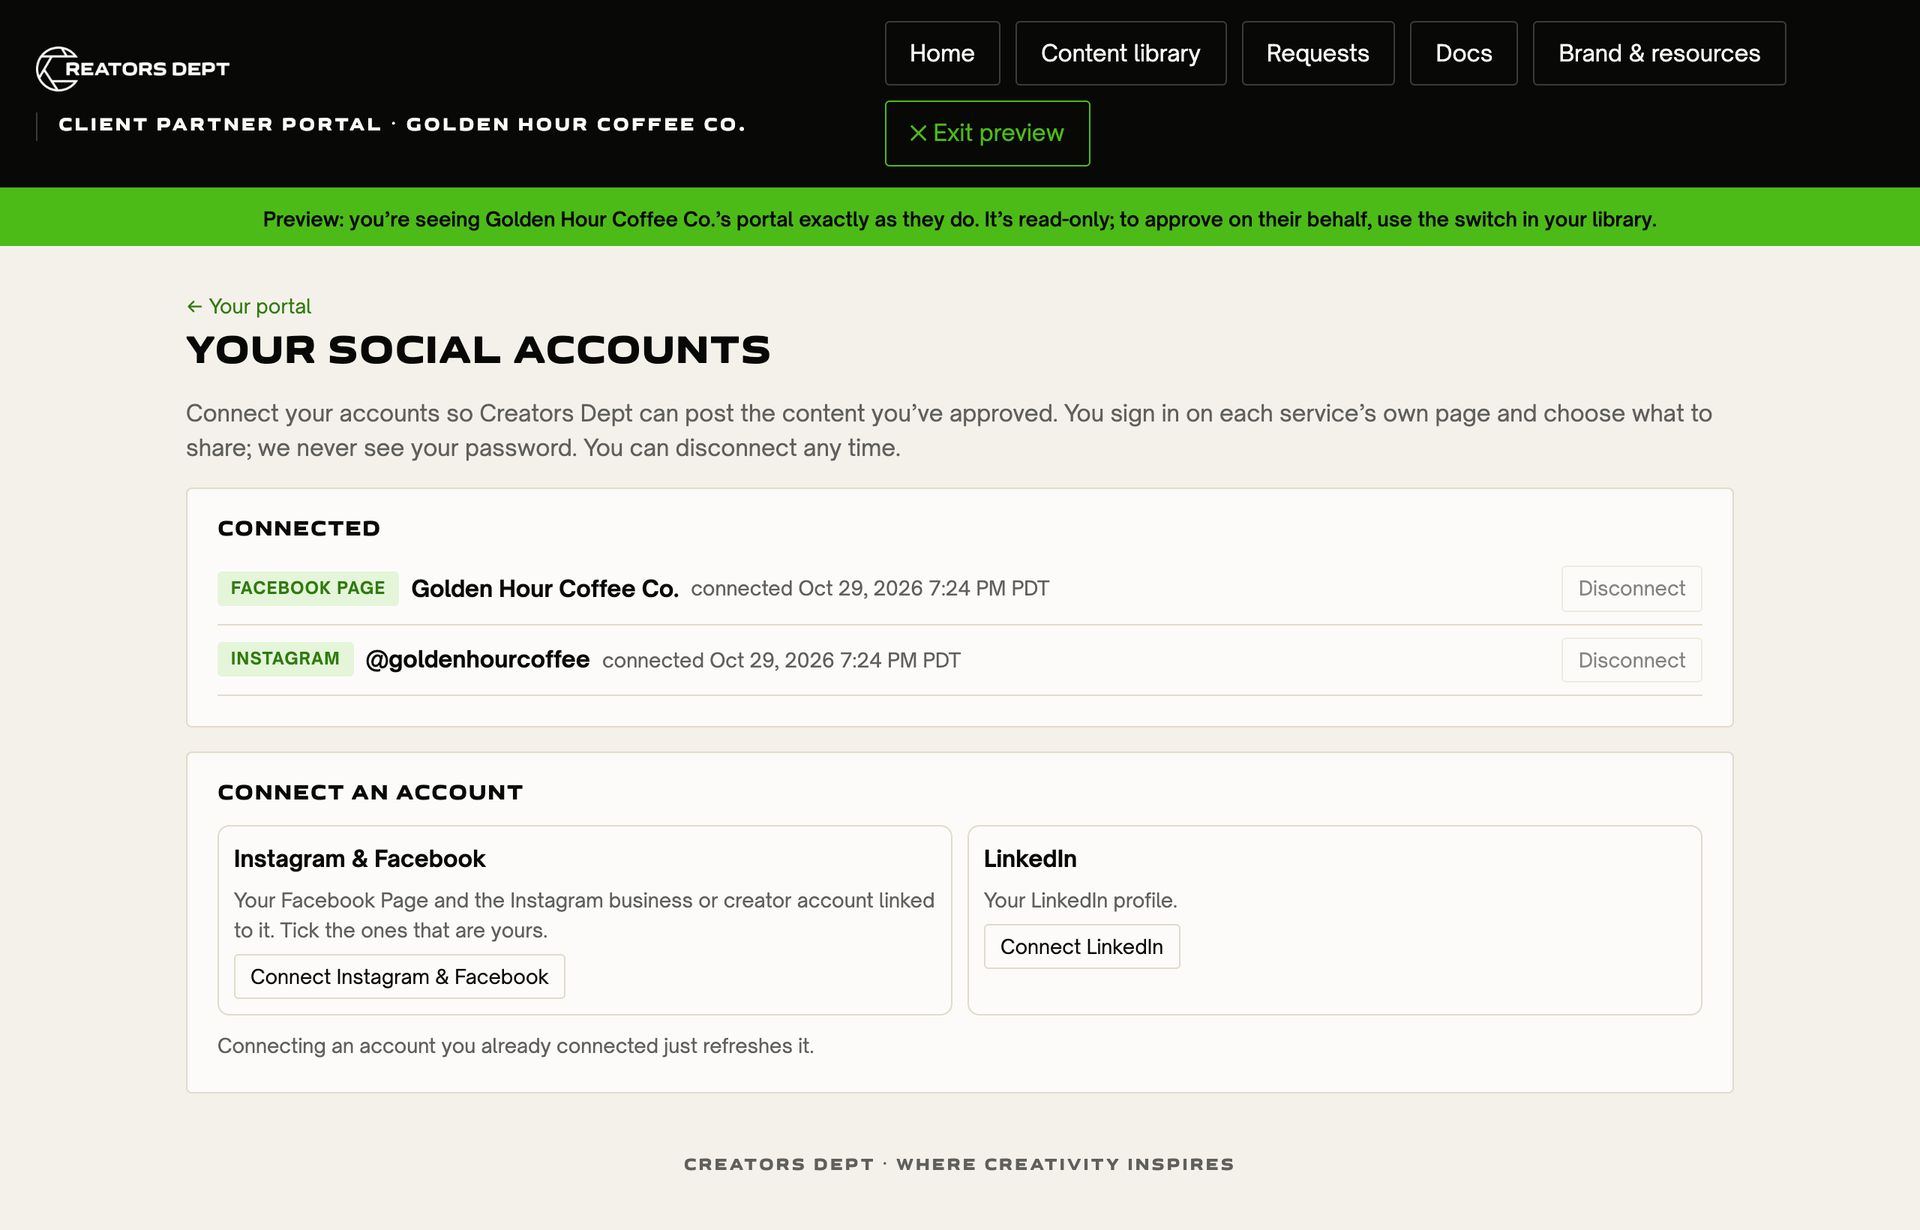
- Connect their own social accounts under Your social accounts, and disconnect them at any time.
- Download their signed agreements, pay invoices by card, and keep their receipts.
16 The iPhone app
The Creators Dept iPhone app is on its way to the App Store. It's the same app you use on the web, plus:
- Camera and photo library uploads: every upload button offers Take Photo or Video, Photo Library or Choose File.
- Downloads to the share sheet: save to Photos or Files, AirDrop, or post.
- Face ID lock, turned on under Your profile.
- Notifications for what needs you.
- Stays signed in and works with passwords saved in iCloud Keychain.
Every change to the web app reaches the iPhone app right away. Until it's in the App Store, the app works well in your phone's browser; add it to your Home Screen for one-tap access.
17 Need a hand?
Choose Help & feedback in Settings, or the Beta button at the top if you're testing a beta copy, and tell us what you think. Or email pete@creatorsdept.com. The newest version of this guide is always at app.creatorsdept.com/guide, with a PDF at app.creatorsdept.com/guide.pdf.
10 Social accounts and Create post
Social accounts (from Home) lists every connected Instagram, Facebook Page, TikTok, YouTube and LinkedIn account and the partner each one posts for. Accounts under Needs a partner are waiting for you to pick who they belong to; Our agency is for your own accounts.
To connect a partner's accounts, open their Social posts page. Choose Connect here if you can sign in to their account, or Link for the partner to send them a one-time link (good for a week) so they connect it themselves. Each service signs in on its own page; the app never sees a password.
To schedule a post, choose Create post (or scroll to New post):
Posts below shows everything with its photo and the icon of the account it goes to. Click Posts to fold it away. List puts what's coming up first, by day, with what's already posted folded underneath. Calendar lays the month out so you can see how posts are spaced, with ← → for other months. Dashed is scheduled, solid is posted, and red didn't post. Tap one to jump to it in the list. From the list you can cancel a post, retry one that failed, or open one that's live with View. The app remembers which view you like.
Instagram needs a business or creator account linked to a Facebook Page. TikTok and YouTube take videos; LinkedIn takes text with one photo.
↑ Contents